Adventure Wagon Ceiling Storage Units
As I’ve been working on my van build (bike/surf/camp/run/ski adventuremobile), I’ve been (slowly) working toward building upper cabinets and making use of all the potential storage space in the upper corners of the walls.
Enter Adventure Wagon and an innovative solution to overhead storage! While at a bike race in Northern California (Grinduro for you fellow bike nuts), I saw one of their vans with awesome overhead storage cabinets. I never heard of them, but was immediately infatuated with their modular overhead cabinets.
“Hey can I check out your cool van?” I said, then proceeded to touch and fondle the van’s cabinets (in a non-creepy way of course).
Adventure Wagon is a small Oregon van upfitter who is doing some interesting things with rental Sprinters and modular interiors. They seem like nice people building a small business.
Build versus Buy
As with all DIY van projects, we all ask ourselves the “Buy it vs. Build it” question. In my case, I weighed the cost of building my own cabinets (80/20 frames + maple plywood skin plus lots of time) versus buying them and instantly having cabinets. Like most working adults, time is a huge constraint in building out the van.
The Adventure Wagon soft cabinets are pricey ($400/each), but really nicely designed and thoughtfully laid out to maximize storage and function. They are custom designed to match the Sprinter roof/wall transition. After weighing the build/buy option for a couple weeks, I ordered three of them for a total of 12′ of overhead storage. The idea is to keep two of them installed at all times, and then add a third cabinet for longer road trips.
Besides the easy install and removal, the light weight appealed to me. Three of the storage units (12′ of overhead storage), was less than 40 pounds. Keeping weight down- particularly up high- wherever possible is important.
The Ceiling Storage units
One of the things I like best about these (besides instantly having soft storage), is the fact that they remove and install easily and pack flat when not in use.

This is 8′ of ceiling storage and Miss Daisy, van dog.
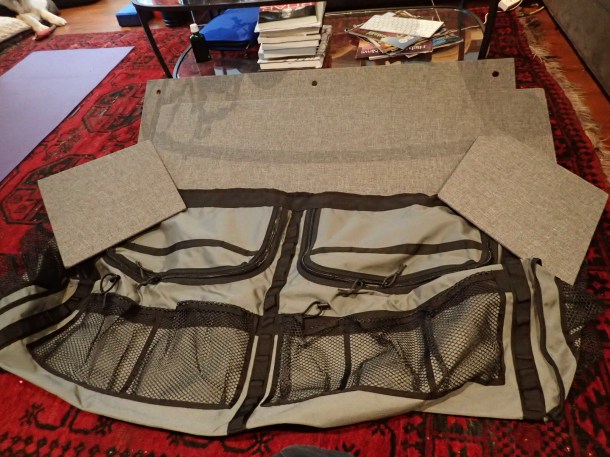
Unfolded in my living room (with the plywood stiffener panels) The bags have a ton mesh pockets and attachment loops all the way around.
Installing the Ceiling Storage units
The most flexible use of the Adventure Wagon ceiling storage bags requires running two strips of L-Track for attachment points (one across the ceiling and one across the wall). The Storage cabinets attach to the van via 6 eyelets in the bags. The weight looks to be equally distributed across the top and wall of the van. You could certainly install them using a backer board or metal strap instead of L-Track.
The bags have four fabric covered plywood stiffeners that give the bag shape. They make it more cabinet-like than duffel bag The stiffener on the rear of the bag has three holes which help it to distribute the load across the back wall.
I was already planning on running flanged L-Track across the ceiling of RadVan to assist with hanging the ceiling panels, and to be able to easily hang surfboards/SUPs if necessary.
-
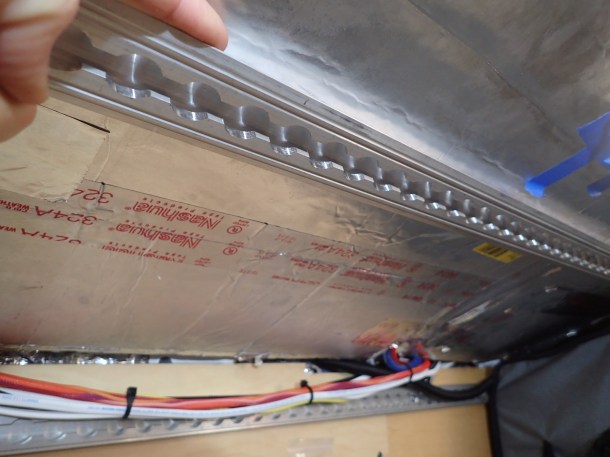
- Flanged L-Track across the ceiling. The flanges will help hold my ceiling panels, and conceal the joint.
-
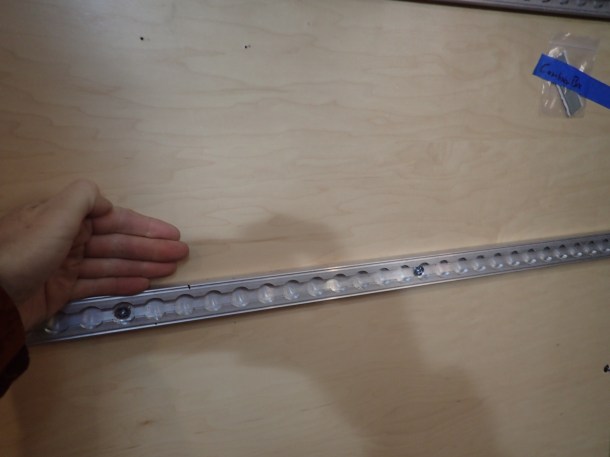
- Surface mount L-Track across the wall
I installed the L-Track using Rivnuts (aka Nutserts). Currently writing a blog post on using L-Track.
Photos!
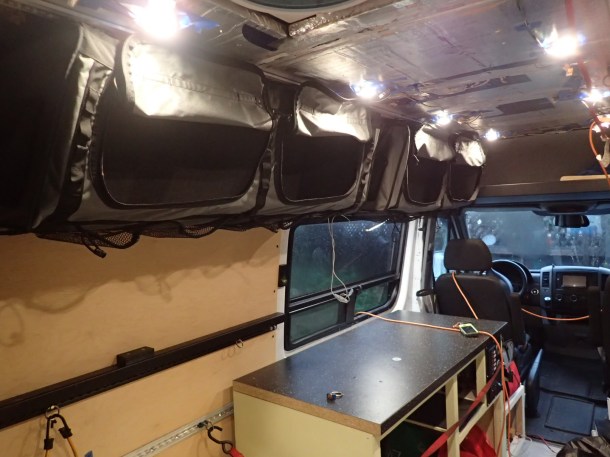
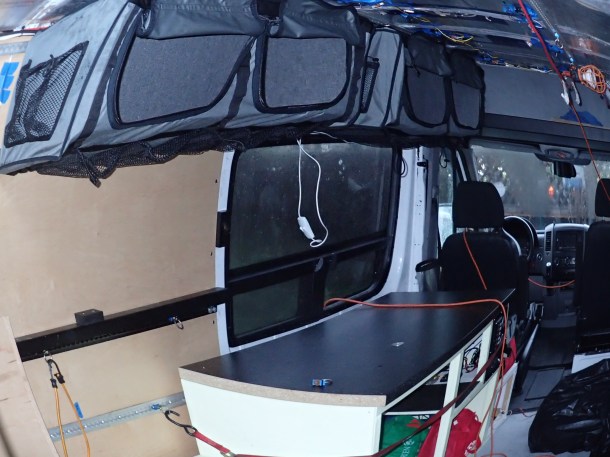
Click for full sized pics. In these pics the bags are test fit.
Note that- I’m in a build phase in these pics. Running the last of the wiring and prepping to do the ceiling panels soon.
-
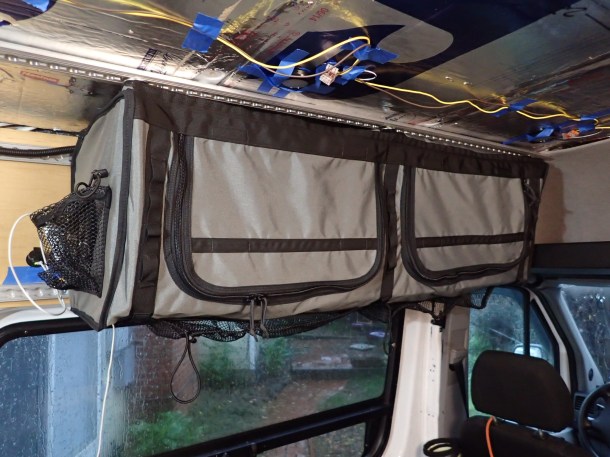
- Two Ceiling Storage Units
-
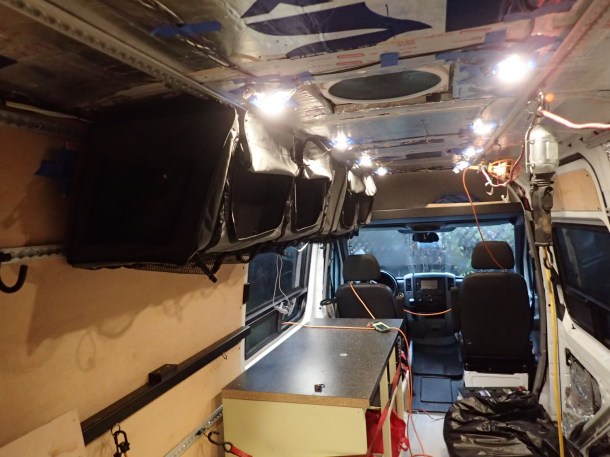
- The ceiling lights are roughed (recessed LED lights from Dream Lighting)
-
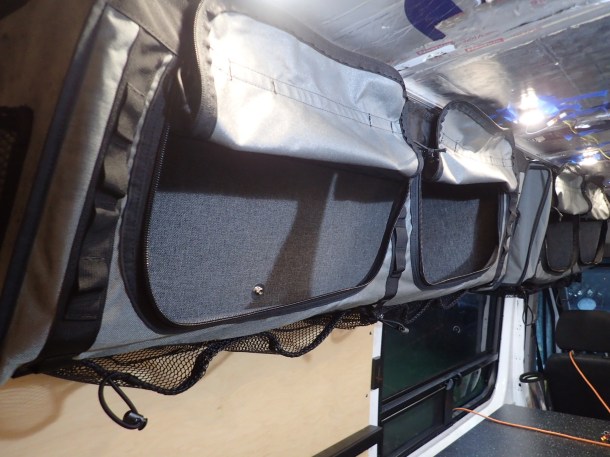
- Sewn in magnets hold the doors open.
-
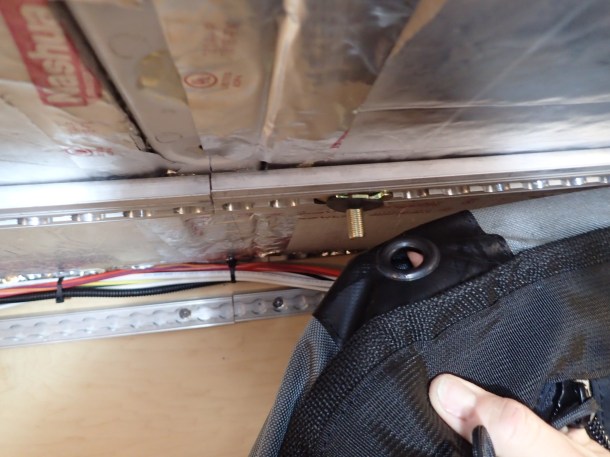
- The bags attach to the L-Track with threaded studs.
-
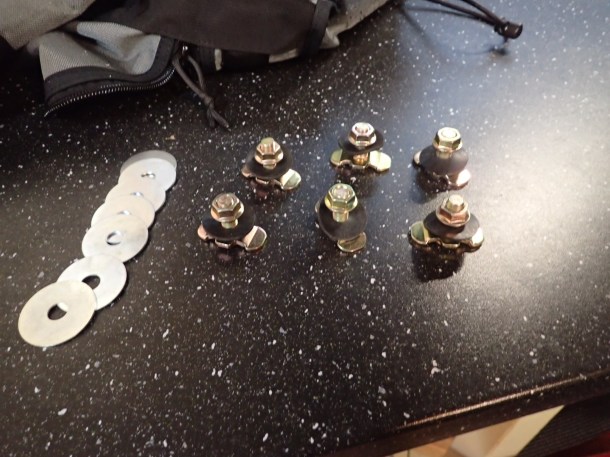
- Threaded bolts for securing cabinets and fixed loads
-
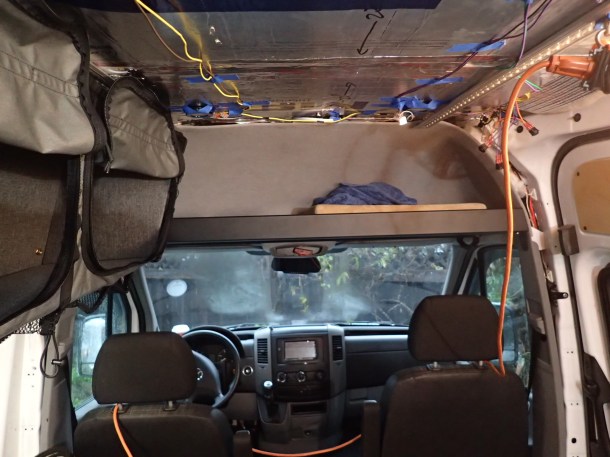
- I also have the RB components headliner shelf which provides massive storage over the front seats.
-
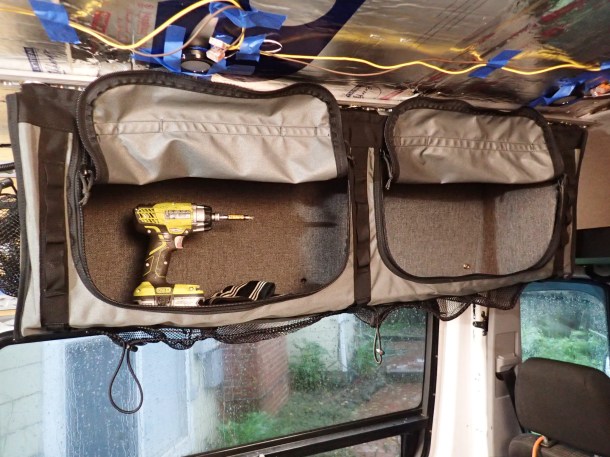
- Driver drill for size reference. The bags are roughly 48″x14″x14″
-
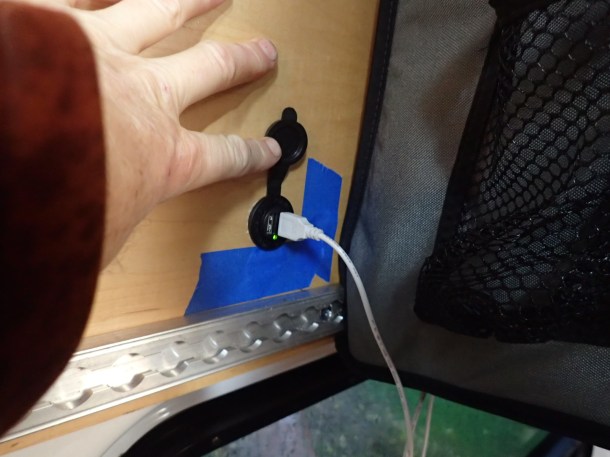
- I installed a double USB port in the upper wall for under cabinet lighting
-
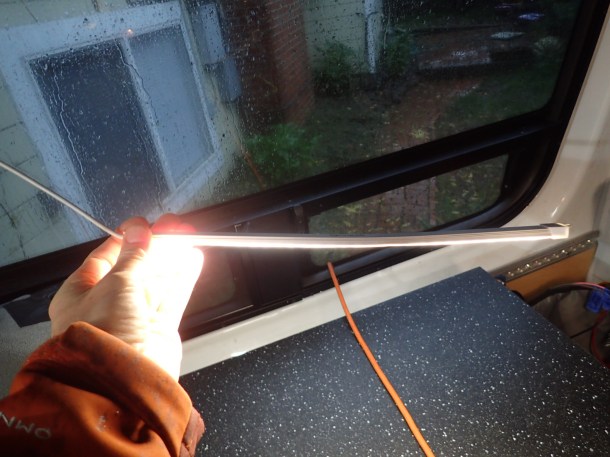
- Qooltek LED strip light for under cabinet lighting. (From Amazon)
-
- USB powered LED Strip light
-

- End pockets
-
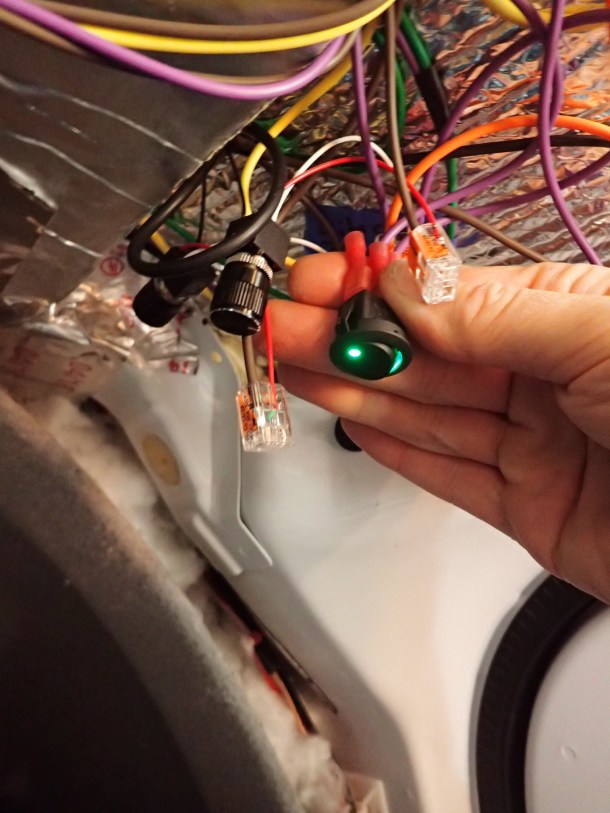
- For lighting I am using recessed 2″ LED lights with a ceiling mounted rocker switch and LED compatible dimmer switch (all from Amazon)
-
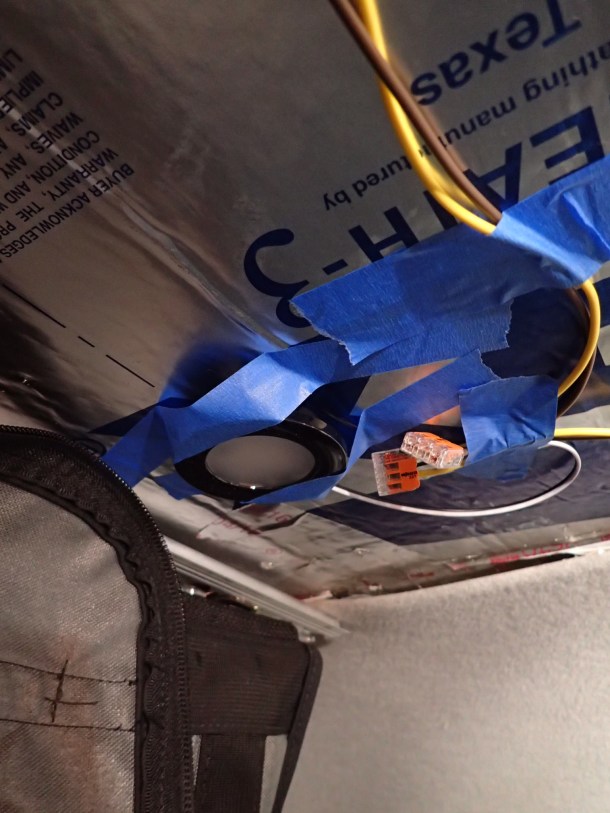
- Roughed in electrical. Dream Lighting 2″ Recessed LED lights ($6/each from Amazon)
Installation notes
Installation of the L-Track is the bulk of this job. I can install the bags themselves in just a few minutes each, and removing them is really fast (1-2 minutes with a battery driver) My only complaint so far is that the bolts for the wall eyelets should be 0.25-0.5 inches longer. It’s a bit of a struggle to get the nut threaded on the rear wall with the short bolt provided by Adventure Wagon. (I’ve only found L-Track threaded studs about 1″ on the internet and am searching for a longer bolt).
I plan to experiment with modifying 5/16″ elevator bolts to get a slightly longer attachment stud.
Pros
- Install and remove quickly
- Can be easily moved around your van (with L-Track)
- Pack flat when not in use
- Very well thought out design!
- Lots of pockets and straps around the outside
- Light weight compared to permanent cabinets
Cons
- Expensive!
- Suitable for soft storage (not bowling balls or your Crossfit equipment).
- Longevity unknown, but appears to be well constructed and sewn. (I will update in a year or two when they have lots of time on them).
Thoughts and Feedback
As always, I’m eager to hear anyone’s comments, criticisms, or feedback. (Even a “Like” if this was helpful).
Share this:


how are the modular storage units working? I’m interested in going this route as long as they hold up. About how much weight can it hold?
LikeLike
Hey Justin-
So far so good. They’ve been in the van since October of 2016. I really like the pockets around the outside. Really nice for small items. I also changed out the three back bolts with longer “plow bolts”, which slide into the L-Track just fine. Lastly, I used large, 2″ fender washers in all the holes to distribute the weight a little more.
In terms of weight, they are great for soft goods, but probably not suitable for heavy items (pots and pans, a ton of books, etc.). We are using them as soft storage for clothes. We use those zippered packing cubes (e.g. Eagle Creek Pack It system). They are perfect for keeping clothes organized in the van for each of us, and reduce clutter. The modular storage cabinets are really well suited to hold 8-12+ of those bags (and allow us to eliminate living out of a duffel for van trips).
LikeLike
If you could install the L-track (going along the ceiling) again, would you have added more reinforcement so that there were more attachment points for the L-track? Thanks!
LikeLike
Hi Julie- I think it’s fine with the existing attachment points. As I recall there are nine rails in a 170 Sprinter. I’m no engineer, but I’ve heard that the pull out load for 1/4-20 Riv Nuts is around 400 pounds. I have 6 Riv Nuts in the forward ceiling mounted L-track (which holds the AdWag soft cabinets). Plus the load is pretty equally distributed on the wall as well (which has several Riv-Nut attachment points as well). We’ve had the bags in for about 9 months now with no issues. Went on a month long road trip with them loaded up with clothes. Driven on many washboard dirt roads with no issues. So I think you’ll be fine with the existing attachment points. Good Luck!
LikeLike