
First road trip- Independence Pass, Colorado.
I am just finishing up the latest round of DIY campervan build projects. Just a few more tweaks and trim pieces then it’s time to have fun in the van for a few months while building the final cabinetry in my garage.
RadVan started as a partially converted windowless stock cargo van.
I bought it three weeks before we went on a 3.5 week long Colorado road trip, and quickly installed windows, platform bed, bike storage, wall panels and a temporary cabinet/countertop. We did that first road trip carrying 4 bikes and a yard sale of gear and camp stuff floating around the van.
Since then I’ve worked on various projects to maximize storage and efficiency to reduce clutter in the van.
Design Philosophy
- Reduce the complexity of camping trips
- Walk out the door for a weekend or day trip in minutes by keeping the van stocked for adventure.
- Modular design for supporting a variety of (gear intensive) outdoor activities
- Open floor plan
- Ability to use the van as a cargo van for home projects
- Comfy base camp for day trips to living in it for longer road trips
- Maximize efficiency of interior space
- Off-grid, off pavement capability
Where we started

RadVan in it’s infancy.
We purchased RadVan in the Southern California Desert as a partially converted cargo van. The previous owner installed sound dampening, insulation, vent fan, and  a single solar panel. The van was otherwise stock except for the optional 220 amp alternator.
The van came well insulated with an obsessive sound dampening.
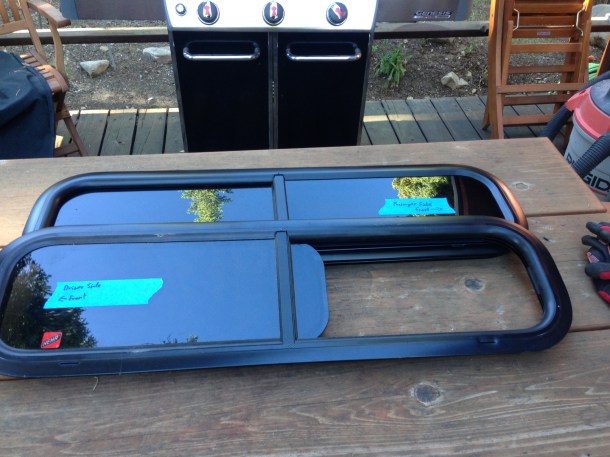
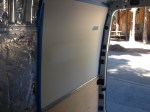
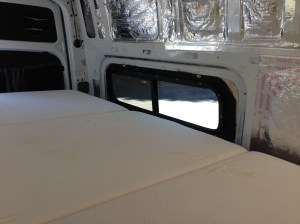
Windows
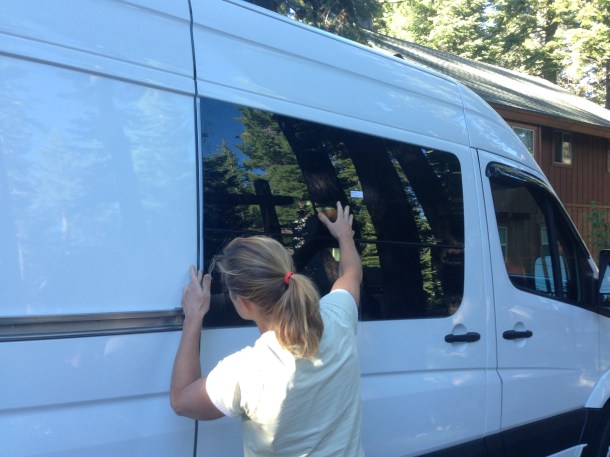
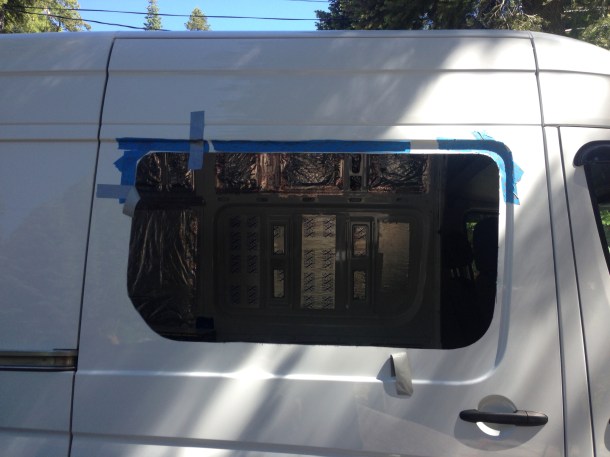
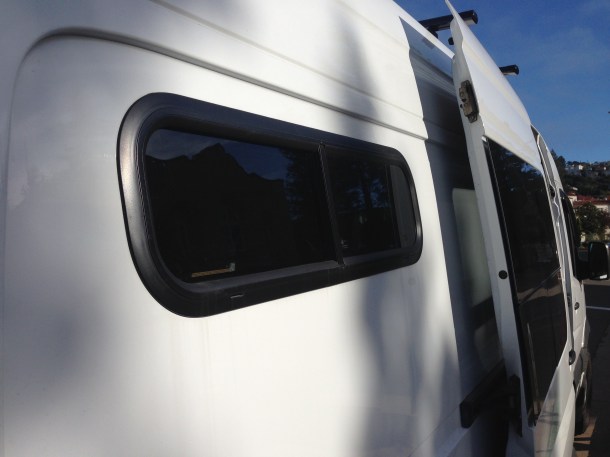
Windows for ventilation, light and views were an early priority. Driving a windowless cargo van was nerve wracking when trying to pull out of tight driveways.
-
- Test Fitting
-
- Big Hole!
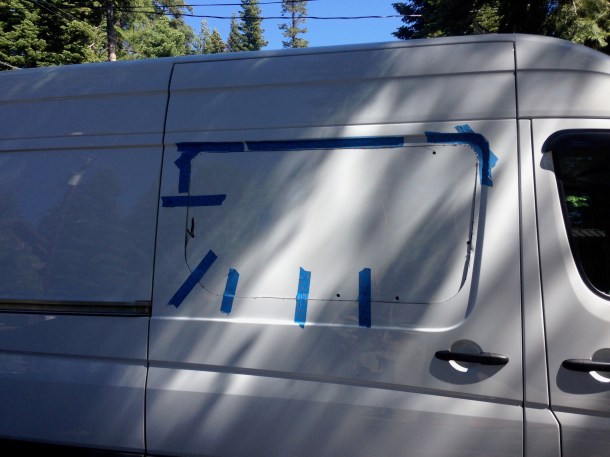

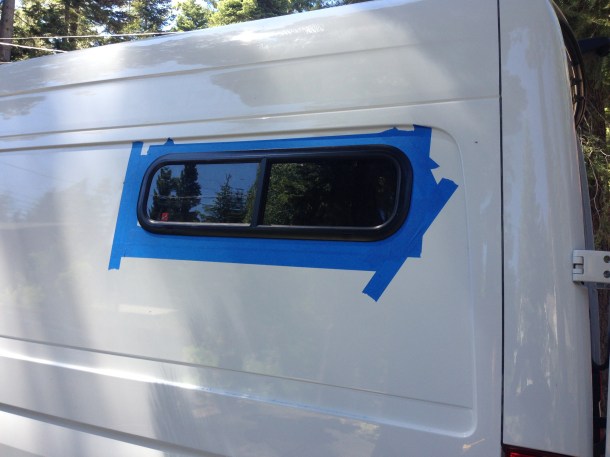
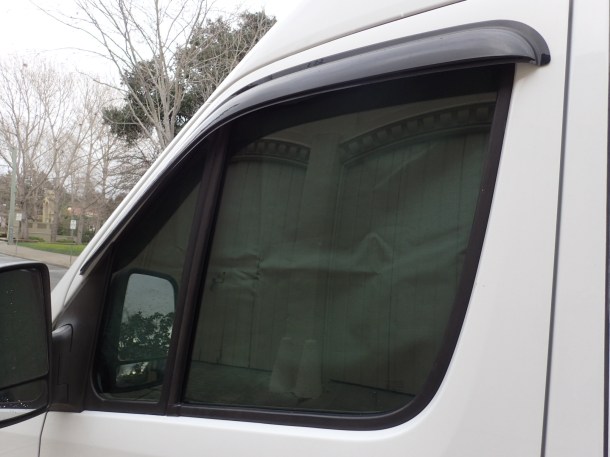
I quickly installed CR-Lawrence windows in the front. Besides the light, views, and ventilation, the windows made a huge difference in driving safety (for lane changes, and pulling out of narrow streets).
There is a long blog post on how I installed them: Installing CR Laurence Windows in a Sprinter Cargo Van
I purchased Hehr 10×33 windows after seeing them on some of the Outside and RB components vans. Having ventilation and natural light near the bed has been great. We have window coverings for them when we need privacy.
I also wrote up my DIY experience of installing the 10×33 windows: Installing rear windows in a Sprinter Van

-
- Test fitting the window
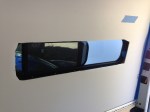
Window Coverings
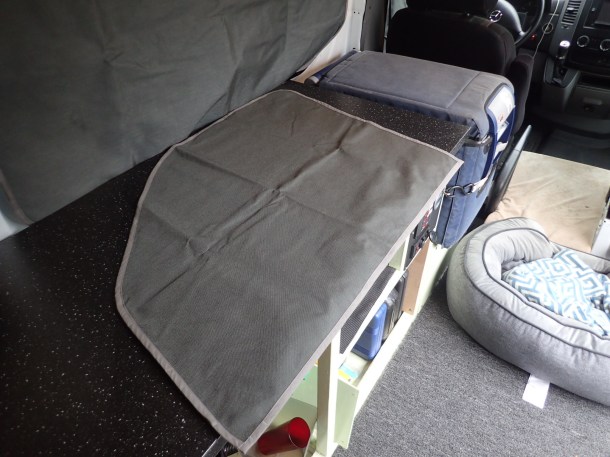
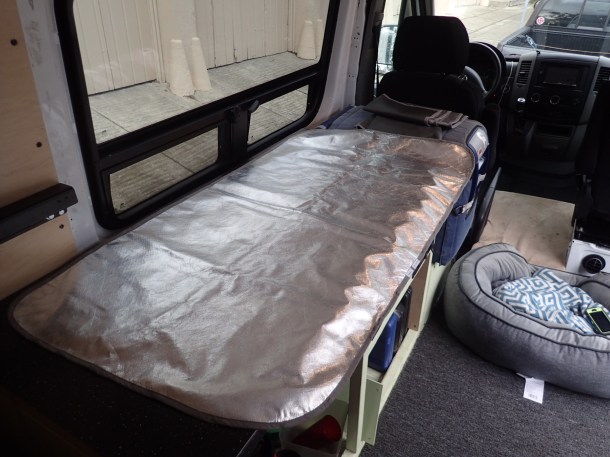
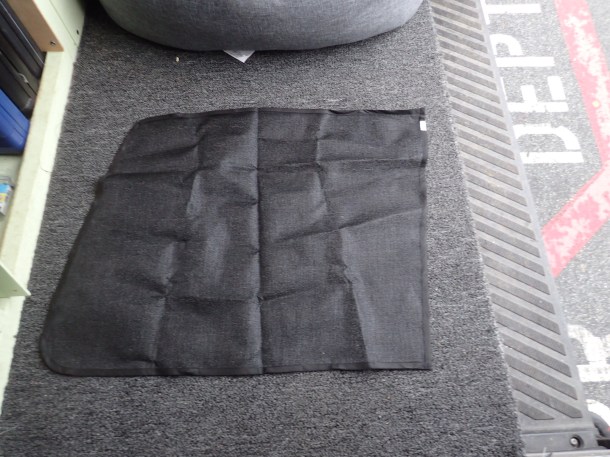
We found an Ebay seller that made custom Sprinter window coverings. We had originally planned on trying to make our own window coverings, but can barely use a sewing machine.
Ripplewear is a nice lady in New Hampshire who made really nice magnetic window coverings for her own Sprinter. They are much, much nicer than we could ever make ourselves. We wanted matching window coverings for our rear 10×33 Hehr slider windows and contacted her directly about getting custom windows. She was able to sew them in a couple days and get them to us for our trip to Colorado.
-
- Ripplewear gray front window cover
-

- Crew Window cover with Reflectix facing out
-
- Reflective (Temptrol) Side
-
- Ripplewear mosquito net
-

- Mosquito net installed
-
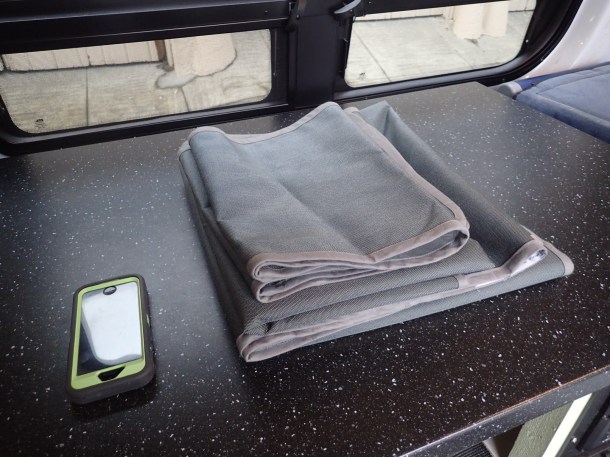
- This pile is 6 window coverings!
-

- Front window covering.
-
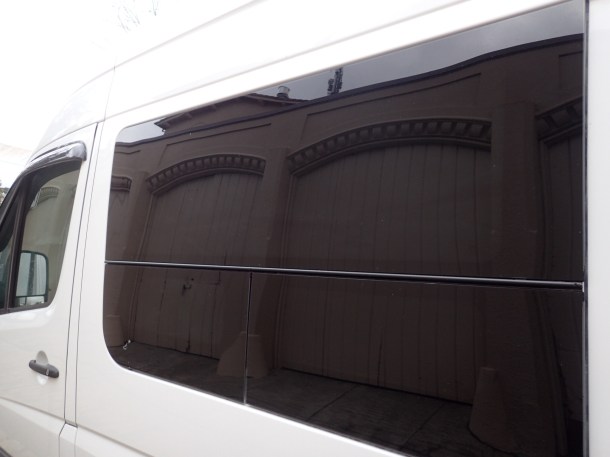
- Fabric side out on tinted windows blacks them out.
-

- With the reflective side out there is no stealth camping.
-
- With the fabric side out, the van is much more low profile.
The Ripplewear window coverings have a Cordura Fabric side and a reflective radiant barrier Temptrol side. Really nicely designed. I’m sure she could custom make heavier insulated coverings if you needed them.
We quickly realized that they were (mostly) reversible. Hard to stealth camp with the reflective side facing out. With the gray fabric facing out, it just looks like the van has dark tinted windows. On actual tinted windows, they black out the window completely from outside. A nice side benefit.
We bought Ripplewear window covers and her mosquito screens for the front windows as well.
Walls

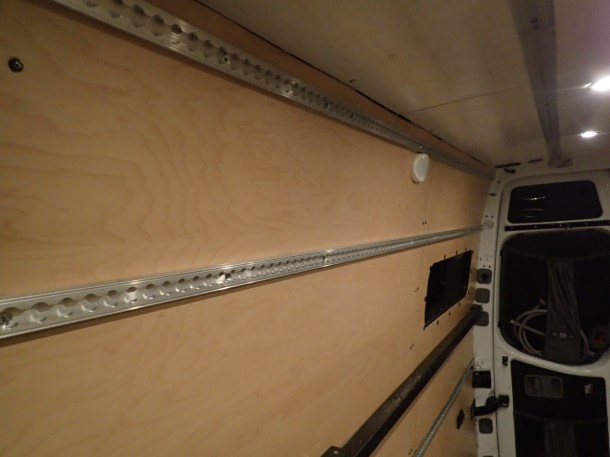
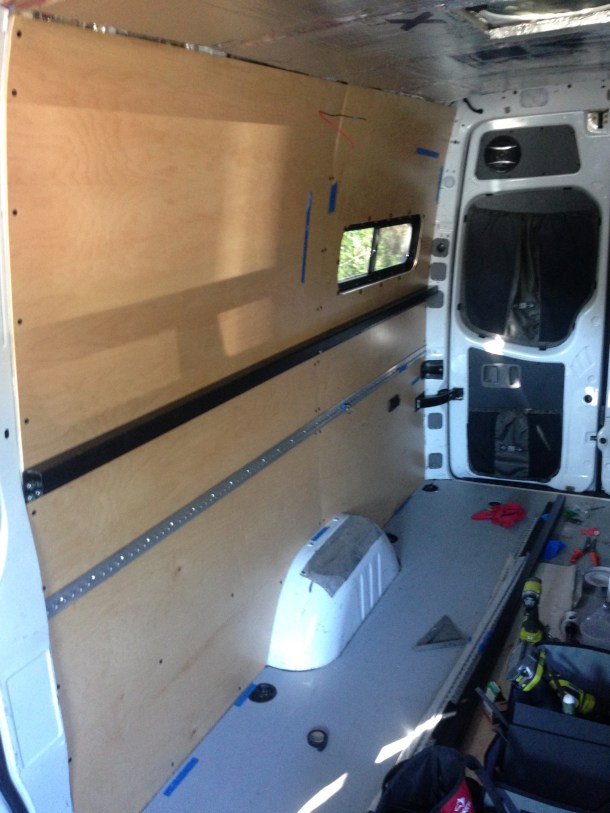
For wall panels I used 1/4″ Maple veneer plywood, stained with a water based “natural” polyurethane sealer. I did not want to use oil based paints in a small living space wherever possible.
To make the wall panels, I used Coroplast panels to make templates for the subtle curves. Coroplast is “corrugated plastic”- like a plastic carbboard. It comes in 4×8 sheets and is easy to trim and cut to shape with a utility knife or shears. Much easier to make templates with this than plywood or cardboard. The upper and lower panels on both sides of the van are mirror images of each other, so I only had to make one templates for one side. Once I was satisfied with the Coroplast templates, cutting the plywood wall panels was a snap.
-
- Coroplast is easy to trim with a utility knife for curves and corners
-
- Cut marks and notes
Coroplast is available in different widths and could be used as wall or ceiling panels in a van. I originally planned on using Coroplast for the ceiling until I held a lighter to it to test it’s flammability. Coroplast ignites and burns fairly easily. I quickly ruled it out for paneling in my van after my informal test.
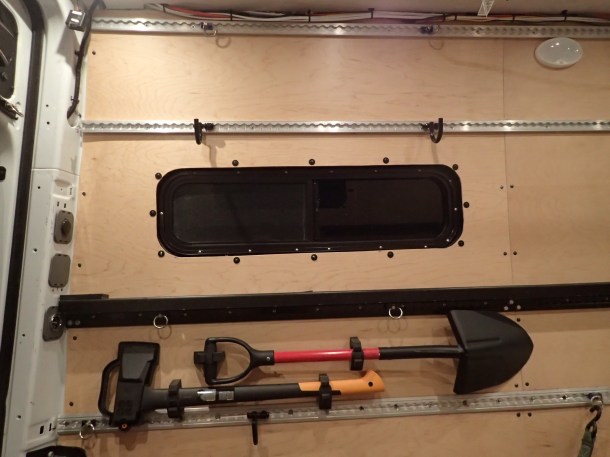
I attached the panels to the walls with truss head sheet metal screws- with heads painted black. Further, I used recessed (flanged) L-Track to hold the wall panels in place and provide a ledger for the upper walls.
-
- Maple Veneer plywood with L-Track
-
- Maximizing use of interior space
-

- The finished product!
-
- finished wall panels with the bed rail.
-

- Windows, bed, garage, bikes.
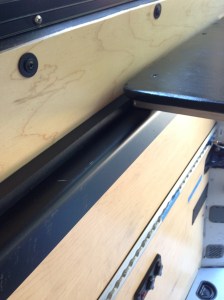
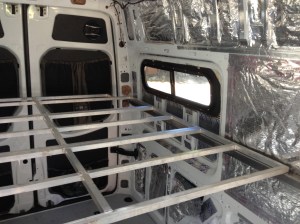
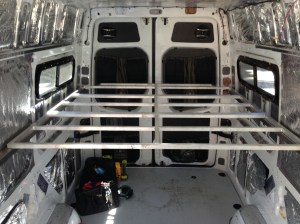
Platform Bed
After researching platform beds from Van Specialties, RB Components and other DIY options, we settled on the DIY platform bed kit from Overland Sprinters in Santa Barbara. I picked it up from him directly the day I purchased the van in Southern California.
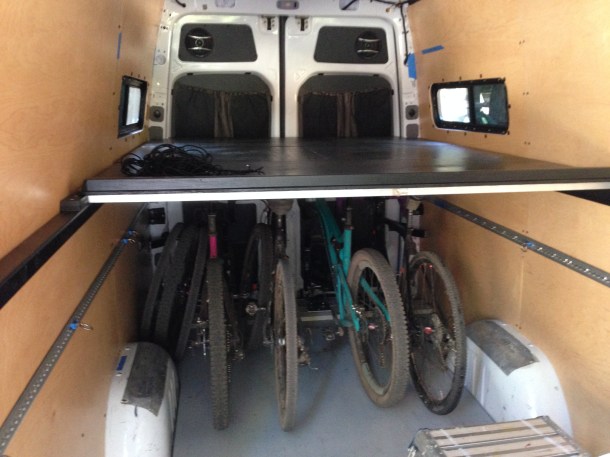
Bed and bike/gear garage
The Overland Sprinters bed kit runs about 1/3 the cost of the other boutique beds, but requires your own installation and finishing. The beauty of this kit is twofold: the rails are pre-bent to match the curvature of the Sprinter walls, and the entire bed can be removed in a few minutes to turn your van back into a cargo van.
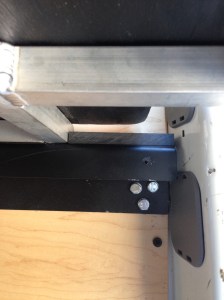
I mounted the bed rails to the walls with M8 Riv-Nuts. I used 1/2 inch plywood to cover the three platforms and overlapped each by 1.5 inches per side so that we could fit a full sized queen (folding memory foam) mattress. I finished the bed panels with 2 coats of black (water-based) polyurethane stain.
To keep the mattress from sliding forward during braking I installed a 2×2 across the front panel as a “bed stop”. I also installed stops on the front and rear of the rails so that the panels always line up exactly and can’t slide forwards or backwards.
-

- Platform bed and bike garage
-
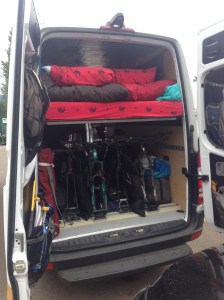
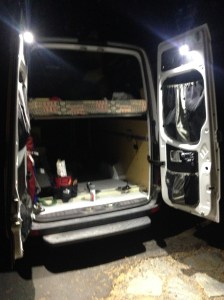
- First Road trip!
-
- Black powder coated L-Track on the underside of the platform bed rails
-
- L-Track riveted to the bed rails for storage
-

- M8 RivNuts attach the rails to the wall
-

- Safety net to keep things from sliding off the bed during braking
-
- L-Track Rings
-

- I cut furring strips from ABS plastic to prevent any side to side movement

-

- Rear stop made from 1/2″ ABS plastic
-
- Test fitting the bed panels
-
- Window height with a 6″ memory foam mattress
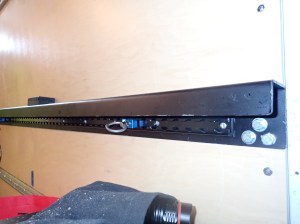
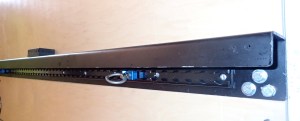
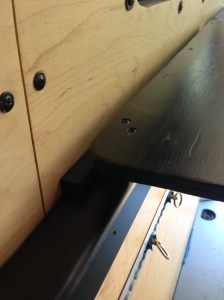
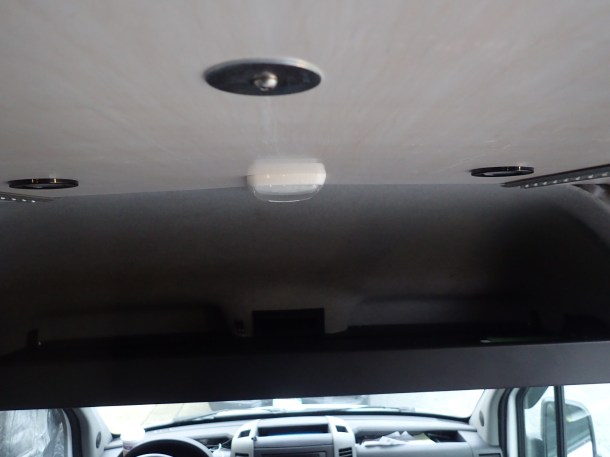
Headliner shelf and rear door storage
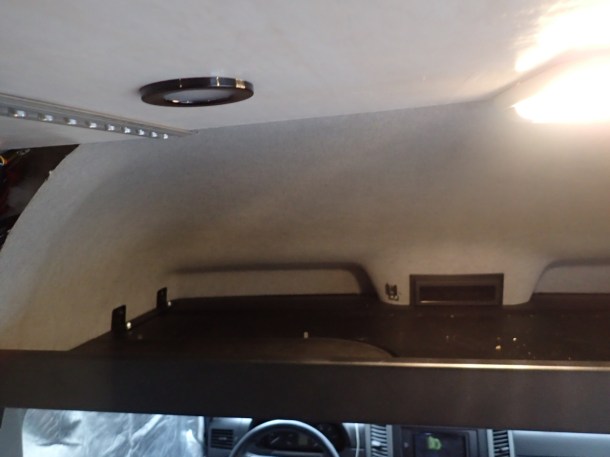
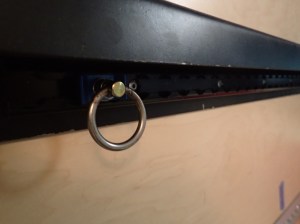
I saw the RB components headliner shelf on another sprinter and was immediately sold on the idea. There is a ton of unused potential storage above the front seats. The headliner shelf is expensive, but is nicely designed powder coated aluminum, very sturdy, and installs in 10-15 minutes.

Headliner shelf- Big enough for 2 springer spaniels plus dog snax
I also added these Atwood flexible grab handles to the headliner shelf for ease of entry and exit in the van. They were a bargain on Amazon at about $10/each. They are actually made for personal watercraft but work perfectly on the Sprinter.
The headliner shelf doesn’t impact our ability to move in and out of the front seats too much. It took four times of whacking my head on the shelf before I instinctively knew to duck.
-
- A ton of storage for soft goods!
-

- Underside view.
-

- The headliner shelf is compatible with grab handles.
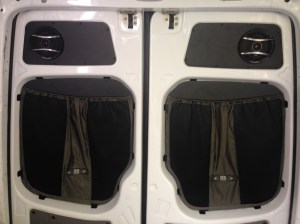
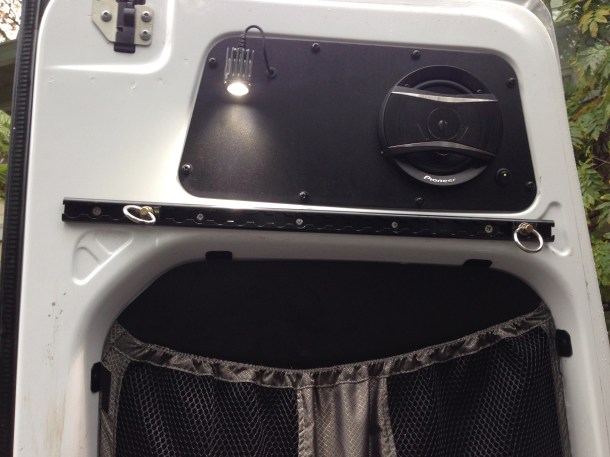
I chose to use the RB components rear door storage system. It is quite expensive, but makes maximum use of the rear doors for storage and organization. Installing the headliner shelf, rear door panels, and rear door storage nets took about 2 hours. In the balance between time to build myself and having something that was easy to install and move on, these won out for me. I’ve since added a few things to the rear doors and wrote a blog post about it- DIY Sprinter Camper- Maximizing storage and function part 1: Rear Doors

Roof, Solar and Fan
Our van roof needs include solar, ventilation, and storage. We needed to be able to haul longboards and SUPs on the roof occasionally.
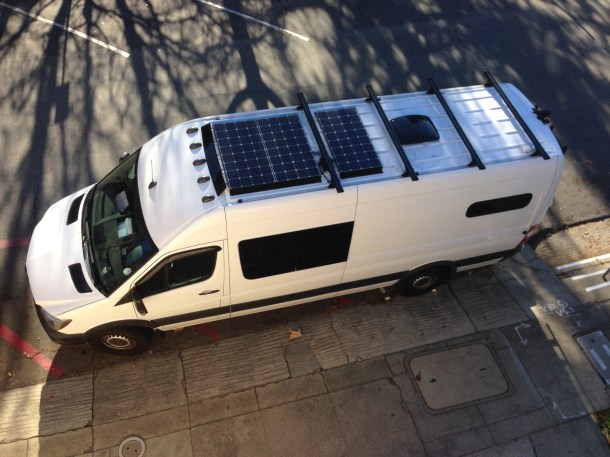
For rooftop storage I installed the Mercedes OEM roof rails and VanTech H3 crossbars. The crossbars are low profile and have plenty of mounting accessories.
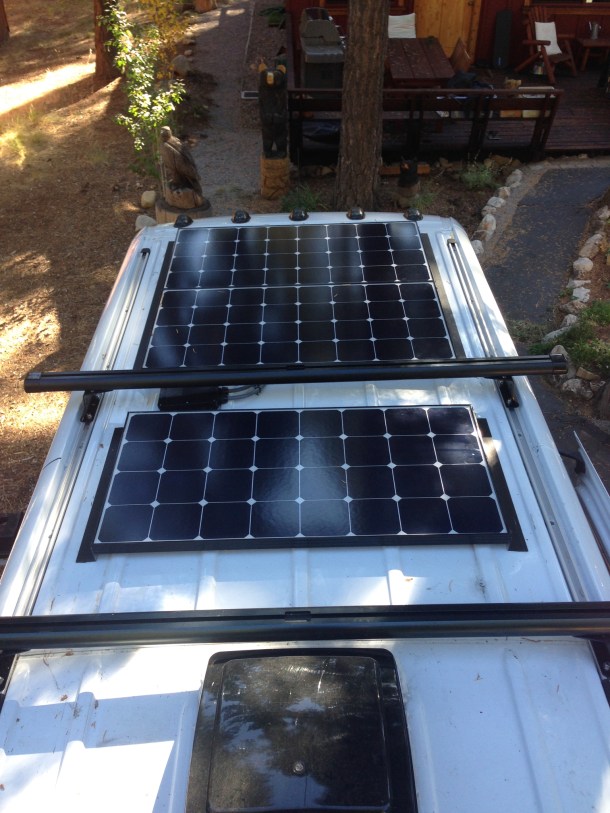
Although the van came with a solar panel and Fantastic Fan installed, I ended up changing them. Solar panels are not created equal! My van came with a 270 Watt Canadian Solar panel. Performance on that panel was abysmal, even at noon mid-summer. I changed the single panel out for 3 x 100 watt Renogy Eclipse panels and a Victron MPPT and have been really happy with their performance. As a bonus, I went from 270 watts to 300 watts and gained about 16″ of roof space. You can see that I spaced out the solar panels between the crossbars. We need to be able to haul SUPs up to 12’6″ on the roof and that was just the way it worked out.
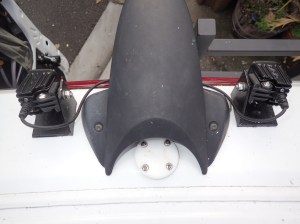
I also modified an old Yakima fairing to mount on the solar panel. The fairing cuts down on wind noise from the panels and provides constant downward pressure on the panels (instead of constant uplifting on the panels).

For roof penetrations, I used the excellent AM Solar Roof Combiner Box, a Blue Sea Systems Cable Clam, and a Instapark dual cable gland through fitting.
-
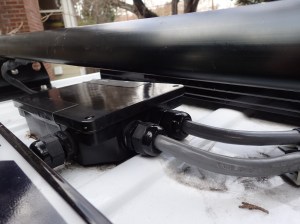
- AM Solar combiner box
-

- Am Solar Combiner Box
-
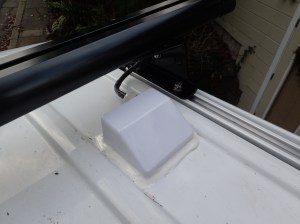
- Instapark Dual Cable Gland
-
- Instapark Dual Cable Gland
-
- Blue Sea Cable Clam
Although the van came with a basic Fantastic Fan installed, I changed it to a Maxxair fan with remote and temperature controls. For our purposes, the Maxxair works great because it has an integrated rain cover, can be left open in all but sideways windblown rain, and can be left open when driving for ventilation out the top. The Maxxair is a little more low profile as well. Unless you know your roof fans, it’s difficult to tell that it is open if stealth camping. We also got the fan with an integrated temperature sensor. The fan automatically increases or decreases fan speed to maintain a set temperature. We travel with our dog, Miss Daisy, and feel that the Maxxair was more dog friendly. The temperature control and ability to leave it open during passing thunderstorms was what sold us on the Maxxair.
For roof access I installed the RB components rear door ladder. Beefy aluminum and easy to climb.
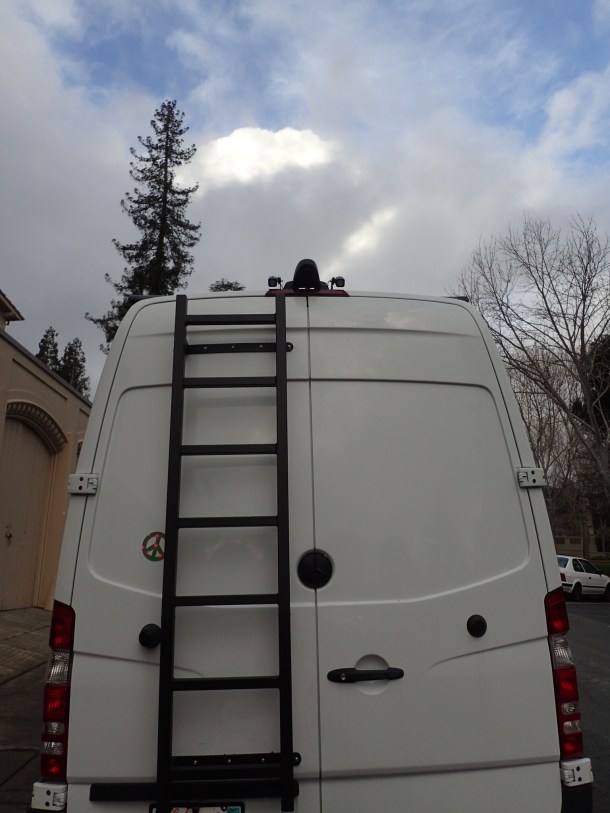
RB Components rear door ladder and Rigid Ignite backup lighting
Suspension, Lift and Air
-
- Stock
-
- After lift and tires
One of the limitations of a 170″ wheelbase is the risk of high centering the van or scraping the back end when driving off pavement. During out initial trip to Colorado, we were close to high centering the van on a few steep drainage swales.
I was also unhappy with the rocking and swaying of the stock suspension.
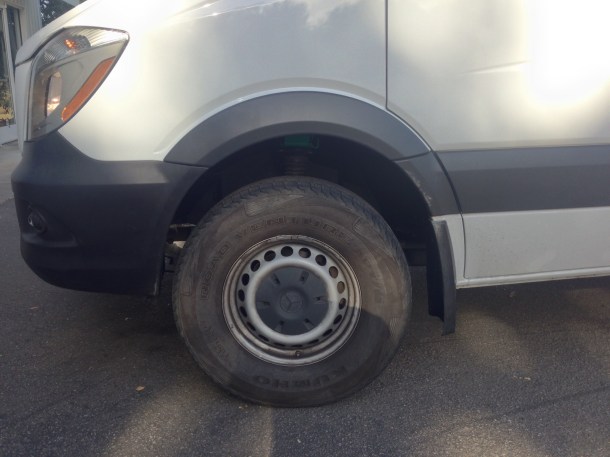
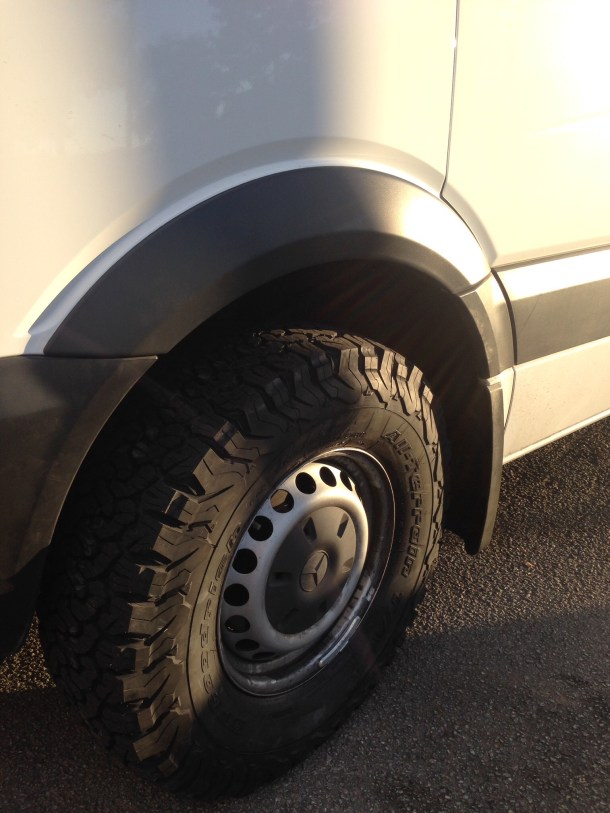
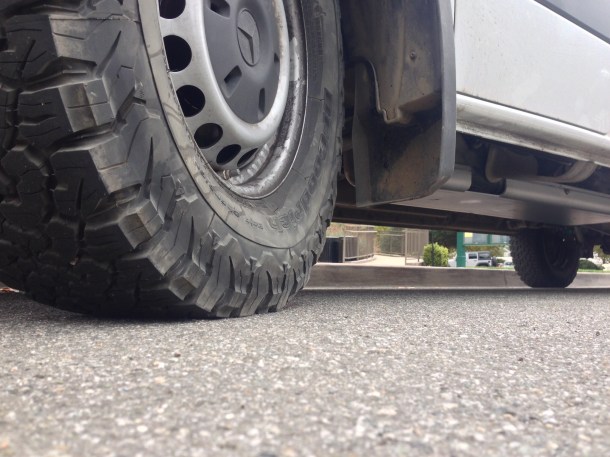
Enter Van Compass and their Sprinter lift kit! Van Compass is a California company making lift kits and skid plates for Sprinters and Transits as well as suspension upgrades and other cool fabrication. I gained nearly 3″ of body lift between the lift and larger tires. I was able to swap to BF Goodrich 265/75/R16 tires and still have room to chain up the rear tires if necessary.
-

- Stock tires
-
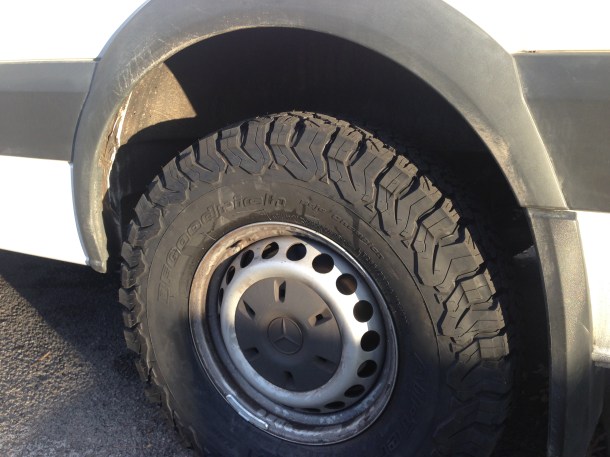
- With lift and BFG 265 tires.
-
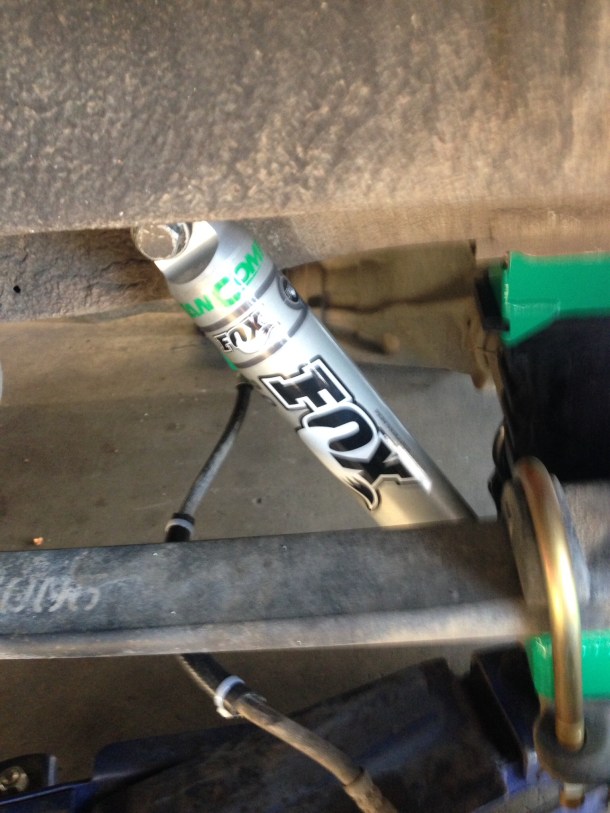
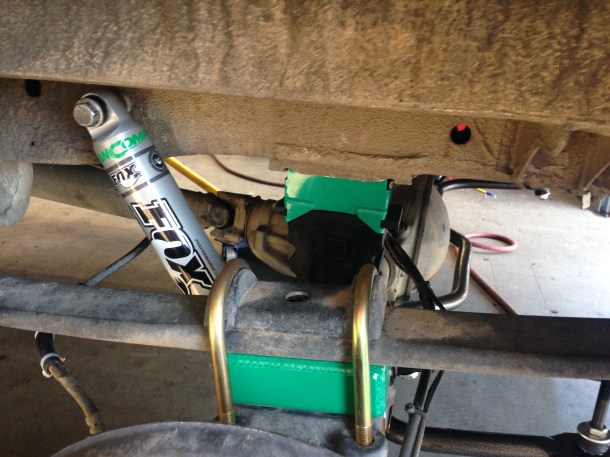
- Fox Shocks and lift kit

-

- Van Compass engine skid plate
-

- Van Compass tank plate
-
- Tank plate

-
- Onboard air system
-
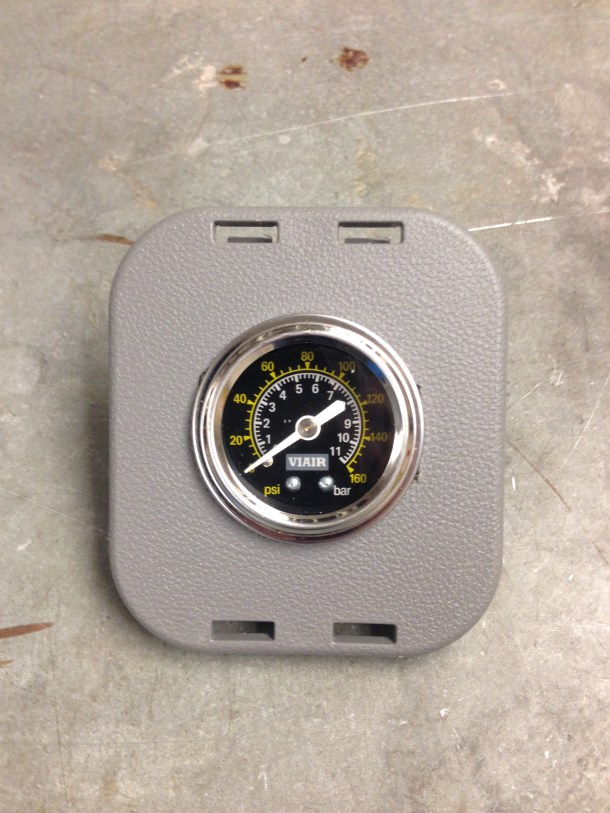
- 145 psi air!
-

- The onboard air system has an airchuck just inside the rear doors

-
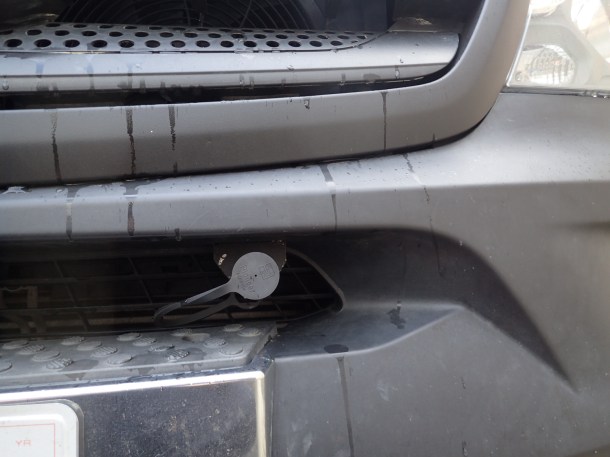
- Air chuck hidden in front bumper
-
- Front bumper air chuck
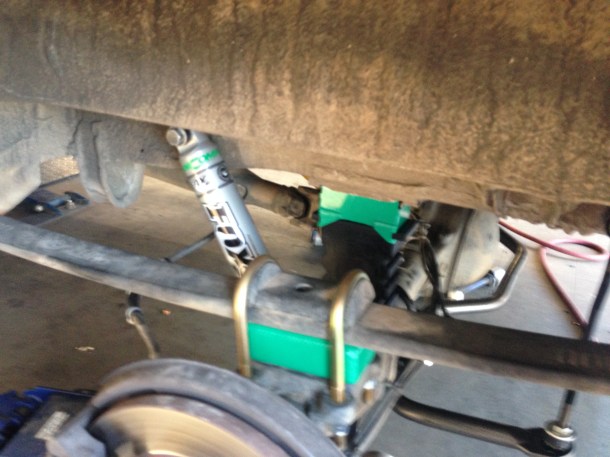
Van Compass installed their custom valved rear Fox Shocks, Koni front struts, Sumo springs and sway bar on the Sprinter. I also swapped the stock Kumho tires with BF Goodrich All Terrain KO2s in a 265/75/R16. What a huge difference in the ride! The excessive body lean is all but gone, and the rocking while entering driveways is minimized. Despite nearly 3″ in height gain, the van drives much better on windy rural roads. Driving on dirt roads is much better as well. The fox shocks seem to handle washboard roads much better.
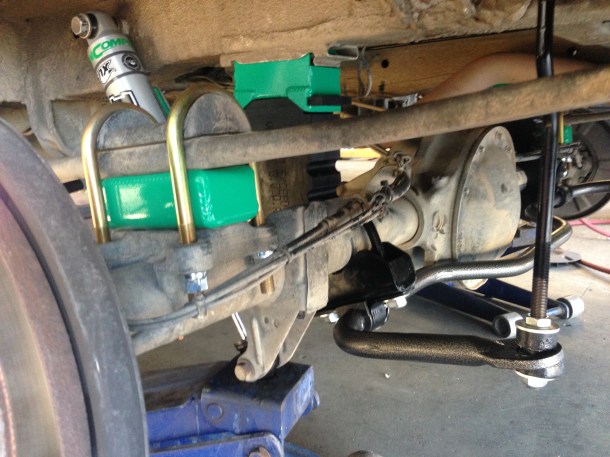
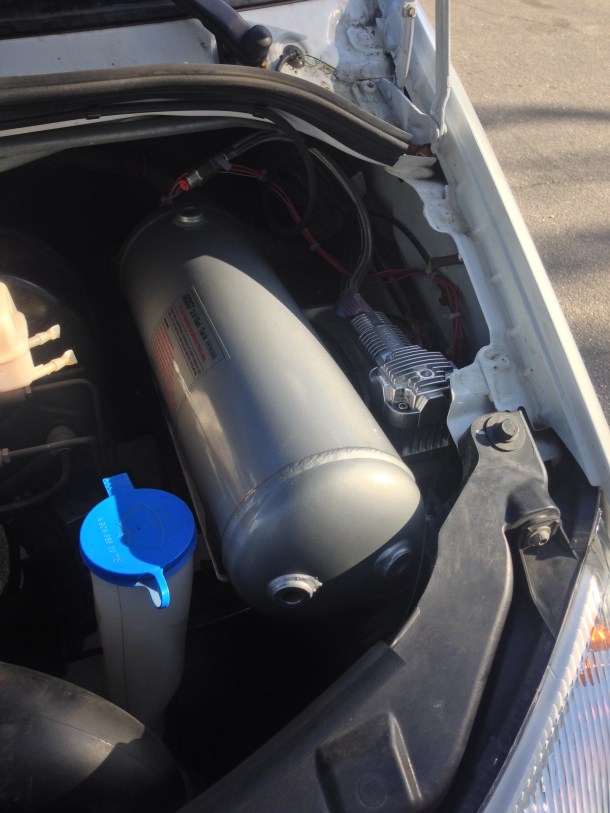
Van Compass also installed an onboard air system. I got one of their prototype compressor and tank mounts installed under the hood (in the aux battery location). I have a Viair compressor with two gallon air tank under the hood with air chucks in the front and rear of the van.
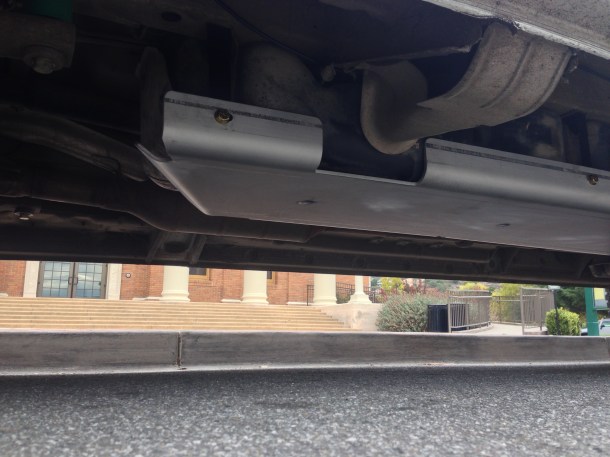
Lastly, I invested in the Van Compass engine skid plate and gas tank plate. We do a fair amount of driving off pavement and like to camp obscure places. I plan on having this van for many, many years. It was worth the piece of mind to have the oil pan and fuel tank protected from rocks or road debris.
The guys at Van Compass are great. They are building a nice business. They are in a beautiful part of Central California if you are close enough for them to install. Surfing, wineries, great bike riding, and the California coast are there for a van upgrade road trip.
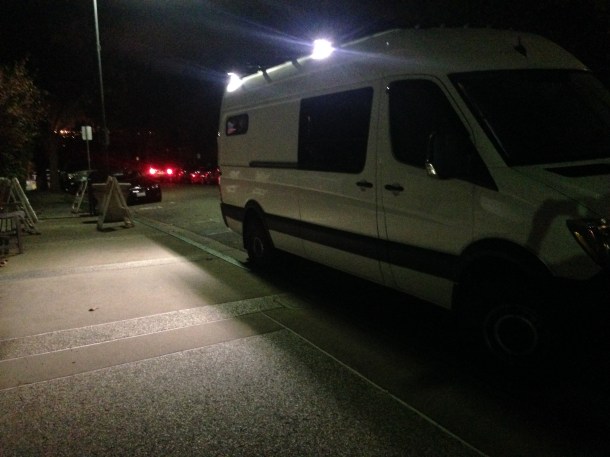
Exterior lighting
So I went a little crazy with the lighting…
Rigid Industries Ignite scene lighting
Seems like we are setting up camp or cooking in the dark on a regular basis.
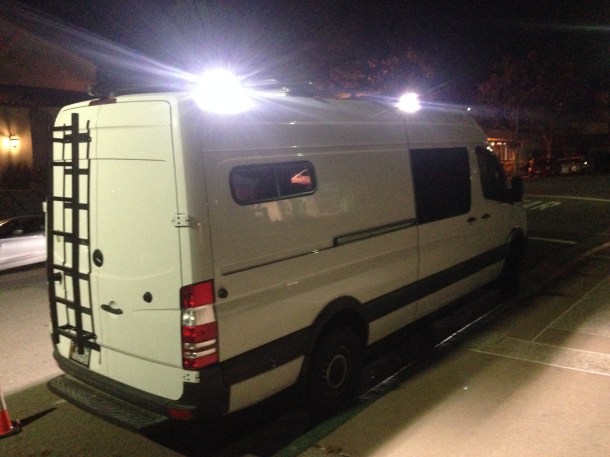
I discovered Rigid Industries Ignite LED lights and ordered a couple of them to see how they worked. They run about $55/each, and put out 1,000 lumens at 12 watts (roughly 1 amp). The Rigid Ignite lights are tiny!
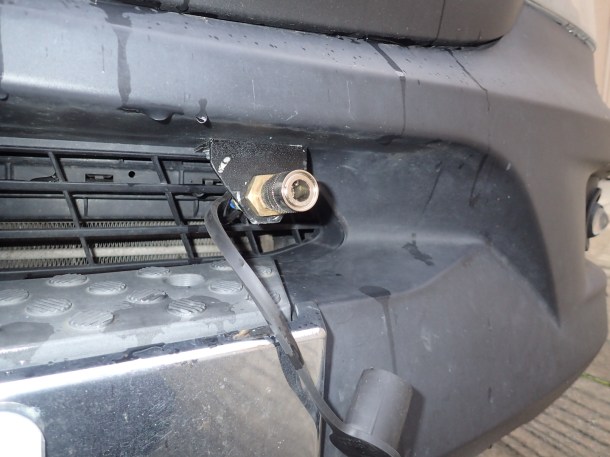
I was able to tuck the lights up under the Vantech Crossbars. They are barely visible from outside the van. I also installed Rigid Ignites next to the back up camera on the roof. They are great for backing up at night. (Side benefit- nothing gets a tailgater to back off like having their car suddenly lit up!)
The new generation of LED lights are fantastic for power consumption. At 12 watts each (1 amp), they use very little power compared to their illumination.
-

- Backup lighting
-
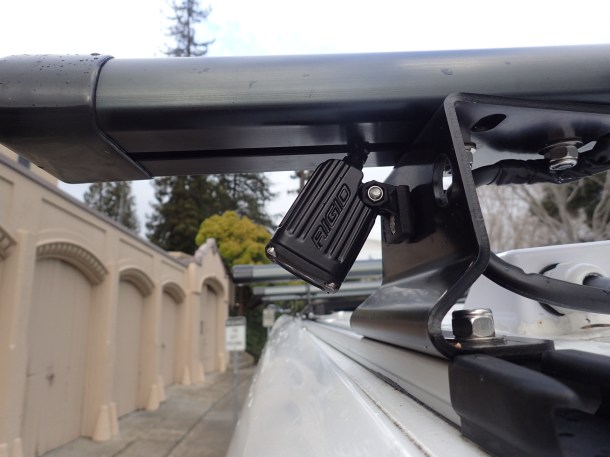
- Tiny lights tuck under the Crossbars

-
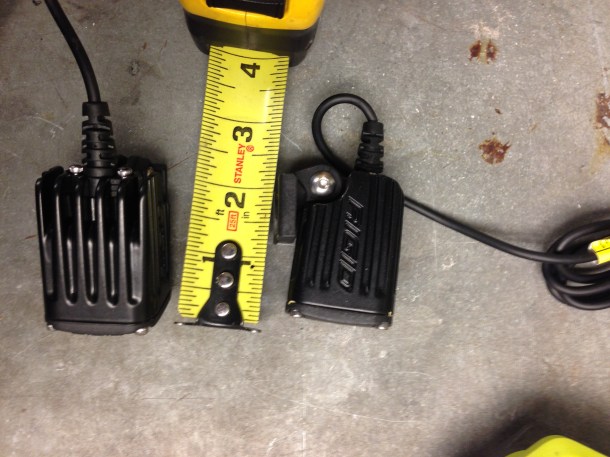
- Roughly 1.2 x 2.5″
-
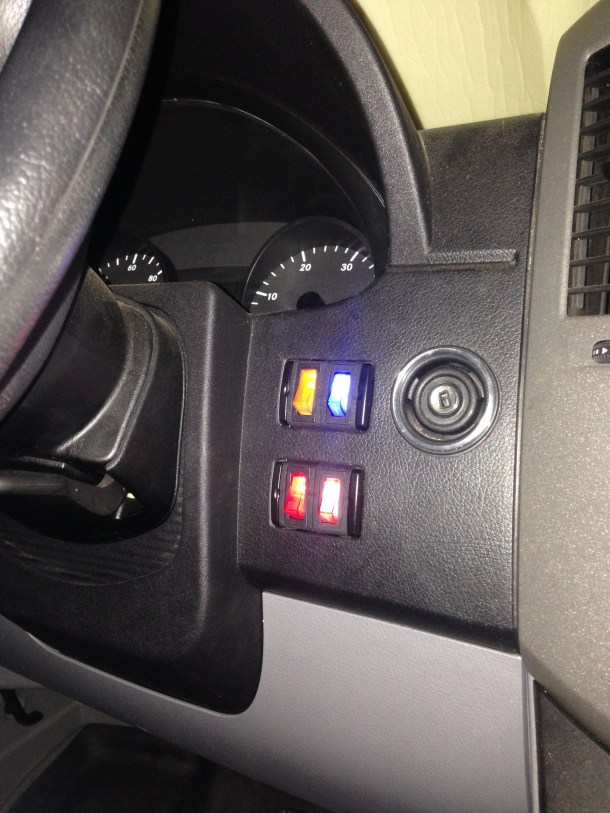
- Dashboard lighting controls (and as the slider as well).
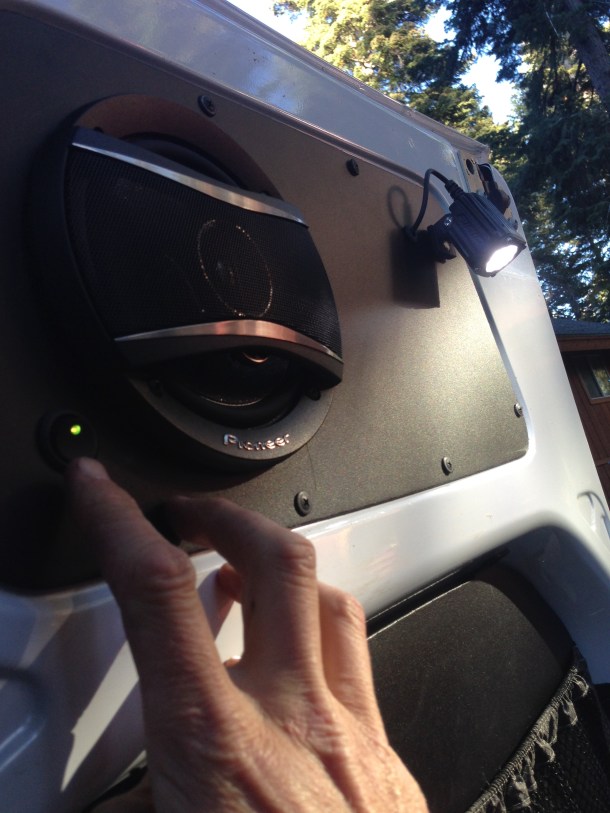
I also installed Rigid Industries Ignite in the rear doors for working outside the back doors.

Temporary cabinet
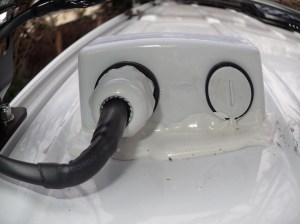
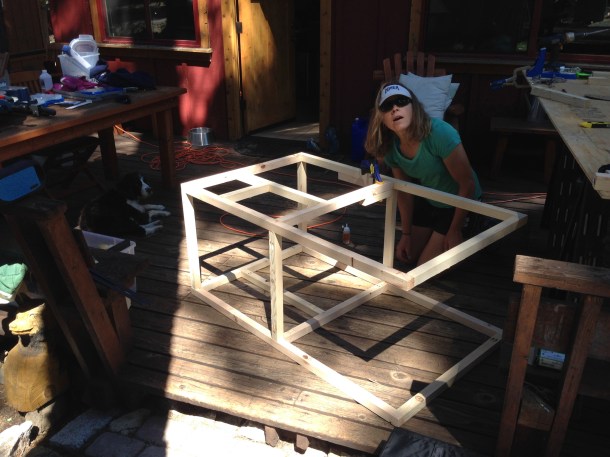
Building a DIY camper can dominate your life. In order to use the van for a few months I built a temporary cabinet with mostly scrap wood. Our temporary cabinet has served us well. It’s made the van livable until I build my final cabinetry. The cabinet is a bunch of 2×2 lumber Kreg Jigged together into boxes and tied together with the excess plywood from the walls. I finished the cabinet with a cheap countertop from Ikea.
We don’t have fancy workspaces. Most van projects happen in the driveway or on the deck.


-
- Solar and battery switches

Electrical and LED lighting
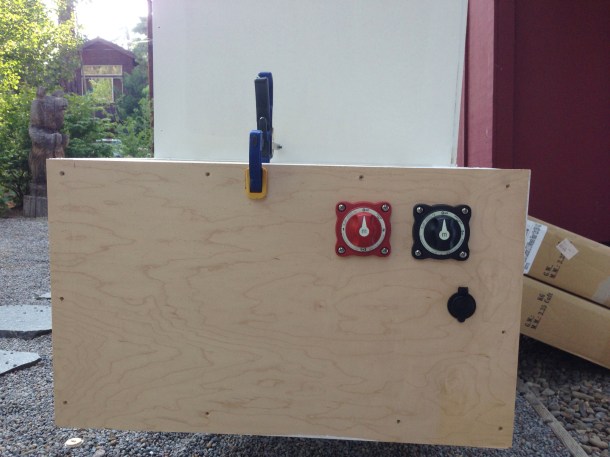
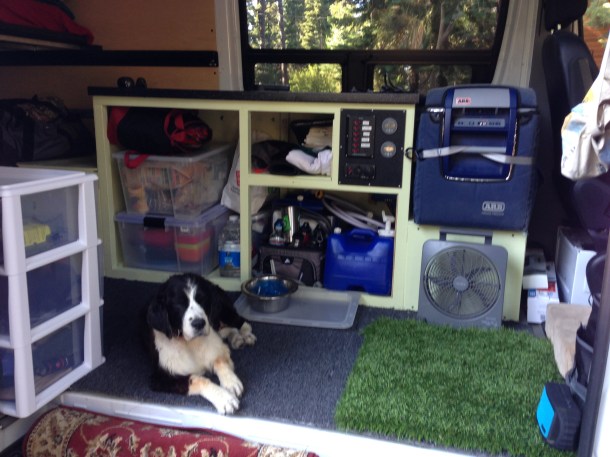
Most DIYers build our vans in stages. I hooked up a temporary electrical system until I get around to installing my permanent cabinets and electrical setup. We have basic electrical needs (fridge, lights, USB chargers, Espar heater, small inverter, etc.), and didn’t need complex system to get us on the road.
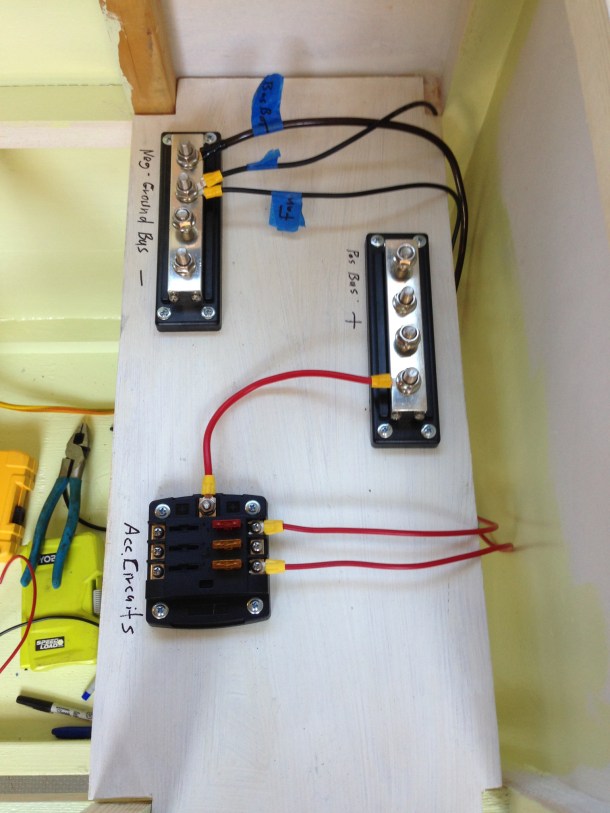
My preliminary electrical system consists of a 245ah AGM house battery, 3×100 watt Renogy Eclipse solar panels, Victron MPPT solar charge controller, Blue Sea System ACR (for engine charging of the house battery), and Victron Battery and solar monitors.
-
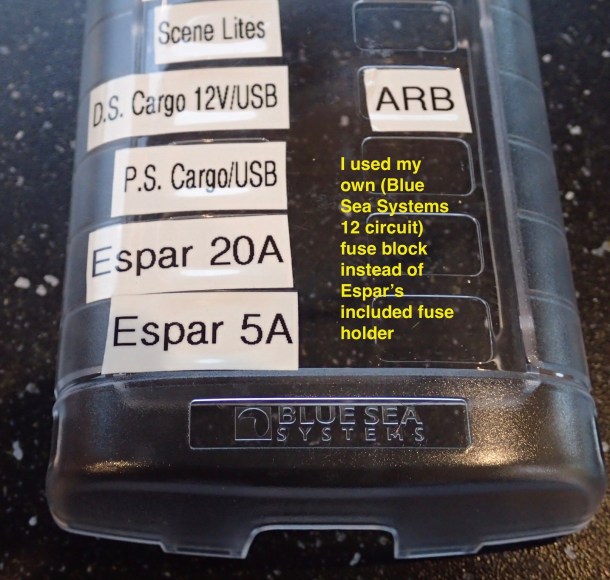
- Blue Sea 12 circuit fuse holcder
-
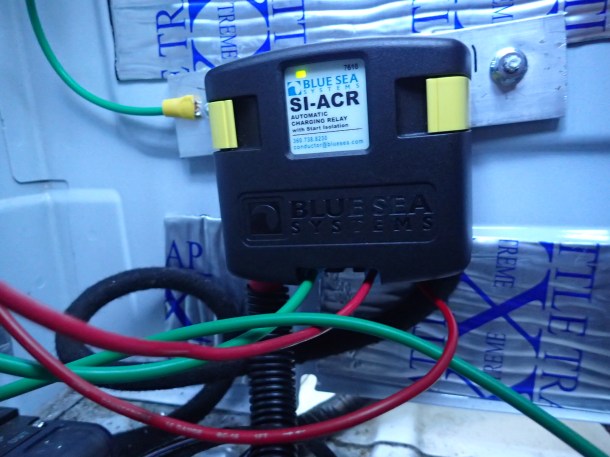
- Blue Sea ACR for charging house battery
-
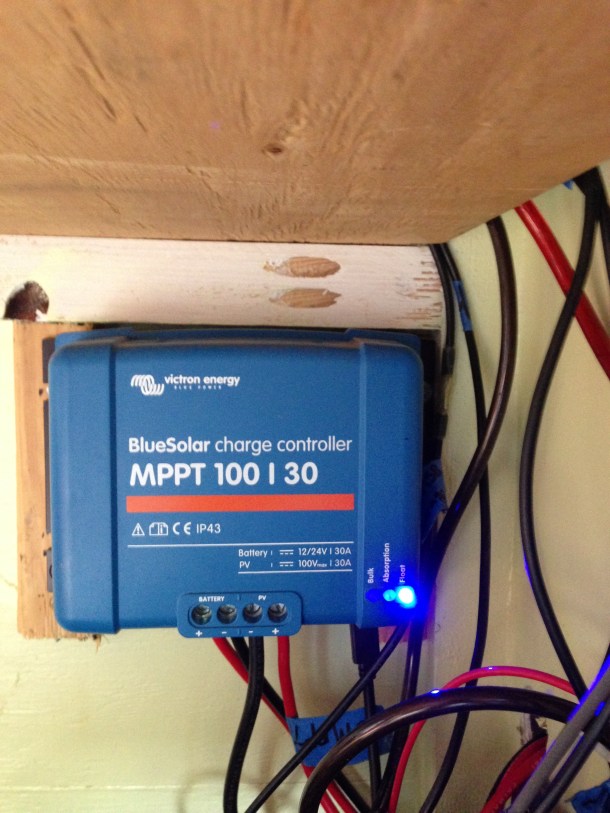
- Victron MPPT solar controller

-
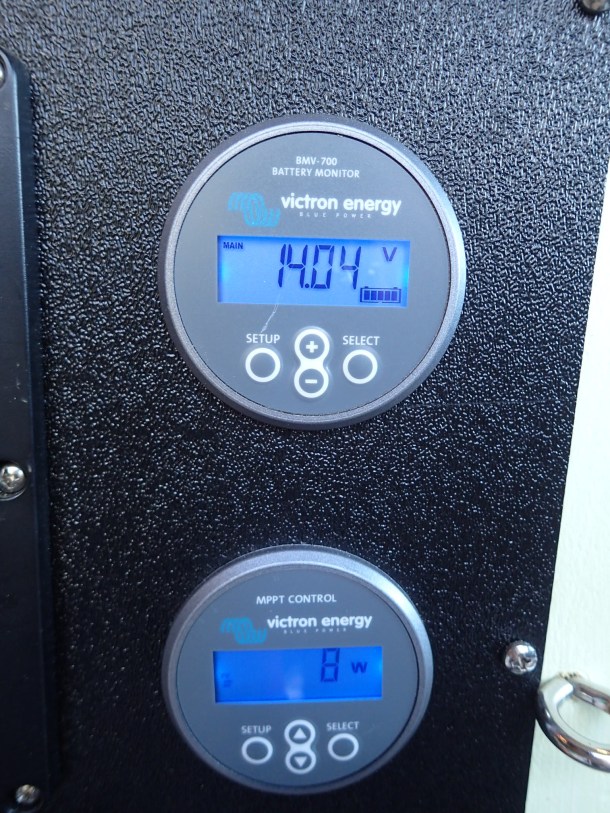
- Victron Battery monitor and solar monitor
-
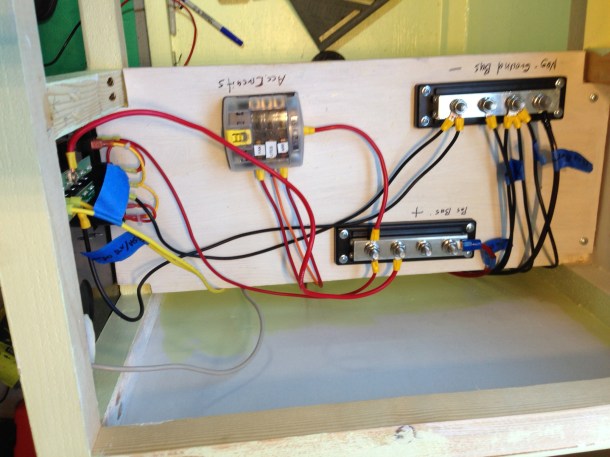
- Putting together the electrical
-
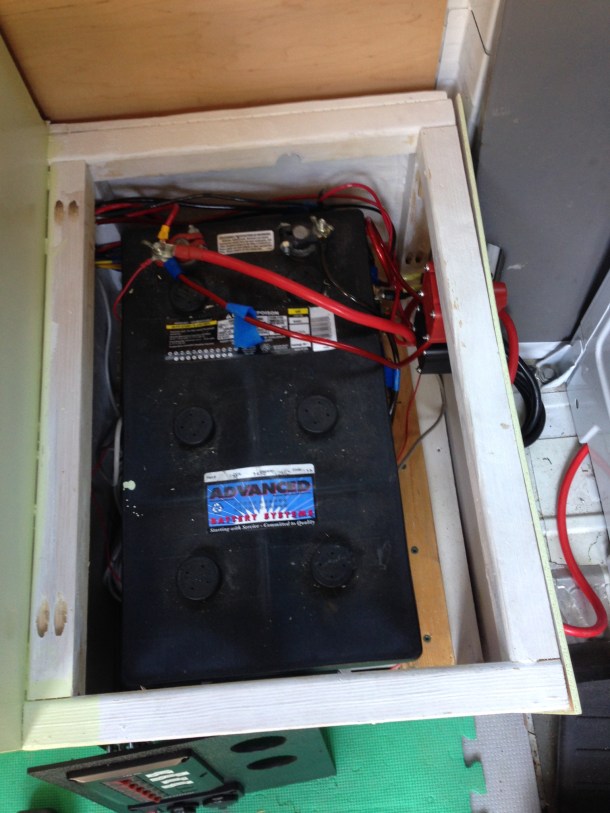
- Temporary battery enclosure
-
- Solar and battery switches
I ended up using a lot of Blue Sea Systems electrical parts. Blue Sea is mostly a marine electrical company, but is gaining a following in campervans and RVs.
My main focus in the preliminary stages was interior lighting, lots of USB ports, and extra wiring for any future electrical needs.
Somehow I ended up installing 14 USB ports throughout the van. 16 seemed excessive…
-

- Blue Sea switched 12V/USB chargers
-

- His/hers USB ports next to the bed
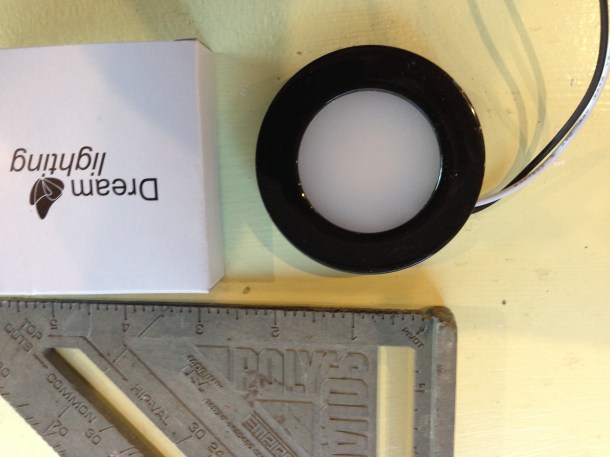
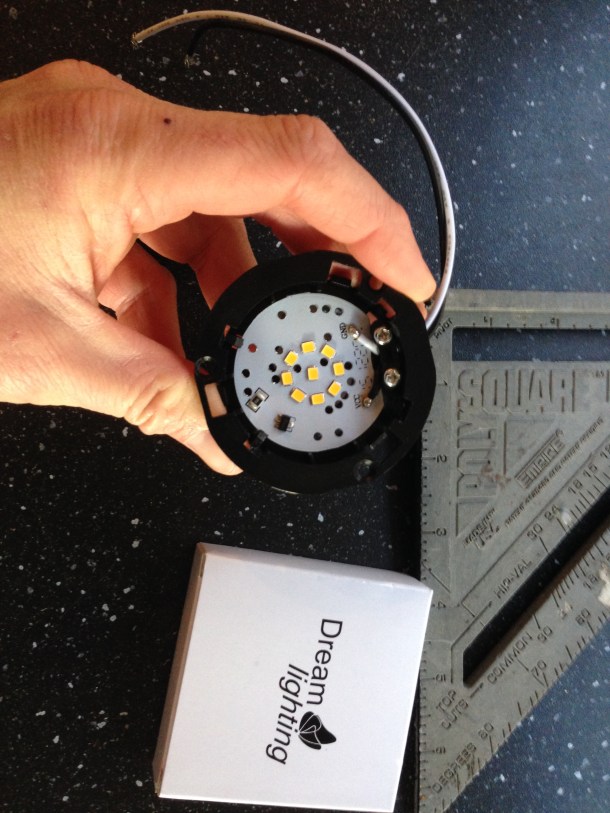
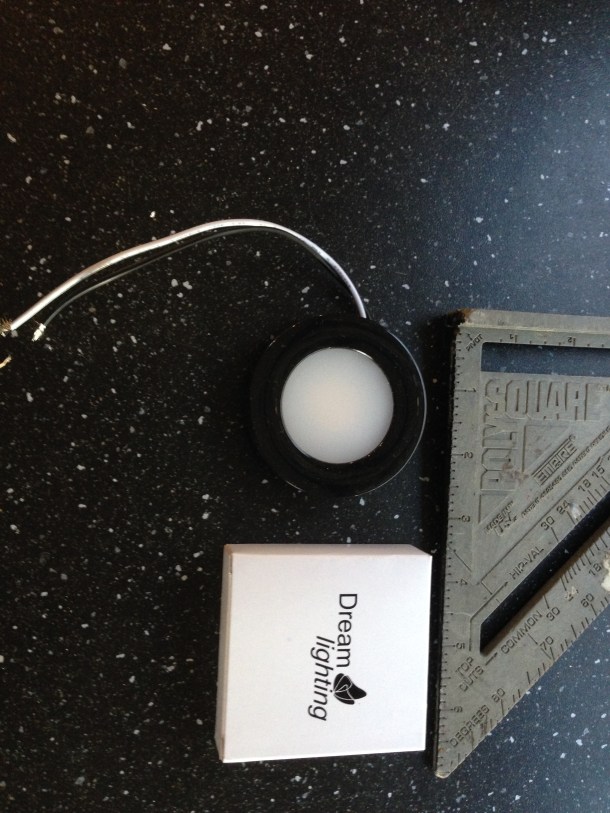
For lighting I installed 3 zones of recessed LED lighting. I used Dream Lighting recessed LED lights. They draw 2 watts at full power and are dimmable (for less energy usage).
-
- Dream Lighting LEDs are just over 2″ in diameter


-
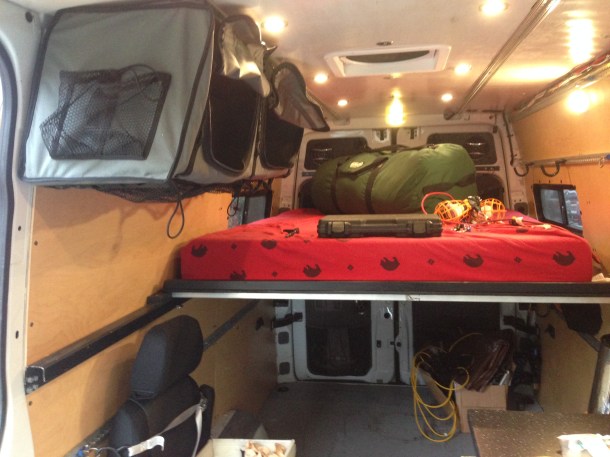
- Three zones of recessed LED lights
-
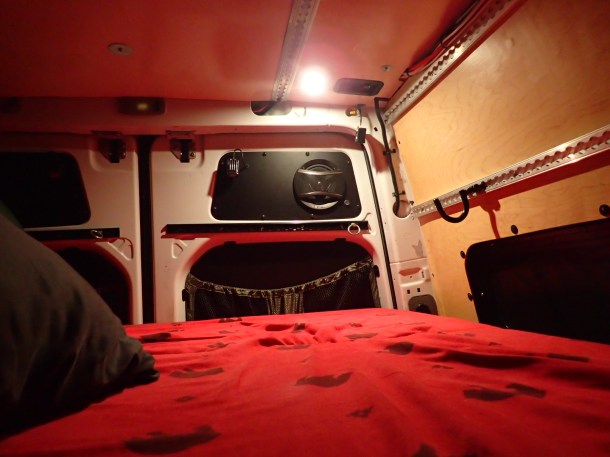
- Dimmable reading lights on both sides of the bed
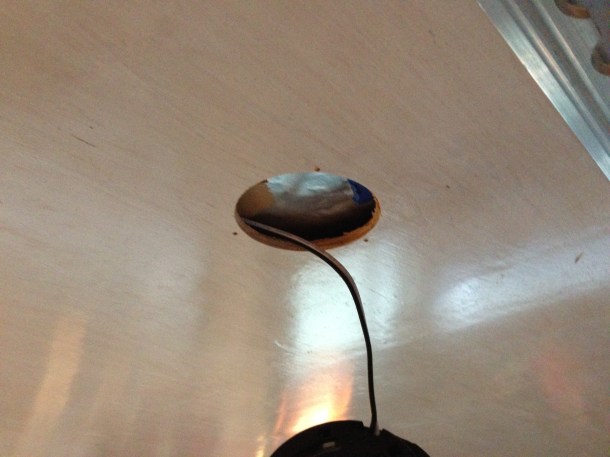
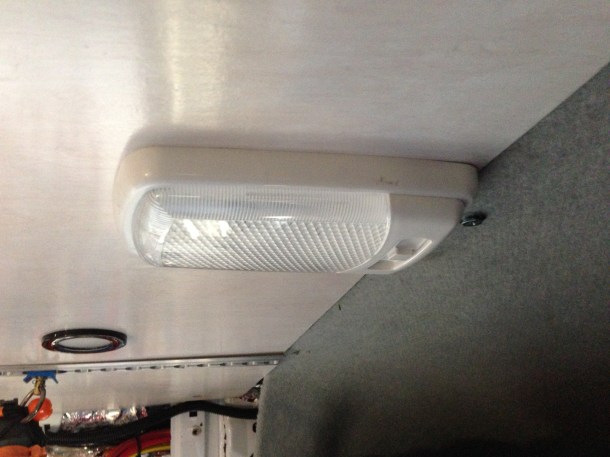
When I installed the wall panels, some of the factory Mercedes cabin lighting had to be removed. I simply extended the factory wiring through the wall panel and replaced them with inexpensive 12V LED lights.
-

- Dream Lighting LED porch light (Amazon.com)
-
- Lumitronics Designer LED RV light (Amazon.com)
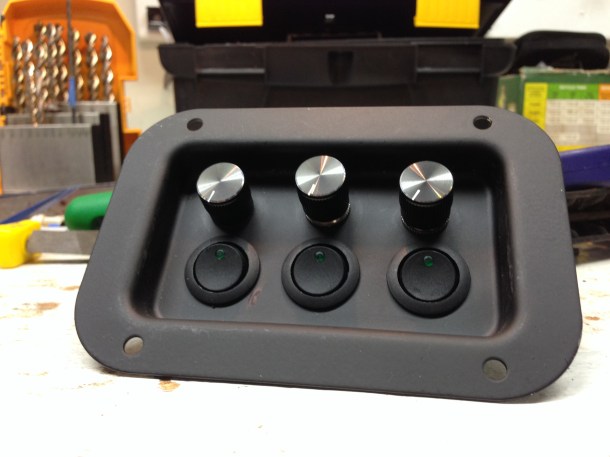
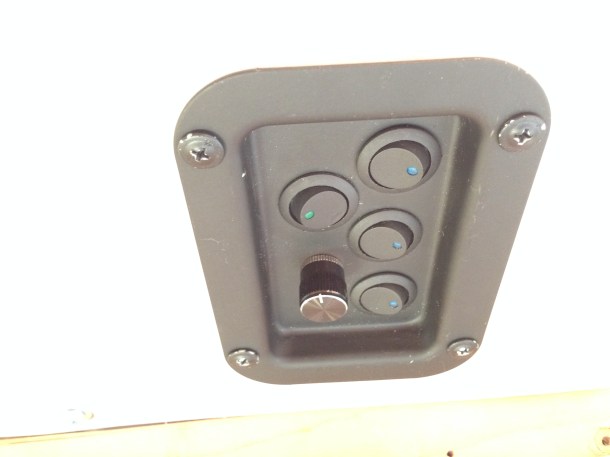
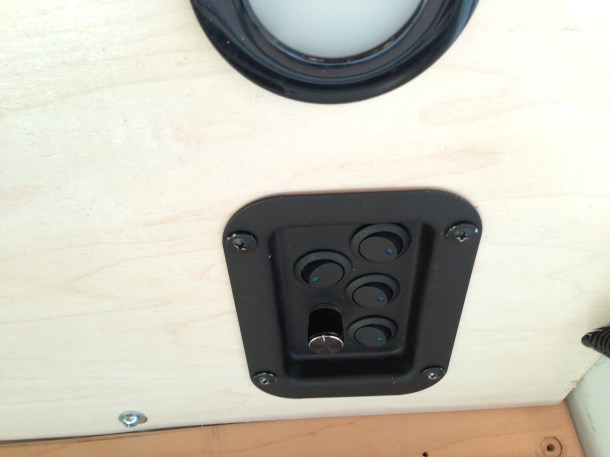
I made recessed light switches from Penn Elcom recessed dishes. I tucked the switches on the ceiling in areas where they wouldn’t get bumped.
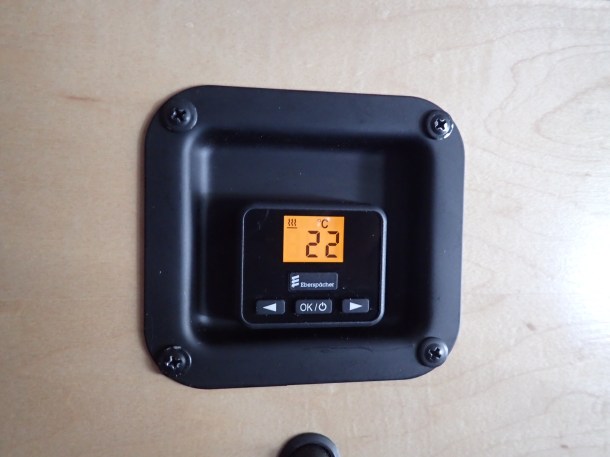
Espar Airtronics Diesel Furnace
Getting a heater in the van was a priority, and vastly increases the comfort and winter use of the van. I installed the Espar Airtronics D2 diesel fired furnace under the passenger swivel seat.
-
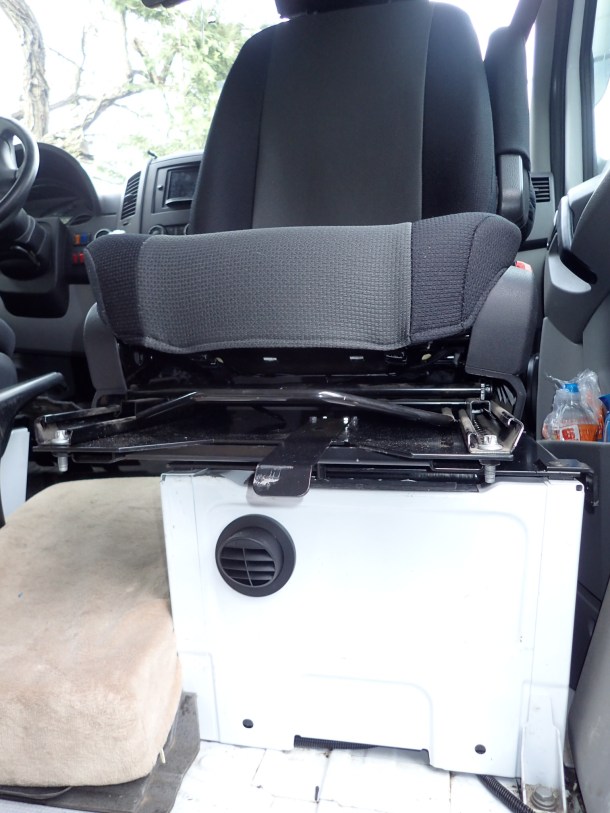
- Espar furnace outlet under the seat
-

- Smaller than a shoebox, 7500 BTU!
-

- Routing the exhaust away from the sliding door
-
- Toasty warm
-
- Miss Daisy. Not that into this project.
Looking Forward
Aside from a few trim pieces and efficiency tweaks, it’s time to take a break from van projects and play in it for a few months.
The pieces that are left are to build and install my final cabinetry, water system for off grid adventures, a hot water system and replace the floor.
All of the VanLife and DIYers all draw inspiration and ideas from other’s vans. We borrow ideas, improve them, and adapt them to our own specific needs. I hope this loooong post and pic dump was helpful.
Please leave any comments or questions below. Subscribe for updates as I go into more detail how I did various projects of this conversion. More non-van, mountain life content coming as well.
Share this:


Your an inspiration, I’ve had my sprinter a few years and have only accomplished a fraction of what you’ve done. I built out the inside of mine decided I didn’t like the layout so recently ripped it all out and started on version 2.0. I will definitely be following your sample on the suspension, tired of dragging my trailer hitch pulling out of the drive way. I have a Catalina 22 sailboat I tow occasionally and a few more inches in the rear will be a god send. Thanks for posting. BT Southern California
LikeLike
Thanks for the kind words. I highly recommend the Van Compass rear lift, Fox Rear shocks, and Sumo Springs. I was always unhappy with the crazy side to side rocking and leaning as well as the departure angle. The Sumo Springs and Fox shocks (with both rebound and compression damping) really helped overall ride quality. I’ve lost a bit of gas mileage with the lift and bigger tires, but still get near 20mpg and haven’t done many freeway miles since the lift. They are up in Atascadero (near Morro Bay). I made a 3 day trip of it and had them do everything. Expensive, but worth it. I think you can run up to 33″ tires with the lift (e.g., taller narrower tires), but I needed clearance for snow chains. Happy to help!
LikeLike
amazing setup and I was glad so hear you will stop working on it and enjoy it! quick question: where did you get those plastic tab where you mounted the his & Hers UBS chargers?
Thanks again
Dimitri
LikeLike
Those came from the dealer. Pretty cheap for OEM parts. The dealer scrolled through the parts fiche for me and found them.
LikeLike
Great post ! A lot of doable ideas for our 170. Some post I follow are intimidating. Like you, we are using a mix of diy and outsourcing. Thank you for sharing
LikeLike
Thanks for the kind words! Working on more content. Easier in the winter when days are short.
LikeLike
Hey. Great info here. I am converting a 4×4 sprinter over here in sunny England.. haha. I am at the bed/sidewall stage and I’m going for the same set up as yourself. How do you find stacking the three panels with the bedding on top? and stowing away the bedding ? The idea of being able to switch into a cargo van is the best thing. Any info would be greatly appreciated.
All the best, Chris.
LikeLike
Hi Chris. Sorry for the late reply. I rarely take the bed platforms out except when I need it for moving stuff. Or working on the darn thing. We do stow away the bedding in a giant duffel bag. Taking out the platforms isn’t difficult, but finding space in my packed garage is an issue.
LikeLiked by 1 person