
Rainbows and VanLife
Our Introduction to DIY Campervan Conversion
Our VanLife journey started with a used 2007 Ford E-350 van (15-passenger).
Our Ford van (named “RadVan 1”) was our introduction to VanLife. It served us well, and I learned a ton about DIY van conversion. We’ve since moved on to a Sprinter 170 (RadVan 2), but I wanted to share some of my pics and details of the Ford conversion.
There are tons of used vanpool and government vehicles out there. Many of the vanpool and government vehicles have fleet maintenance and are well maintained. Our used van had complete dealership service records (down to oil changes and tire inflation), and left us confident in buying a used van with 100K miles. When searching for a van to convert, keep an eye out for government and fleet owned vehicles.
VanLife doesn’t have to be expensive. It’s easy to get sticker shock at the $50-100K+ campervans out there. Our total investment into the van was about $15K (including the van, cabinets, solar, fans, water system, electrical system, etc.). We used it for about a year and a half, spent 50+ days on awesome camping road trips, and dozens of day trips. We sold it for $15K (roughly what we put into it) to a great family who is enjoying it now.

Dogs love vans! Miss Daisy thought it was her big doghouse.
I built out the Ford with solar, fans, USB ports everywhere, a queen sized platform bed, cabinets, vent fans, and a 25 gallon water tank with outside sprayer. It was built to suit the needs of an active outdoor couple.
Wherever possible, I used recycled lumber leftover from other home improvement projects.
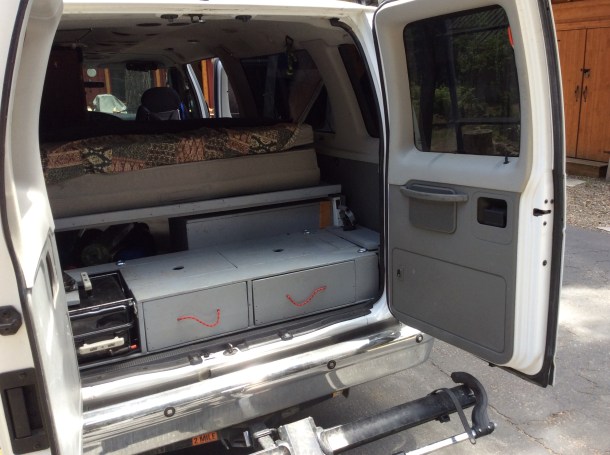
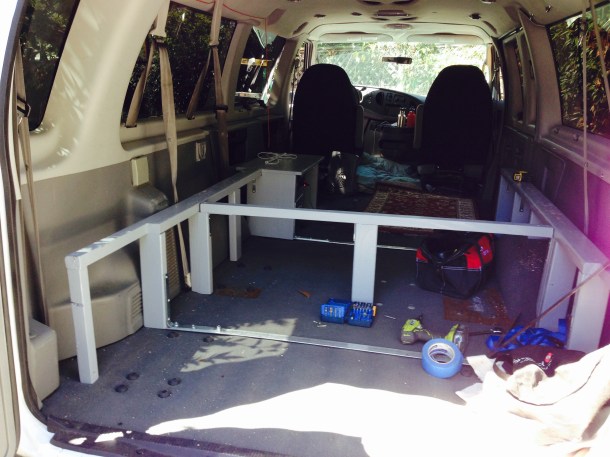
One of the things that was important to us was to have a modular layout in the van. We needed the van to be able to store bikes, surfboards, etc. The van was built to be able to accommodate whatever the adventure was (from day trip to two week road trip).
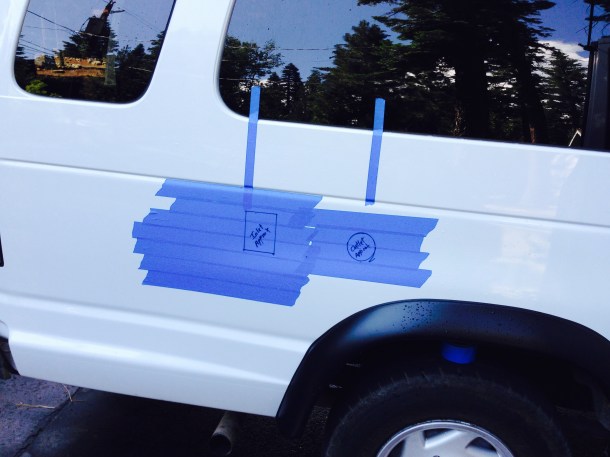
When we first got the Ford , I slammed a temporary bed platform into it and we went on a week long mountain bike road trip. It was crude and disorganized, but living in the van for a week really firmed up what we needed to meet our needs. On that first trip, we brought a bunch of blue tape, sharpies (to mark out ideas), and a notebook to sketch out a build. There are so many ways to build a great van. Everyone has different ideas and needs. Get creative!
Following are pics and some construction details of our first campervan. Hopefully it will be helpful for other DIY campervan folks.
Cabinetry
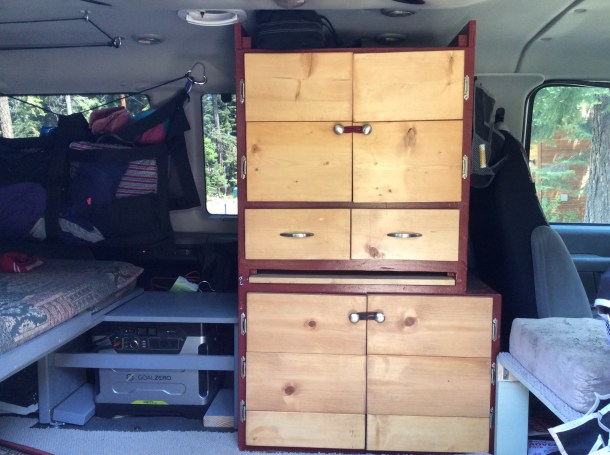
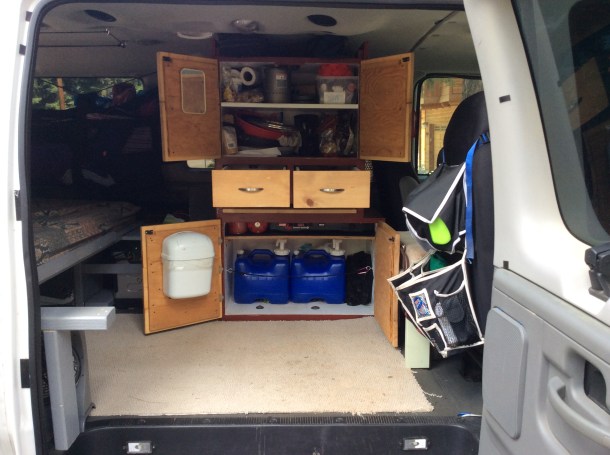
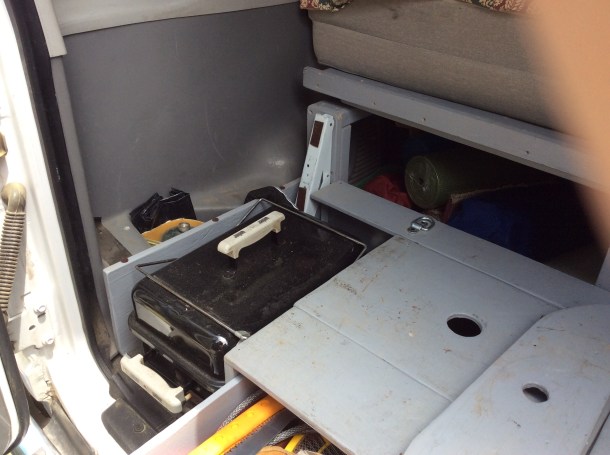
After I removed all the seats, I built a large cabinet from recycled wood behind the driver’s seat. It stored all of our cookware, 8 gallons of water, 2 burner stove, toiletries kits for both of us, and a bunch of food. It was the tallest cabinet I could squeeze into the van and maximized all available space.
-
- This cabinet maximized our storage behind the driver’s seat.
-
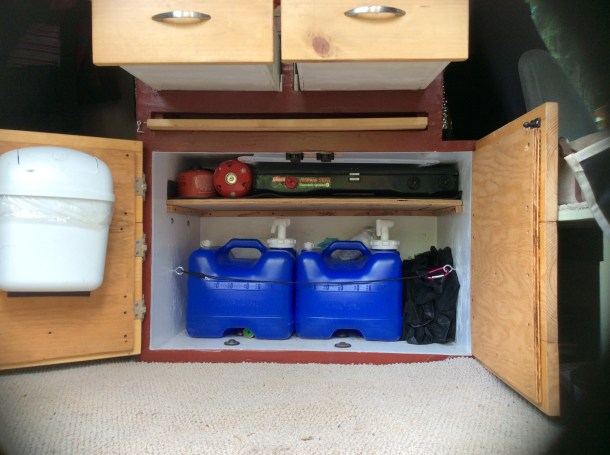
- 8 gallons of water, camp stove, fuel, etc.
-
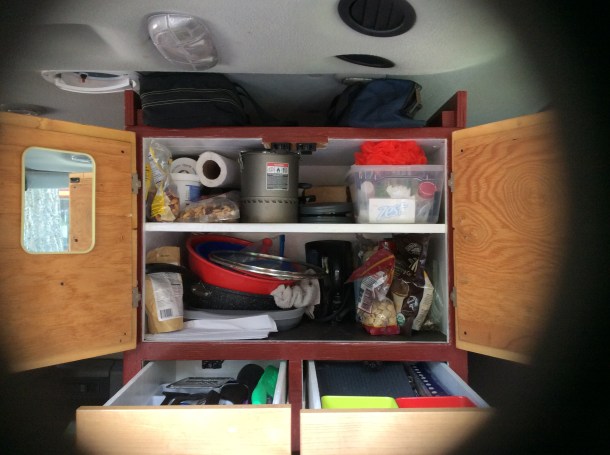
- Pantry, cookware and silverware
-
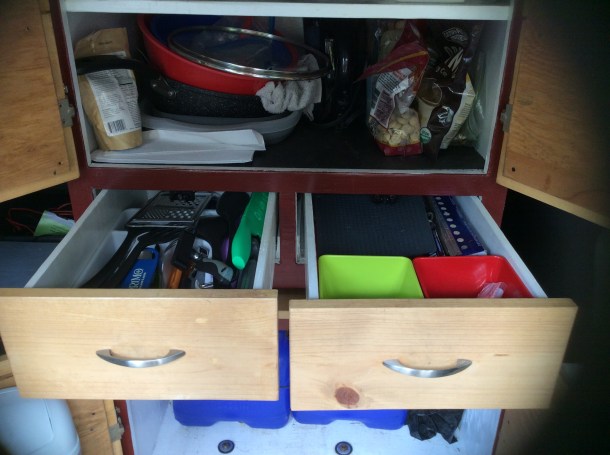
- The drawers were sized to fit our plates and bowls
-
- The pull out cutting board was the most expensive part of the cabinet
For all the built in cabinetry, I used the existing seat attachment points to secure all the cabinets to the floor. Everything was safely secured to the van, and could be unbolted and turned back into a passenger van if necessary.
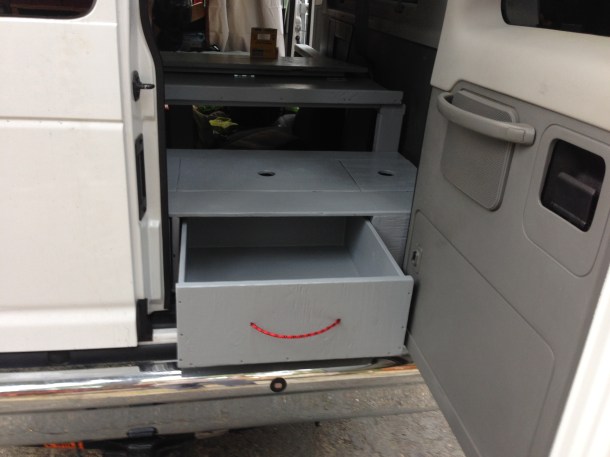
DIY VanLife is all about “borrowing” conversion ideas from others. I saw a cool Sprinter in Oregon with pull out drawers in the back, and applied that idea for rear door storage. I wanted to be able to store our expensive bikes inside when necessary, or to be able to travel in stealth mode (sleeping with bikes inside). I also added a compartment for our portable Weber propane barbeque. We could be barbecuing in five minutes and stow the grill as soon as it cooled down!
-
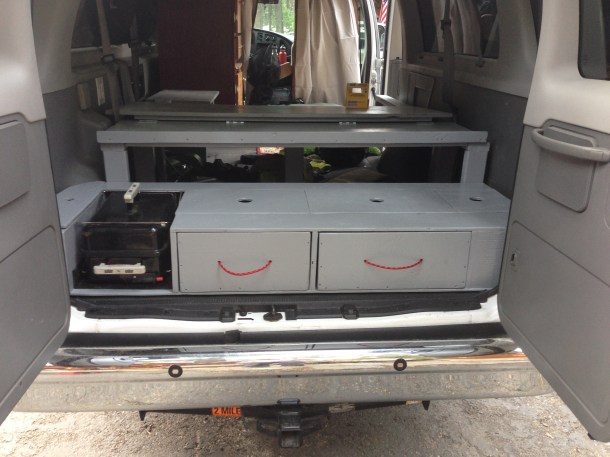
- Two large drawers, a built in BBQ compartment
-
- The drawer was sized to be the biggest I could fit with one door open
-
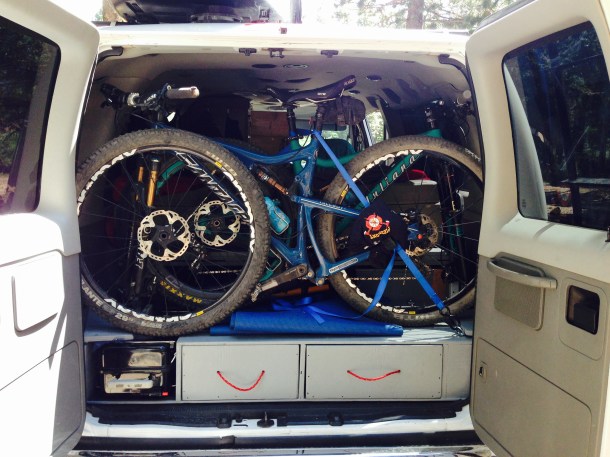
- Stores two 29er mountain bikes!
-
- You’d never know there are expensive bikes inside
-
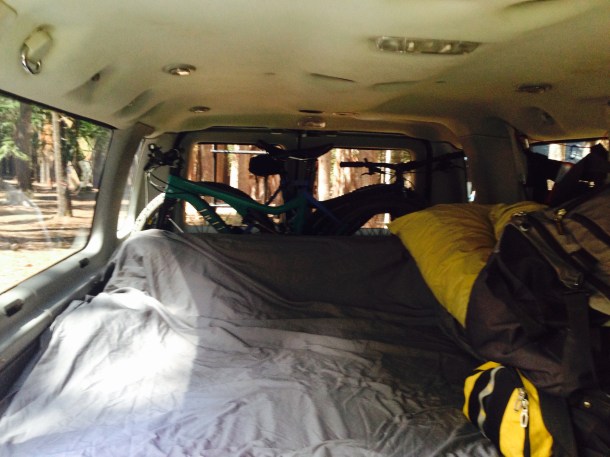
- We could sleep on a queen sized bed with the bikes inside
-
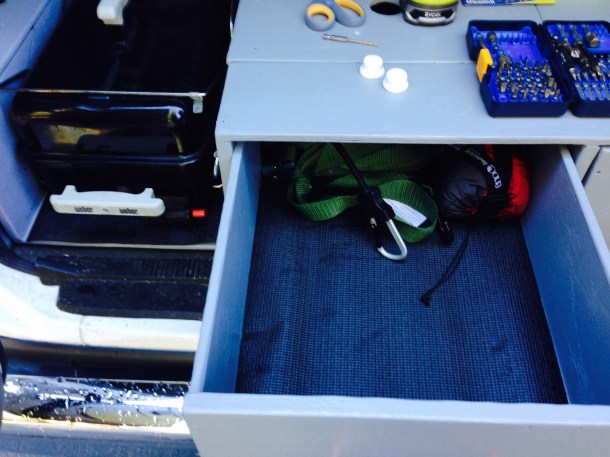
- I lined the drawers with cheap yoga mat. No rattling allowed.
-
- Fork mounts could be moved around to accomodate different sized bikes.
-
- Cooking with gas! I built a compartment for out small propane Weber BBQ
-
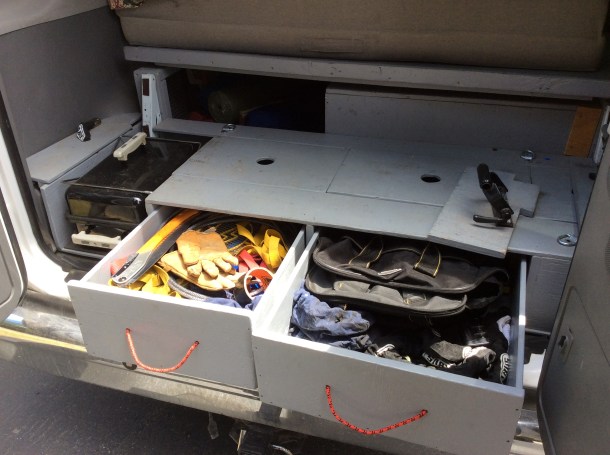
- Tons of storage!
-
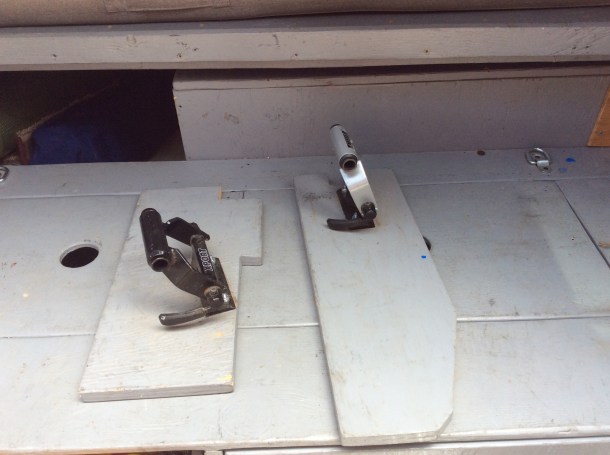
- The cabinets could be opened without opening the rear doors, those holes are finger holes to lift out the tops and access the drawer.
A “garage” for interior bike storage, wetsuit storage, or other “stuff” really improved the quality of life inside the van.
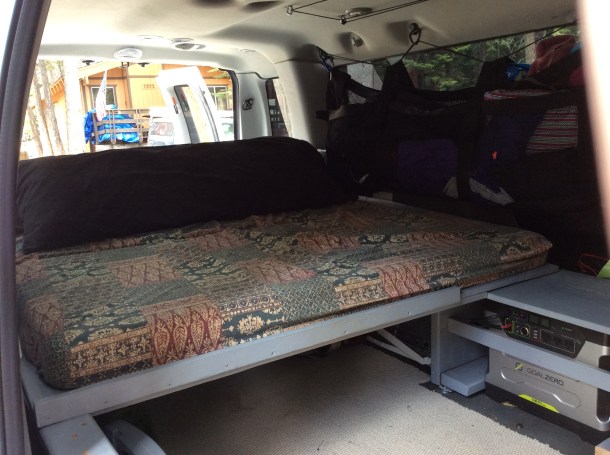
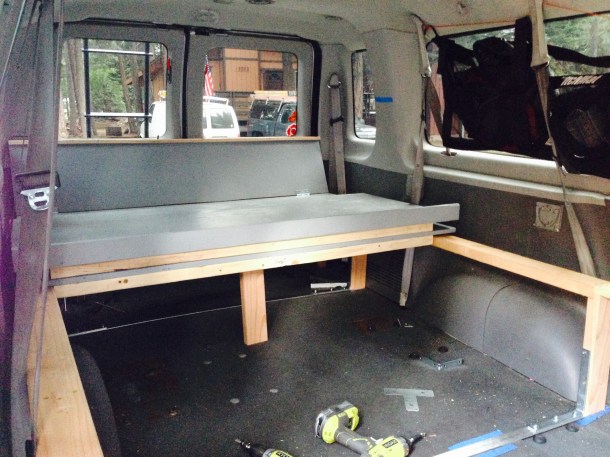
For the bed, I made a platform bed approximately 15.5″ off the van floor. It had three sections and could be folded up for more interior living space. It also could slide to the very back of the van if we weren’t carrying bikes (by using folding locking hinges).
-
- Platform bed.
-
- A lip on the front panel kept the queen sized mattress from sliding off.
-
- Simple and made with cheap 2x4s.
-
- Folded into a couch.
-
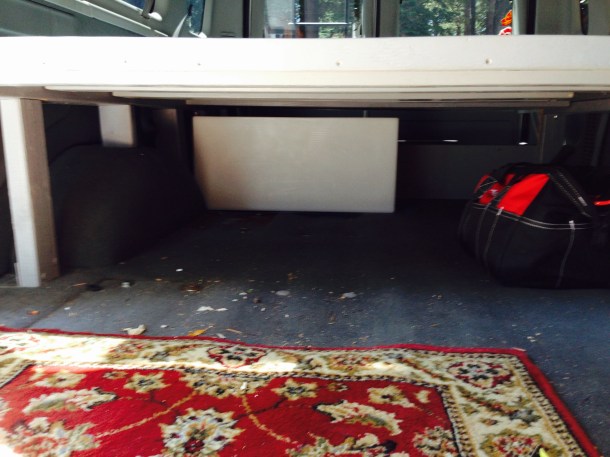
- The water tank stowed way back underneath the bed.
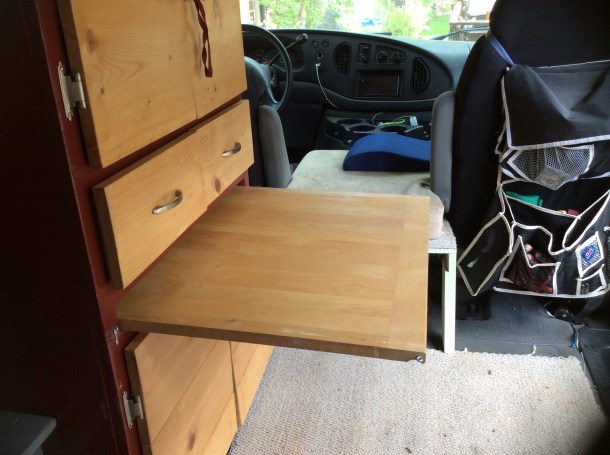
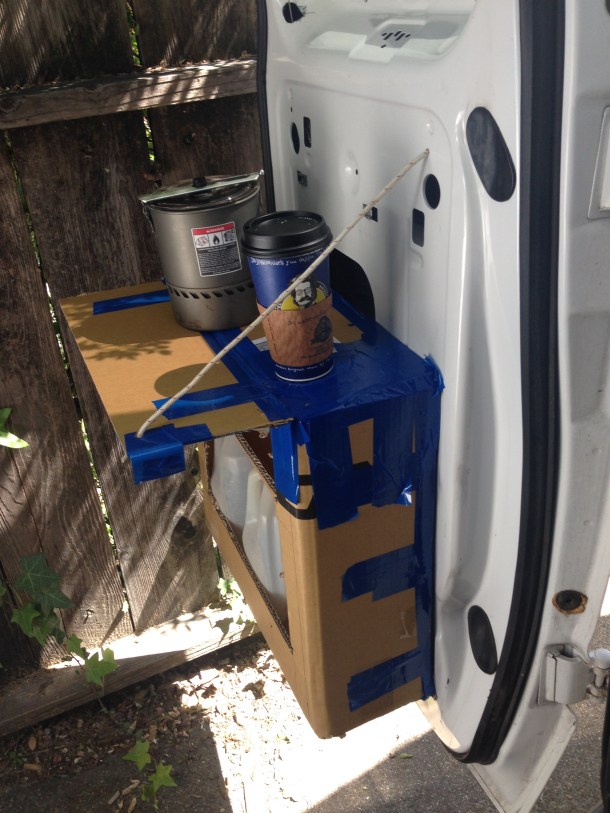
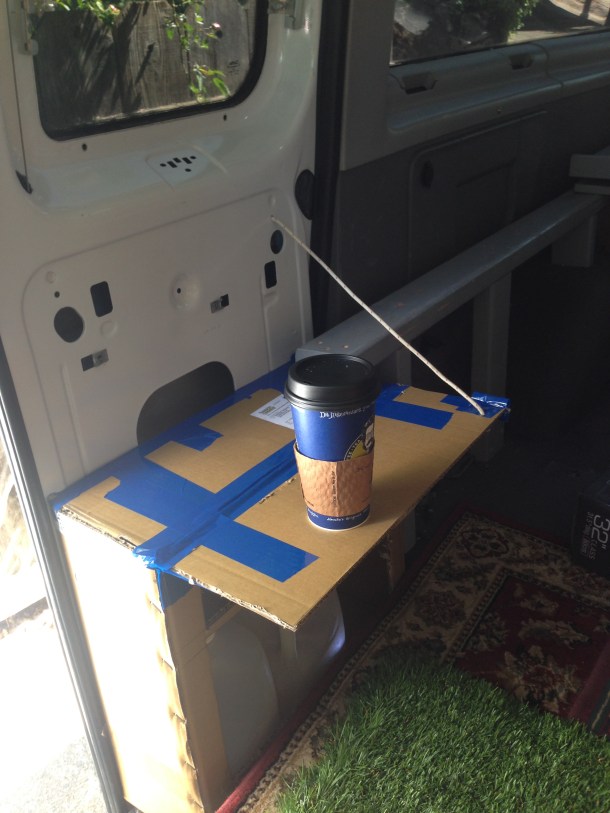
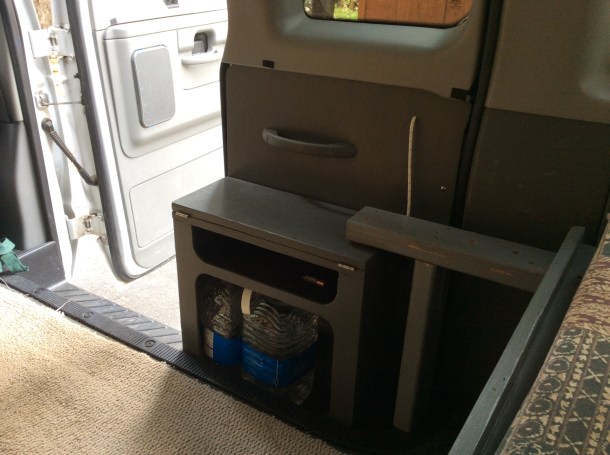
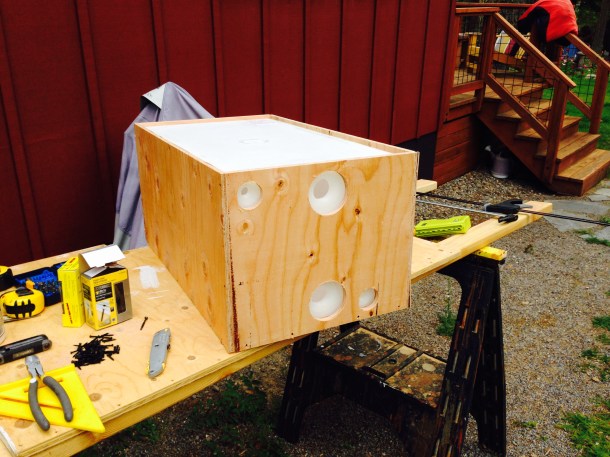
So much of VanLife is about making efficient use of all available space. After looking at the side door for a year, I built a custom cabinet that attached to the door. The door cabinet was sized to be able to fit three gallons of water and had a fold out table.
-
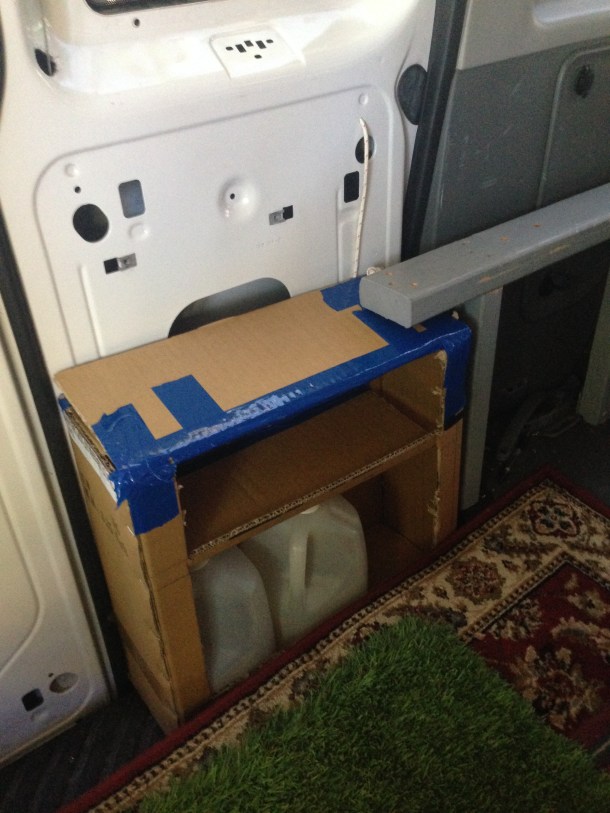
- I started with cardboard mock ups
-
- Cardboard and tape!
-
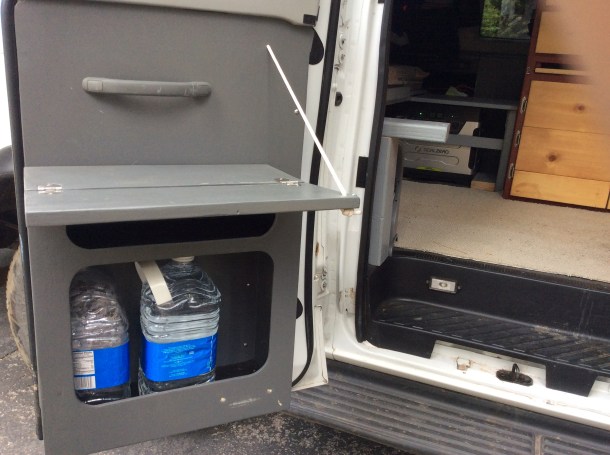
- The finished product
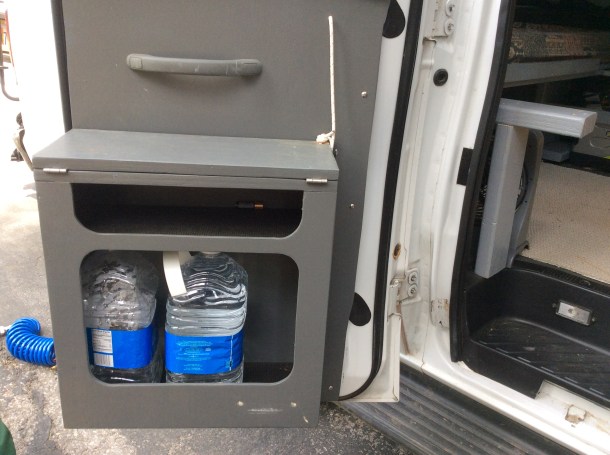
-
- Tucked into the foot well.
-
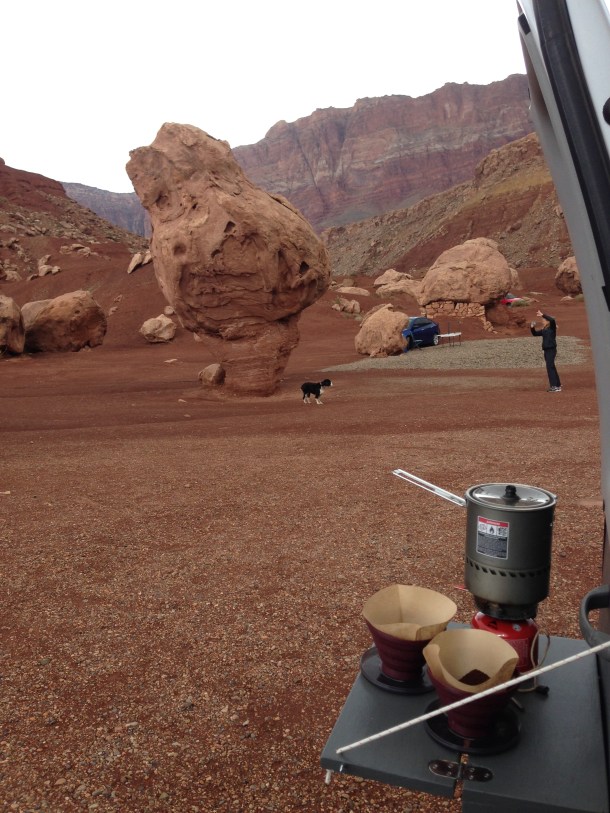
- Coffee stop on Mars with the fold out table.
-
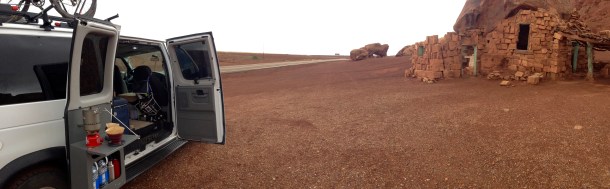
- VanLife! Road trips are the best.
Solar, Water, Ventilation and Electrical
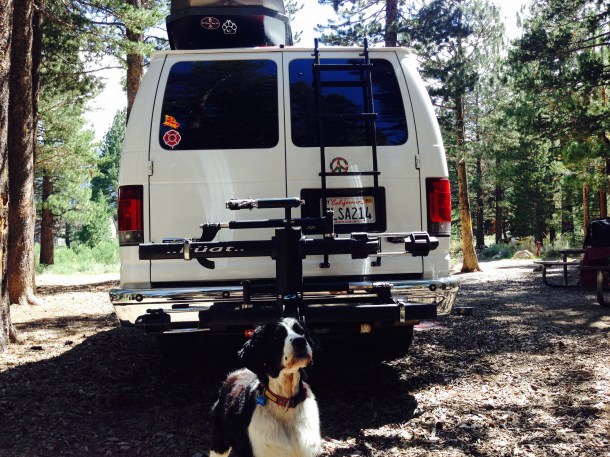
We quickly discovered that roof ventilation was key to sleeping in a van. Condensation and humidity inside a van is a big issue, as we found out on our first road trip (with dripping windows and a muggy humid interior). We also travel everywhere with our dog, Daisy. Keeping her cool comfortable and safe critical when we are out riding or surfing. Because our van started as a passenger van, we had the AC ducting running down the center of the ceiling. I installed two Ventline Vanair vent fans (front and back). Why two fans? Simple, I wanted to be able to move air from the front to the back of the van, and also to be able to stealth camp with all the windows up. I also wanted to be able to blast fresh air through the van when Daisy was sleeping in it while we were out on our bikes.
Off grid travel is important to us (our best camping has never been in a campground). I installed a Renogy 150 Watt solar panel on the roof, and powered all of our electrical needs with a Goal Zero Yeti 1250. I initially struggled with the cost of the Goal Zero Yeti 1250. I can say that it was totally worthwhile for someone wanting a easy plug and play solution for their campervan. The Goal Zero powered our lights, fans, USB ports, 12V ports, and an ARB fridge/freezer. We ran almost entirely on solar power, (and it also charged while driving with a small inverter hooked to our van battery).
The Goal Zero Yeti 1250 is great for someone wanting a simple solution to DIY camper electrical. It combines the battery, solar charge controller, inverter, USB outlets, and 12 volt outlets in one simple, easy to use package.
-
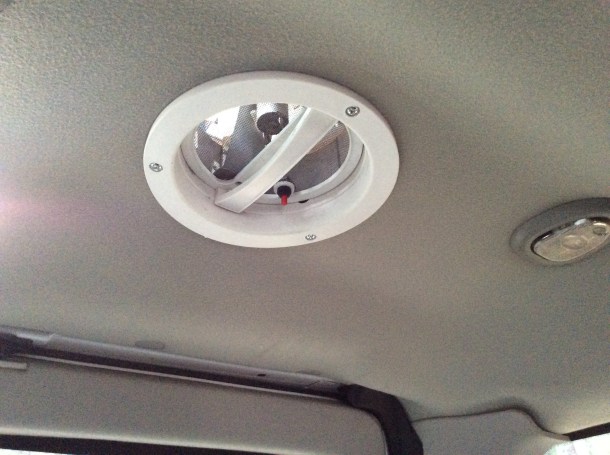
- Ventline Vanair ventilation fans worked great
-
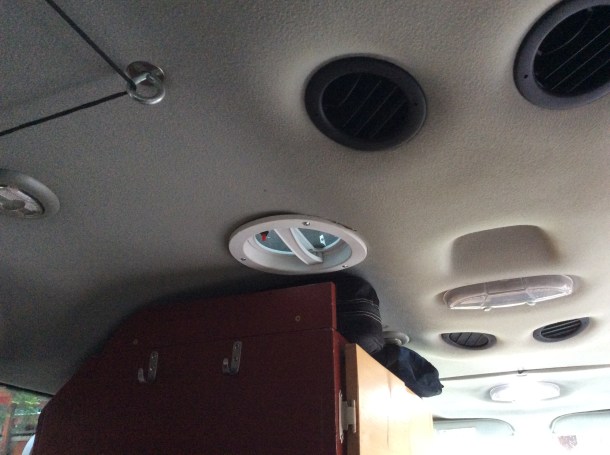
- The fans were installed front and rear, offset because of the AC ducting
-
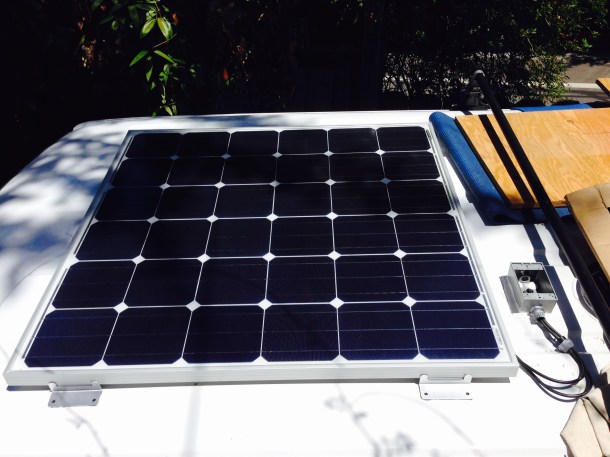
- A Renogy 150 watt solar panel fit perfectly into the roof channels
-
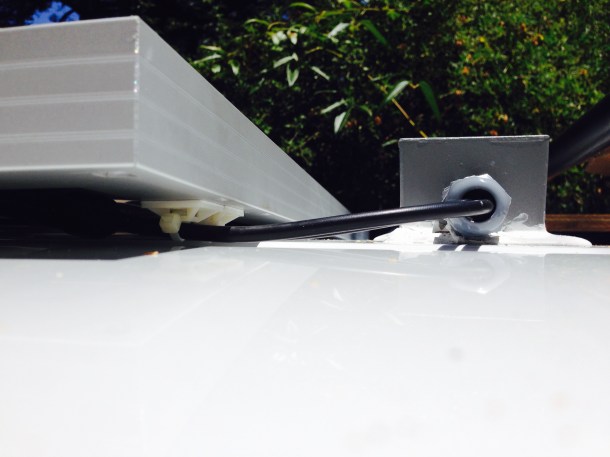
- Solar power inlet using a waterproof box.
-
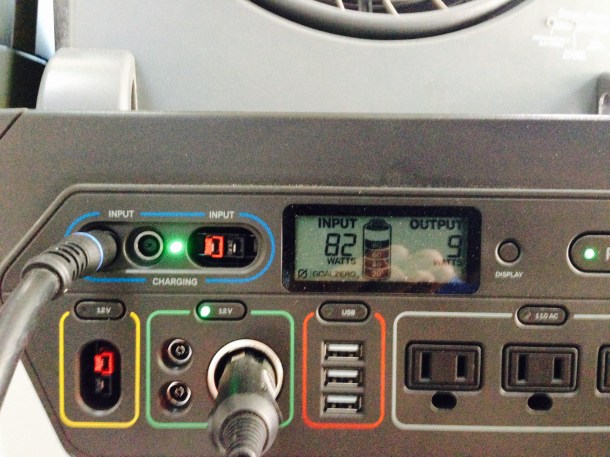
- Goal Zero Yeti 1250 provided power for fans, lighting, USB ports and the fridge
-
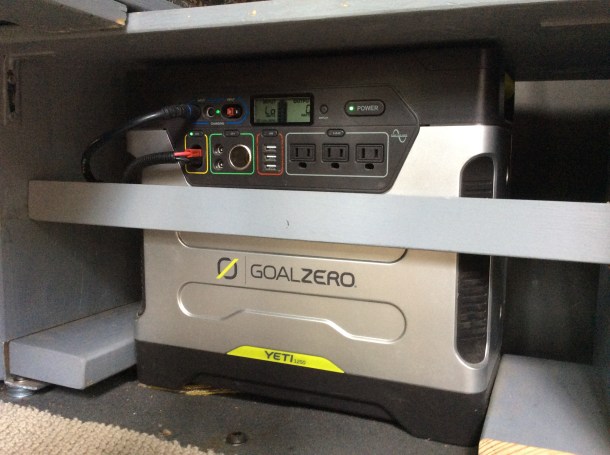
- Goal Zero Yeti 1250- a plug and play solution to van electrical! The most expensive thing we bought. Worth it!
-
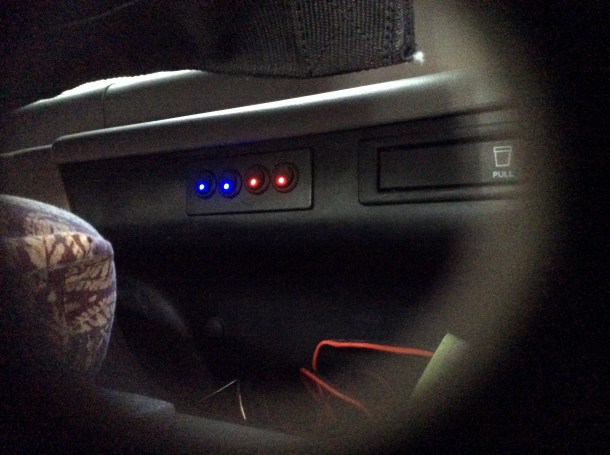
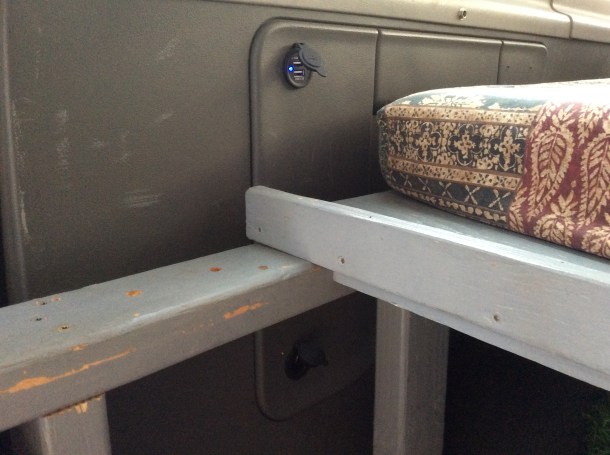
- Switches using a small factory panel controlled fans, USB ports, and H20 pump
-
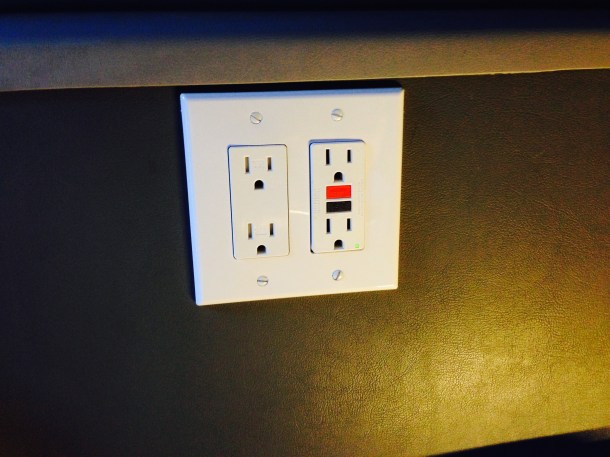
- GFI protected shore power.
-
- Getting ready to cut the water inlet and outlet.
-
- Building an enclosure for the water tank
-
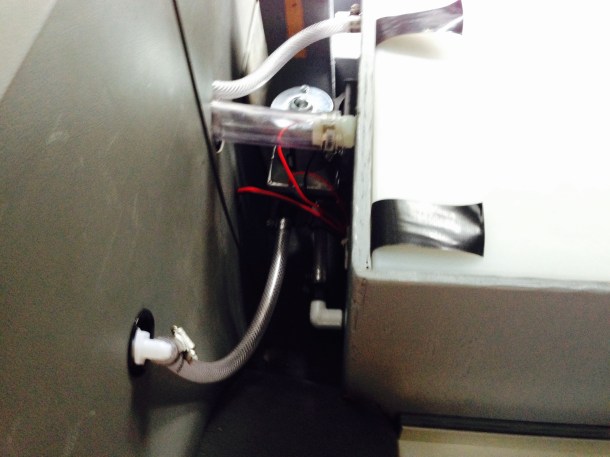
- Filler, vent, pump, and exterior shower connections

High Five if you love VanLife!


Share this:


Leave a comment