A caution to DIY Sprinter campervan owners (and anyone with covered lower walls). Check for leaks!
While running some wiring I removed a wall panel and discovered that the area inside my rocker panel was damp and mildewy. On further investigation, I discovered that all the lower wall panels had moisture settling inside. Even though the walls had only been covered for three months, I was starting to get mildew inside my walls!
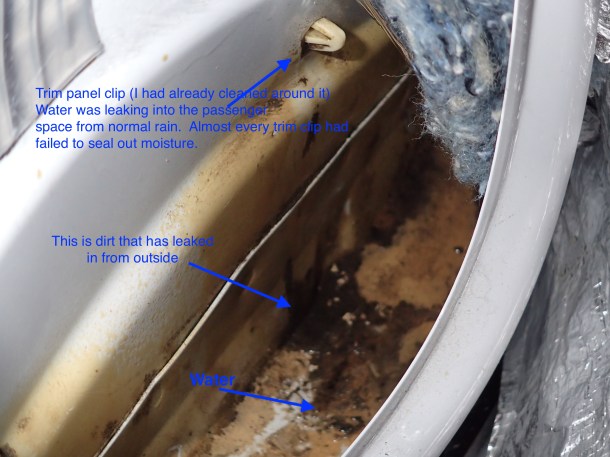
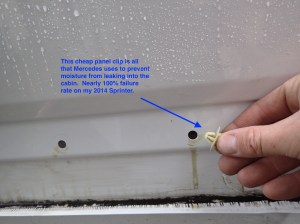
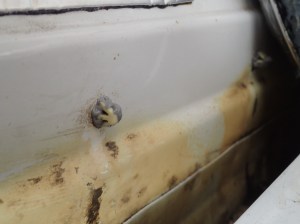
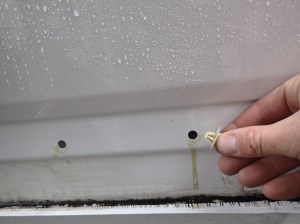
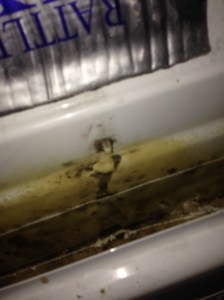
Water and dirt leaking through the panel clips into the passenger cabin.
Some quick internet research (thank you Sprinter Forum!), and a garden hose test I found that the water was leaking in from the plastic trim clips. According to the Sprinter Forum, this is a common issue dating back to the 2006 and earlier Sprinter vans. This ridiculous (and unresolved) quality control problem is undoubtedly contributing to premature rust in tons of Sprinters, as well as mildew and mold inside covered walls.
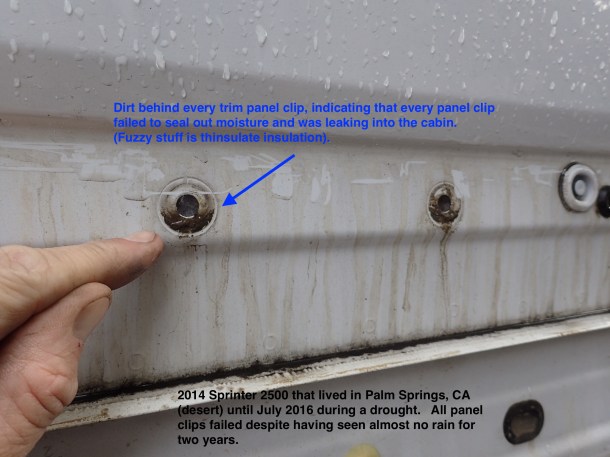
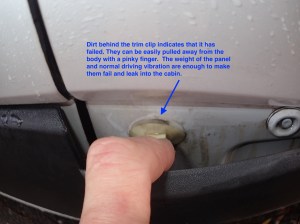
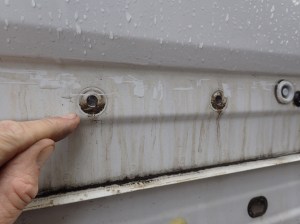
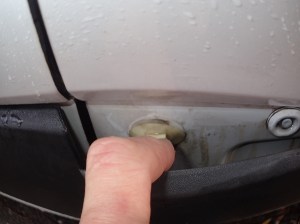
Almost 100% failure rate on the panel clips. Dirt behind the panel clip flange indicates that they have failed.
My original idea was to apply caulk from the inside, around the trim clips. Sealing leaks from the inside is not the ideal solution. In general, it’s better to keep water coming in from outside. Like many good DIY projects, this one quickly escalated out of control. I started pulling the plastic wall panels using my cheapo set of Harbor Freight trim panel removers. I quickly realized that I had a nearly 100% failure rate on all the panel clips. They all had dirt built up under the exterior flange, indicating that water and dirt readily flowed behind them (resulting in leaks into the cabin space).
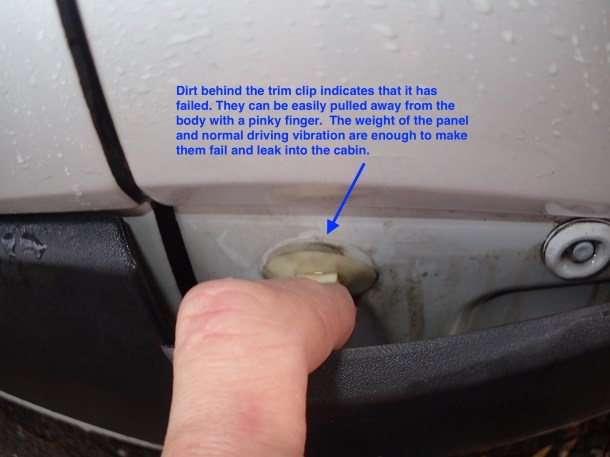
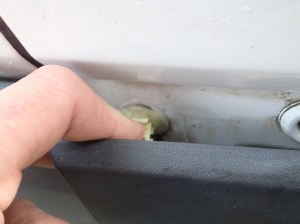
Dirt behind the panel clip indicates failure to seal.
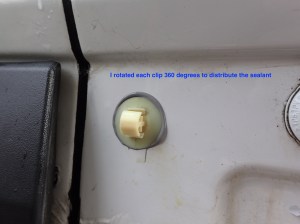
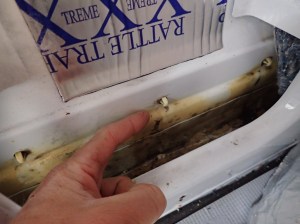
After removing all the panel clips (with needle nose pliers and a screwdriver), I used a gutter and flashing caulk I had leftover from a home project. There are a lot of great caulking products. I used one that is not latex (water soluble) and could be applied on wet surfaces. I applied a daub of it around the hole, reinstalled the clip, and rotated 360 degrees to get even distribution of the caulk.
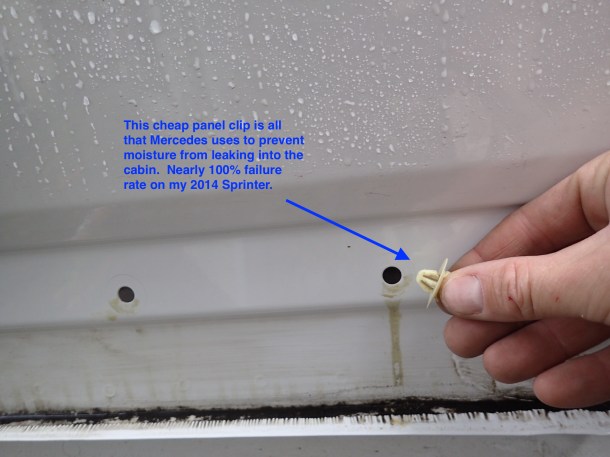
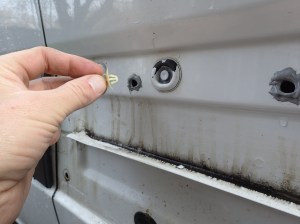
Trim Panel Clip

Finished panel clip

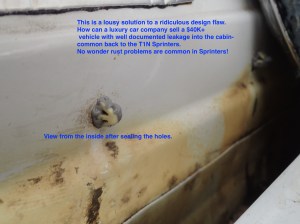
Finished panel clip from the inside.
I finished one side of the van in about an hour.
Caulking around the holes is not an ideal solution to a ridiculous problem. To say that I am frustrated that Mercedes would sell a $40K+ vehicle with a known leakage issue into the passenger cabin because of $0.02 panel clips doesn’t really seem to express my feelings. This is shameful. I am guessing that there are tons of Sprinters with premature rust problems because of this. Any leakage into a covered space (any sprinter with covered lower walls) has no way to evaporate. Moisture inside covered walls leads to rust from the inside out! In addition to rust, mold and mildew in the cabin space is also a concern, particularly for anyone with insulated walls.
My solution to the leak problem may create other problems if I need to replace a trim panel, but at least it should keep water out of my walls.
A panel clip with a rubber gasket and more secure mounting would fix this issue permanently. A permanent fix for this issue would cost Mercedes a few more cents per fastener and a few extra minutes of assembly time. Enormously frustrating.
Note that I am in Northern California (not a rainy or wet climate). I bought my used Sprinter in Palm Springs, CA (think desert, 100F+ days, and cactus) in July 2016 (in a drought). My Sprinter had likely only seen rain a couple of times in its first two years. I can’t imagine what Sprinters in rainy areas look like.
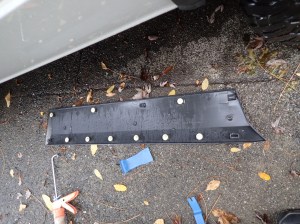
Tools I used
- Trim pullers ( from Harbor Freight)
- Needle nose pliers
- Flat head screwdriver
- Rags to clean up the hole and excess caulk
- Caulking gun
- Caulk (I used a flashing and gutter caulk that could be applied wet)
Links and other information
I found the Sprinter Forum invaluable in a quick resolution to this issue. I was able to confirm the issue, and confirm the leak source (by spraying side of the van with a garden hose) in a few minutes. Here is the main thread I found on leaking trim panels. A huge thank you to those on the forum who documented this issue as well!
Please leave any comments below on the blog. Others can benefit from your experience and solutions! Thanks!
-
- Dirt behind the panel clip indicates failure to seal.
-

- Water and dirt leaking through the panel clips into the passenger cabin.
-
- Finished panel clip from the inside.
-

- Almost 100% failure rate on the panel clips. Dirt behind the panel clip flange indicates that they have failed.
-
- Finished panel clip
-
- Trim Panel Clip
-
- Caulking around the holes
Share this:


You could consider double sided tape along the top edge and both vertical ends. I have used this (3M tape) on the fender flares of one of our vehicles, holds up very well and prevents moisture from creating past the trim. I like the gutter seal you described, holds up very well and could be applied in the same manner as the tape, for parts that don’t need to be removed like trim.
Good luck,
Emile.
LikeLike
A buddy of mine purchased a 2016 4×4 last October, and his has the same exact leak.
I purchased a 2017 4×4 170wb last month (July 2017) and tested this immediately per my buddies instruction, mine leaks too. Took it back to MB and they fixed the rear panels, but neglected the front panels so it will have to go back in later this week. My buddy also had to take his in twice as they only fixed the left sides and not the right.
Not sure how or why this is still a thing from 2008 all the way to 2017, and why they would fix only half of it when one is brought in.
I feel your frustration, these things are too expensive to have such a cheap oversight with no actual fix in 10 years!
LikeLike
I have a 2008 and the rust is really bad on the left side behind the wheel.. There is a huge hole formed by the rust . The rest of the left side is “ok” The right side is pretty good. They only fix the left rear panel because the problem is there.
LikeLike
Hi Vincent- sorry for the late reply. Since I wrote that blog post I’ve seen so many stories and photos of rust inside that panel. So frustrating that it’s a known issue dating back over ten years…
LikeLike
Hi Vincent- It’s been so long that I can’t remember exactly the Sikaflex number I used. I believe it was a gutter sealant. Strong stuff.
LikeLike
Thank you for this post. Glad I came across this before insulating and applying walls!
LikeLike
Thank you for posting this. I’m glad I came across this before doing insulation and wall paneling!
LikeLike