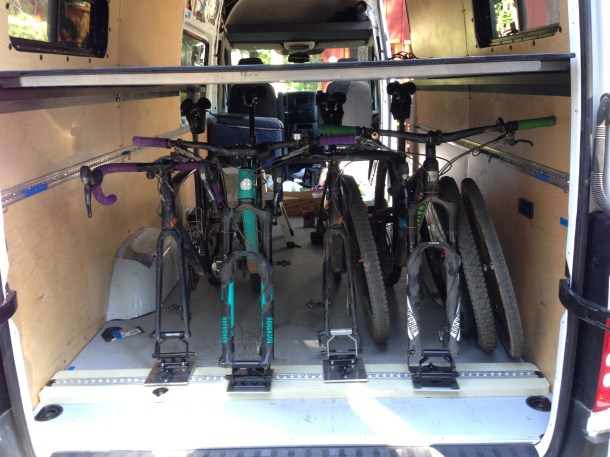
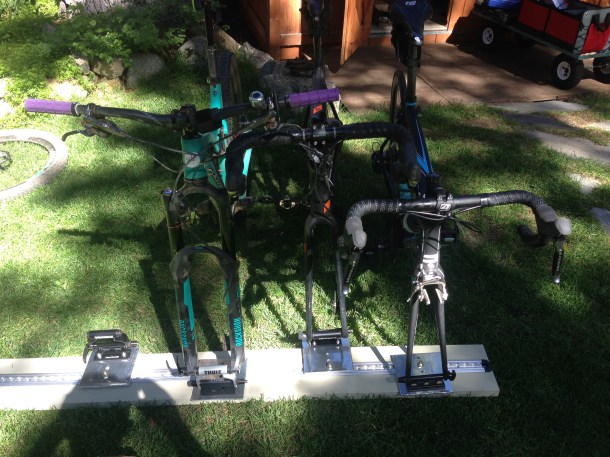
Four bikes under the platform bed
This is our way of storing bikes in our Sprinter Campervan. We wanted to be able to securely store four bikes in our van with easy loading and unloading.
The design of our Sprinter has a platform bed and large garage for storage of bikes, surfboards, camp gear, and “stuff.”

Our first road trip! Steamboat Springs, CO.
I’ve seen many cool ways of storing bikes in vans: slide out trays, roll-in storage, and bikes packed into tiny spaces.
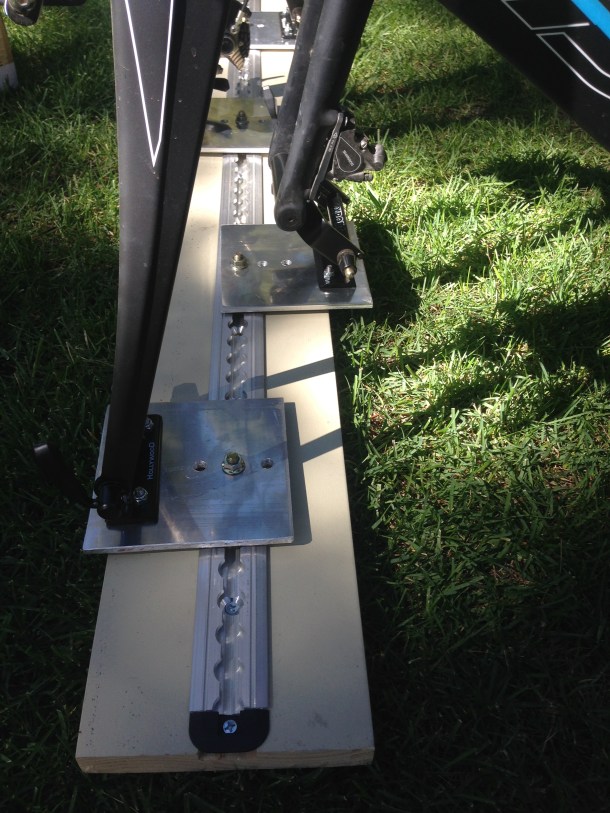
I used L-Track as a mounting platform to make a safe, secure interior bike storage system. Total cost of building a custom four bike storage system was under $200. Scale down if you don’t need to carry four bikes. The L-track can also be used to secure cargo.
L-Track (short for Logistics Track) is a modular attachment system for hauling cargo. It is used extensively in trucks, vans, and increasingly in the DIY camper niche.
I wrote an extensive article about using L-Track for storage.
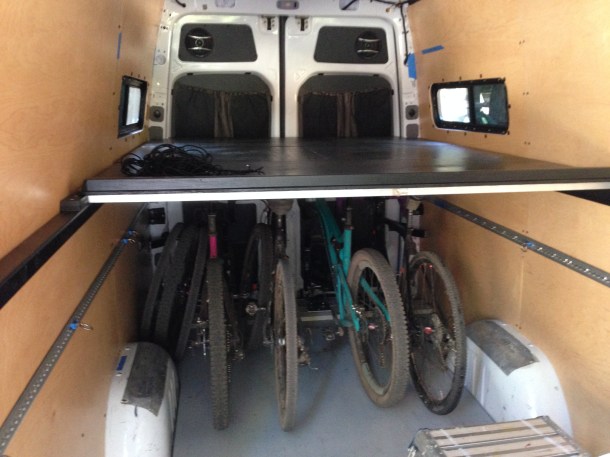
Four bikes mount securely under the bed with room to spare
Making the bike mounts
Basic Parts needed for 4 bike mounts-
(Click links below for Amazon products).
- 1/4″ aluminum plate
- Plow Bolts
- Four arm knobs
- Bike mounts (lots of options from cheap to $$$, these were $12)
- Surface or recessed L-Track
- L-Track threaded stud fitting
- 65mm bolts for securing to the van floor
- 1/4-20 bolts and nuts for mounting bike mounts to mounting plate (or whatever works for your mount).
First I cut the aluminum plate into 6″ squares. It was fairly easy with a reciprocating saw and a new metal cutting blade. It is possible to cut the mounting plates smaller to fit your bike mount. I cut them into 6″ squares for convenience from my 12×12 plate. My inexpensive bike mounts were about 5″ across with mounting holes in the 4″ range. It would certainly be possible to make the base plates 5×5 or smaller.
-
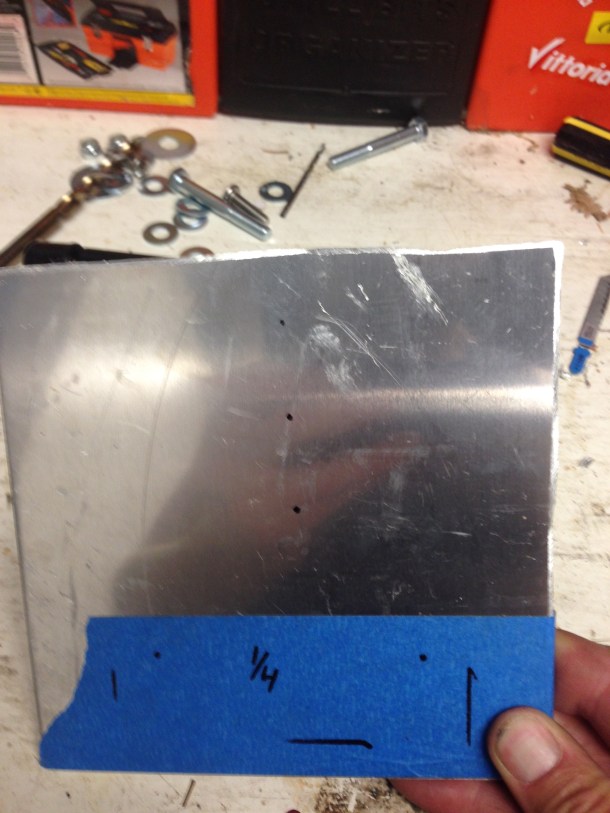
- Square plates with drilling marks
-

- Laying out the fork mount
-
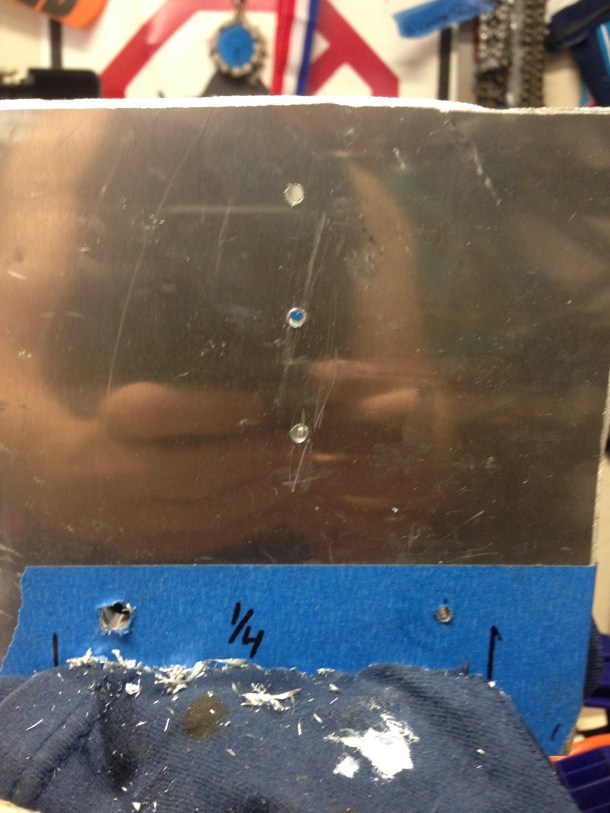
- Drilling small pilot holes
-

- Multiple holes for offsetting handlebars
-

- The finished mount and threaded stud.
-
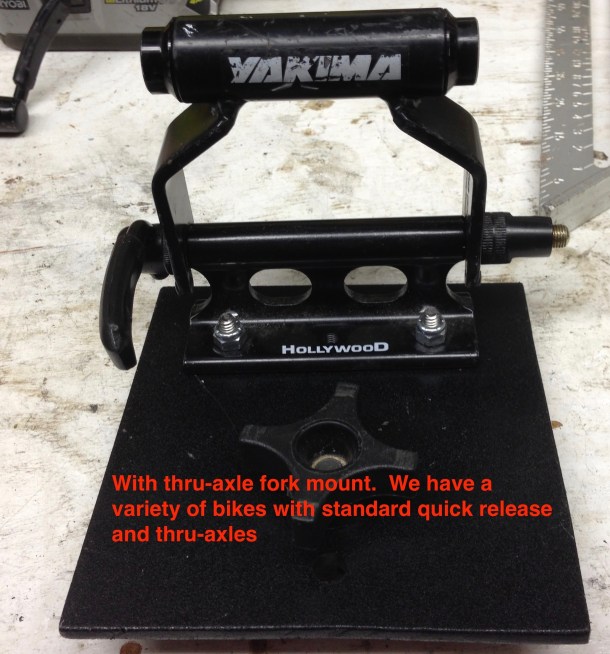
- Finished project! Add a thru-axle adapter if you need it.
Then I laid out and drilled holes for the bike mount, and a few holes to be able to stagger the mounts to offset the handlebars for different bikes. I drilled three holes, but in the future I would have only drilled two holes. Most of the handlebar offset comes from swiveling the plates around.
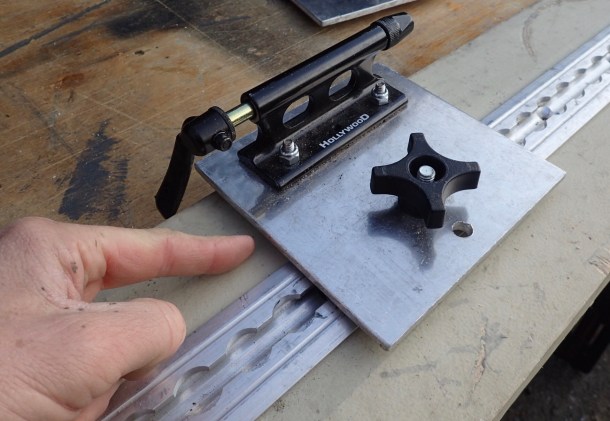
I changed the bolt that comes with the L-Track threaded stud to a 5/16-18 plow bolt with a four arm knob. I wanted my bike mounts to be easily adjustable and removable without tools. Speed and ease of use is important. You could also just use the nut that comes with the threaded stud.
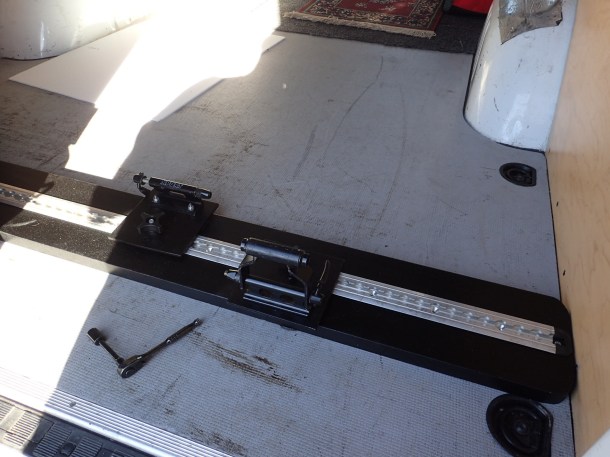
I used recessed L-Track for my bike mounts. RadVan is a work in progress and I’m slowly working through the build. My plan is to permanently mount recessed L-Track in the floor. The bike mount you see here is my temporary solution until I pull the floor (and install water system, etc.)
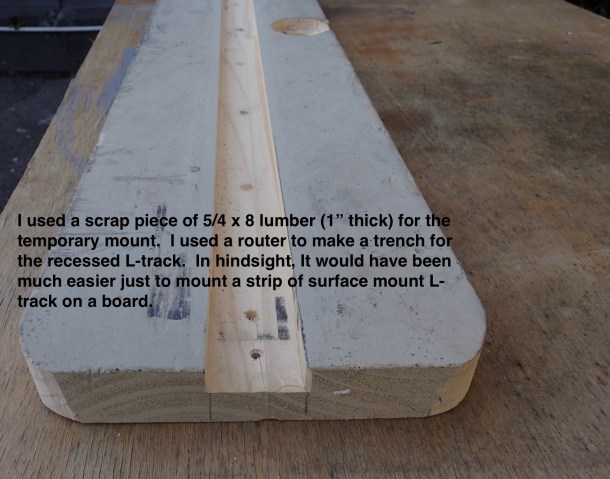
Surface mount L-track will work just as well as recessed L-track with less work. I used a router to cut a track into some scrap lumber. I used a piece of 5/4 x 8 trim- (1 inch thick lumber). If you aren’t a tool geek, any 1×6 or 1×8 board will work if you are using surface mount L-track.
-
- Channel cut into 5/4 scrap board
-
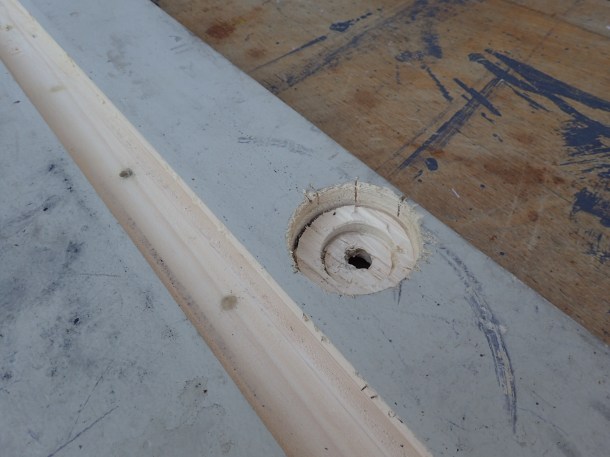
- I recessed holes for the factory floor mounts with a hole saw and chisel
-
- Furring strip to reduce wobble
-
- Test fitting the system in the back yard
-
- Prototype before I added the 4 arm knobs for tool-free removal and adjustment
-

- The finished product with a rattlecan paint job.
Finishing up your mount
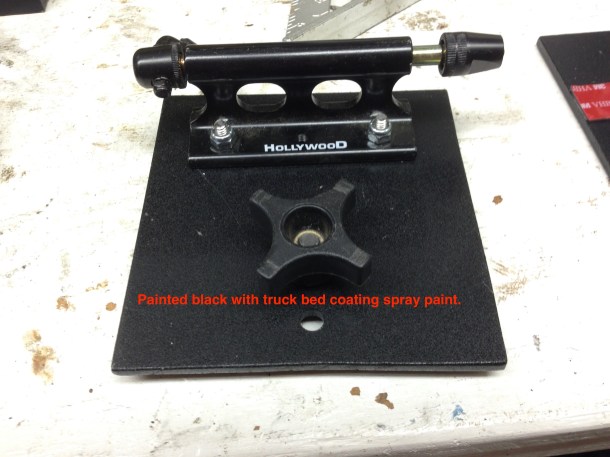
After six months of using the bike mounts I finally got around to painting them with Rust–Oleum truck bed coating. Not necessary but looks better.
-
- With thru-axle adapter and paint.
-
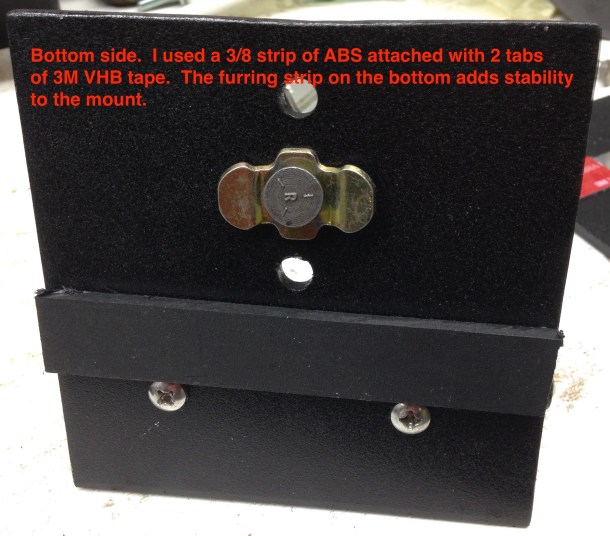
- Furring strip on the underside
-
- The finished product with a rattlecan paint job.
-

- Notice the mounts are offset. This is the way to mount bikes tightly and clear handlebars
-
- Furring strip to reduce wobble
-
- Finished project! Add a thru-axle adapter if you need it.
-
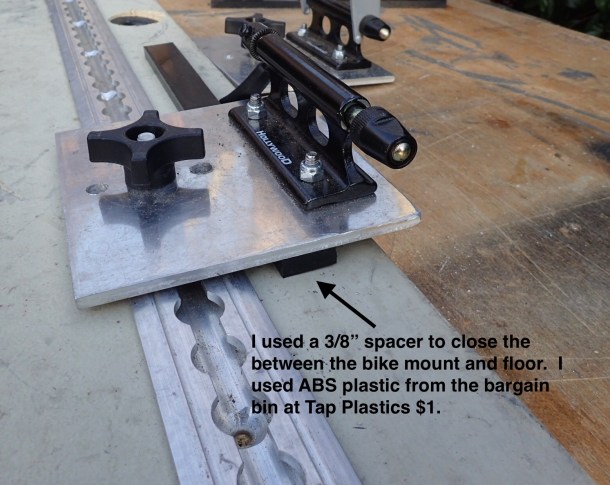
- ABS plastic from Tap Plastics- any scrap board would work just as well.
-

- Project Supervisor
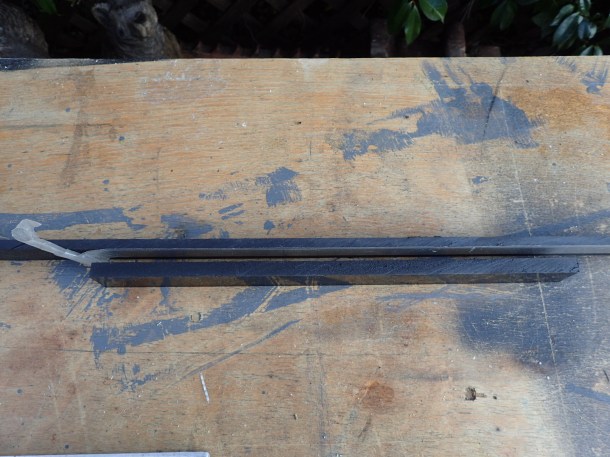
I also ran a 3/8″ furring strip across the underside of the mount to reduce wobble and give a more secure connection to the floor. I used 3/8″ ABS plastic I got from the $1 bargain bin at Tap Plastics (the bargain bin is a great source for van projects!). I just used a couple tabs of 3M VHB tape to secure it (also leftover), but any quality double sided sticky tape should work since it’s not under tension. You’ll have to measure your own L-track height for proper sized furring strip.
Securely mounting the bikes in your van
Securing cargo loads is important, and you don’t want to have your bikes flying (and potentially injuring you) in the event of a collision or emergency stop. I used the factory floor mounts as a way of securing the bikes to the floor. This is a temporary system and I will eventually be permanently mounting L-track into the floor of the van.
-
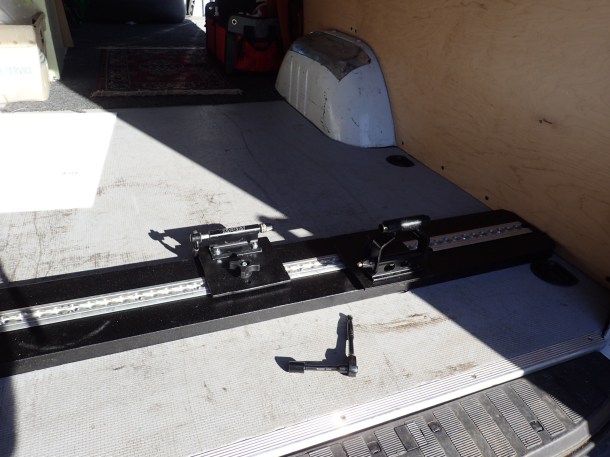
- Mounted in the van
-
- I replaced the factory floor bolt with a longer one
-

- I used the factory floor plates.
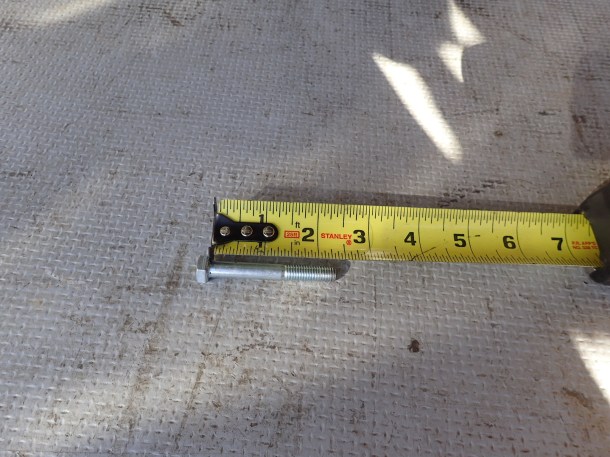
I replaced the factory bolt with a longer M8 x65mm bolt (please check the bolt size and pitch on your own- I can’t remember exactly what size it is).
I also used a hole saw and chisel to use the factory round hole covers. A fender washer would work just fine as well with much less effort.
Other notes and Tips
Mountain bike disc brake rotors are sharp! They can gouge carbon fiber frames, chip paint, and leave nicks in spokes if rubbing on your bike. We quickly realized that Wheel bags were a good investment to protect bikes and wheels. We purchased these Mavic 29er mountain bike wheel bags to hold our front wheels. They fit road and mountain bike wheels easily. Their handles make it easy to secure the wheel bags in the van.
-

- 29er Wheel bag
-

- Hangs from L-Track
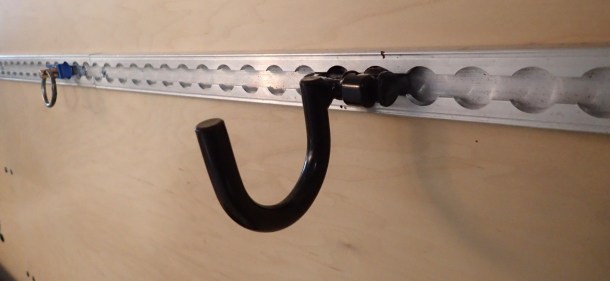
L-track storage hooks are also a great way to hold a front wheel for quick trips. If I’m quickly loading a bike for a short trip, I just hang the wheel on the hook.
There are many great ways to haul bikes in a van. This method works well for us in its flexibility and ability to carry up to 5 bikes of different types.
DIY vans are a great platform for your specific needs. I’m a huge fan of L-track for it’s function. This system could easily be modified for use in slide out bike trays, sideways bike storage, or short sections for those that don’t need to carry 4 bikes.
Picture Gallery
Click for full sized pics


Questions or comments? Reply in comments below. Would love to hear if this was helpful for you! The DIY van community is great for sharing their knowledge and inspiration. We all learn from each other. We also copy, modify, and improve on each other’s ideas.
See you on the trail!
Share this:


Nice job. I think I’m going to take a similar approach with mine.
LikeLike
We have similar bike Van interests . I used DE Sta Co hold down toggle clamps to make my bike mounts adjustable / removeable by lifting up on clamp levers . Quick and easy – and more adjustable. Let me know if you are interested on more info.
LikeLike
Thanks for the tip! Checking them out now. It’s a cool idea. I was thinking of trying to use those to hold down the platform bed. Haven’t figure out a clean approach yet though!
LikeLike
Hi Skip, wondering where I could buy the quick releases that you mentioned. The company that you said does not exist. Was this a mis type?
Thanks for your help
LikeLike
There are a bunch of quick releases available from different vendors. Any will work. I think we have a mix of XPort, and Hollywood. Plus Thule and Yakima QR15 adapters
LikeLike
Fantastic Write-up! I ordered the parts and they arrive today. Can’t wait to assemble and get travelin to distant places to ride! Thanks for your help!
LikeLiked by 1 person
Woohoo! Glad to help!
LikeLike