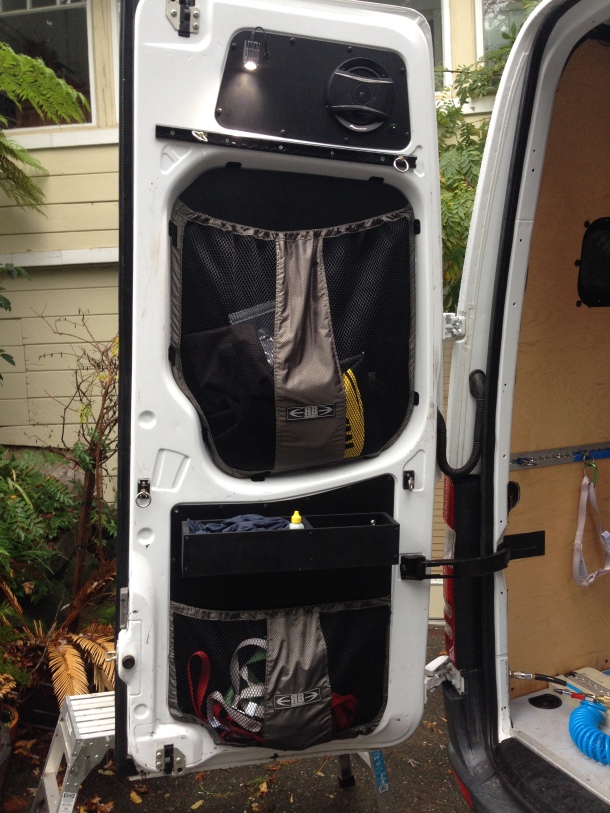
One of the things we quickly learned from VanLife road trips was the importance of making every available space functional. Here are a few pics of how I maximized storage and function for the back doors.
The rear doors are well suited for storing lightweight items (soft storage). They are also wide and tall. No point in letting all that space do to waste.
I purchased the RB components powder coated aluminum rear door panels and their mesh storage nets. They are expensive, but nicely made and should last for the life of the van. Having 4 large storage pockets in the rear doors is fantastic. We use them for bike helmets, cinch straps, bike shoes, air hose, etc.
Rear Door Storage box


I also built a small rear storage box out of scrap plywood. 21.5″ x 4″ x 4″. Fits everything I need for most pre-ride bike maintenance and tuning. No more digging through my bike repair case. Metric hex wrenches, chain lube, rag, T25 wrench, shock pump, digital tire gauge, gear brush- covers more than 90% of routine bike maintenance. For more involved repairs, I have a fairly complete kit. The bottom of the box is lined with cheap yoga mat to prevent rattles while driving.
As mentioned I built the box with a few scraps of plywood lying in my garage from previous projects (then spray painted it with Truck bed coating). It attaches to the door panel with a few RivNuts and can be removed in less than a minute.
L-Track

L-Track! This strip is for hanging a shower curtain, showerhead, or drip drying wet clothing or wetsuits.
I installed L-Track with a rivet gun on both of the rear doors. I wanted a way to quickly attach a shower curtain to the rear doors for showering right at the van while camping. The L-Track will also be used to hang my shower head from the rear doors for hands-free showering. I also wanted to be able to hang wetsuits to drip dry a bit

This single point L-Track is for attaching the bottom of the shower curtain for privacy.
It can be used to hang (and drip dry) wetsuits or other miscellaneous items. I also plan on making a bracket to hang my shower head so that I can have a hands free shower.
Lighting and Speakers
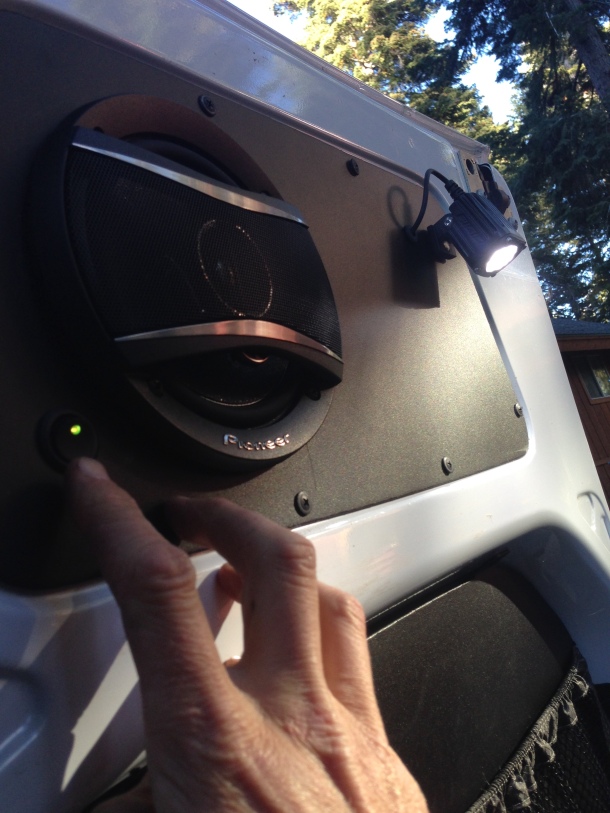
The upper panel of the rear door is a great place for speakers. I installed a shallow mount 6″ speaker in each door (if I had to do it again, I would have gone to a shallow mount 6×9 speaker instead).
The back door is also a great space to install some sort of “scene lighting” for working outside the back doors (or even on the side of the van). I’ve seen a bunch of cool DIY variations of scene lighting. There are a ton of inexpensive (low power) LED lights available from Amazon.

Let there be light! Working in complete darkness is a snap with door lighting.
I stumbled on these cool Rigid Industries Ignite LED lights. Their power consumption is only 1 amp at 1000 lumens. They are also very small at roughly 1.5″ x 1.5″ x 2″. Working outside or loading gear in the dark is a snap with these lights. Many of the aftermarket door mounted lights have some sort of recessed alcove for the lights. The Rigid Ignites are so small that I mounted them right to the door panel. They can also be moved and pointed in any direction in case I need light 40′ from the van.

-

- Rigid Ignite Diffuse LED backup kit.

-

- Wiring the Ignites into the door panel
Bike Repair Stand
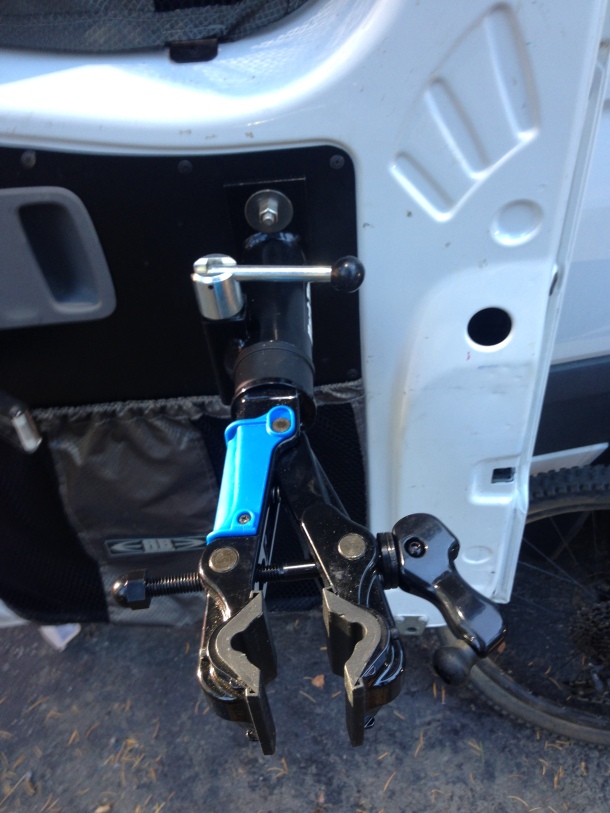
When you need to work on your drivetrain or brakes, there is nothing like having a professional work stand at your disposal.
I wrote a tutorial on how I installed the repair stand- Campervan Bike Work Stand.
Other Stuff
Near the rear doors I hung an axe and shovel on the wall just under the platform bed. In the past this has been “dead space” for storage. We don’t need a shovel or axe every day, but it’s a camp necessity.

The axe and shovel attach to the wall in the “dead” space just under the platform bed.

The clamp for the bike stand attaches to the wall with a QuickFist adjustable clamp.

The onboard air system has an airchuck just inside the rear doors


Very cool setup and blog. Love the bike gear detail! Thanks for sharing!
I am trying to sort my wiring now for a house battery but I cannot find a “standard” gauge wore for smaller items such as a fan and LED lights in the back. I was going to just run 10 gauge while I have everything apart and hook it up later but I am not sure if it is the correct size. Is there a default size cable you would recommend for small draw devices like this?
LikeLike
I actually have a great resource for you. For sizing all my van wire I used an iPhone app! Check out Blue Sea Systems Circuit Wizard. Available for iOS and Android. I used it frequently, but still sized up one wire size.
It has a wire sizing action based on the Amps for whatever you are using (fan, fridge, lights, USB ports, etc.). A lot of 12V van stuff can hold a 10% voltage drop (from 13V to 11.7 for example).
Also e sure to run extra wire for future use. Much easier to to once and have extra unused wire in the walls.
Hope that helps. I am actually writing a blog post on some of the things I’ve learned about DIY campervan wiring. Will try to get it published in a few days. Check back soon.
FYI, I’m not an electrician. Use at your own risk…
LikeLike