Disclaimer- I am not a professional. I am a moderately skilled DIYer looking to share some of my experience in building my own campervan. This is not intended to be a comprehensive step-by-step guide. It is intended to show my process of installing the windows and give other DIYers some ideas and confidence to tackle their window project.
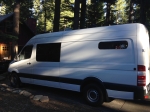
Since our DIY campervan is outfitted as a multi-sport adventure mobile, we needed to put our platform bed up high so that we have a “garage” for bikes, surfboards, SUPs, and other “stuff.” I wanted rear windows near the bed, but couldn’t accommodate a large window.

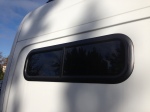
I’ve always liked the long skinny windows you often see in some of the boutique Outside, or RB components vans. Getting light and ventilation to the sleeping area is great. We can look outside from bed, and get fresh air. On warm nights we turn on the fan to 10-20% speed, open a rear window, and feel a refreshing breeze flowing in. Other benefits to the long skinny windows are that they are nearly 8 feet off the ground. I’m comfortable leaving them open when I’d be worried about leaving other windows open. We always travel with our Dog, Miss Daisy, and being able to run the roof fan on high with 4-5 windows cracked means a complete air change in the van about every minute. We can keep the van pretty cool for her.
Lack of installation information
I found very little information about installing this type of window on the web, and the windows came with no instructions. After unsuccessfully scouring the internet for step-by-step instructions, I tackled the first window slowly and methodically. Because of the prep work I did, the second window took 1/3 the time as the first.
I’m happy with the windows and my installation. They look great, and make the van much more comfortable.
The windows
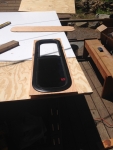
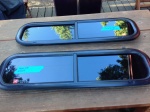
I bought the Hehr slider windows from RB components, along with their MDF trim rings. The interior glass dimensions is roughly 7.5″ x 33.5″, and the exterior dimensions are 11″ x 36.5″. They were about $200/each, and the RB trim rings were $99/each. I purchased the windows the day I picked up the van since I purchased it in Southern California.

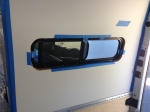
The 9×36 Hehr windows
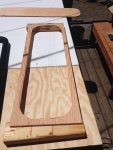
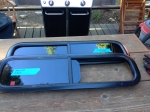
The RB trim rings were a bit expensive but saved me hours of making my own. They allow an easy, professional looking flush mount.

The RB Trim ring before installation. Expensive but made for a clean finished look and saved me at least a couple hours.
Motion windows makes similar windows in various sizes. I don’t know much about them, but imagine that the installation is pretty similar (as it would be on any campervan).
Installing the windows
These long skinny windows are more complex to install than the CR Laurence windows. See my post on installing CR Laurence windows. Whereas the CR Laurence windows follow the OEM window template, the narrow windows require fairly precise layout before cutting your hole.
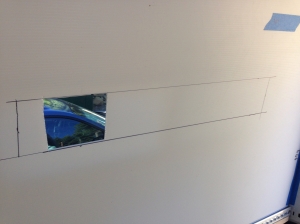
The first thing that I did was to make a template for the window. I bought a few sheets of Coroplast from a local sign shop and have used it for all sorts of templates (including the walls to get the curved sections right. Coroplast is “corrugated plastic.” It’s the stuff that sign shops use to print election yard signs. It’s light and easy to cut with a utility knife into just about any flat shape. It’s also available from Home Depot and Lowes. You could use cardboard just as easily, but it’s hard to find cardboard in a 4×8 sheet. Since nothing is straight or square in a vehicle, I’ve used Coroplast extensively to make van templates.
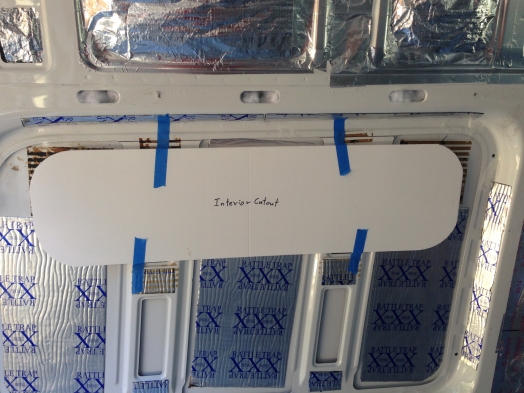
I used Coroplast to make interior and exterior templates. Easy to trace and cut with a utility knife.
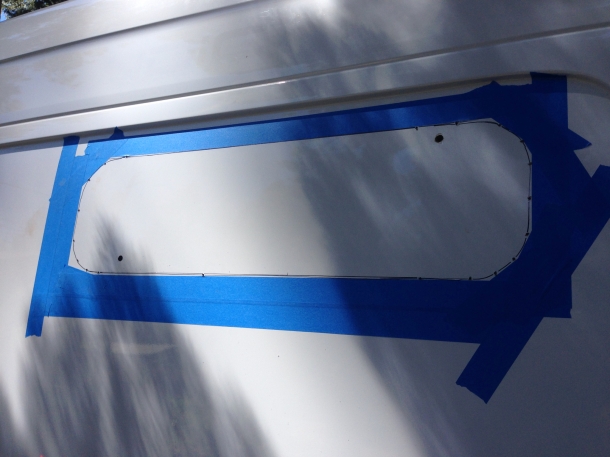
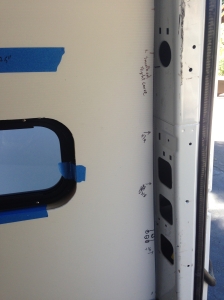
Once I dialed in my window location, I taped down the interior cutout template, traced the lines with a Sharpie, and had my cut location traced.
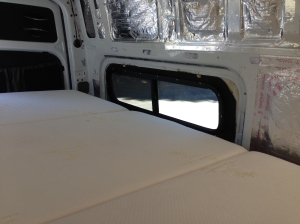
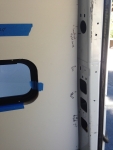
When doing your layout, remember to leave space for the exterior window flange! The hole was roughly 9″ x 34″, but the exterior measurement is 11″ x 36.5″ inches. Make your hole too high and you may run into the lip at the top. I located my windows with about 1.5″ clearance to the lip on the top.
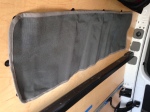
The Hehr windows require a 1/4″ spacer between the sheet metal and the window clamp ring. I tried using a 1/2 sheet of ABS plastic, but it was too thick for the clamp ring. A quick call to RB Components confirmed that I needed to use 1/4″. I had tried ABS since it would be impervious to moisture forever, but ended up using 1/4″ plywood for a spacer ring. I would consider using ABS instead of plywood if I did it again.

My spacer ring. I put the window down, traced it with a sharpie and cut the spacer. I cut the straight sections with a circular saw (easier make long straight cuts), and freehand cut the corners with a jigsaw.
Location of the spacer ring. Notice that I had to round off the exterior corners a bit. If you look carefully at this pic you’ll see an alignment line at the top. I made a few alignment marks to ensure the spacer ring went back perfectly.
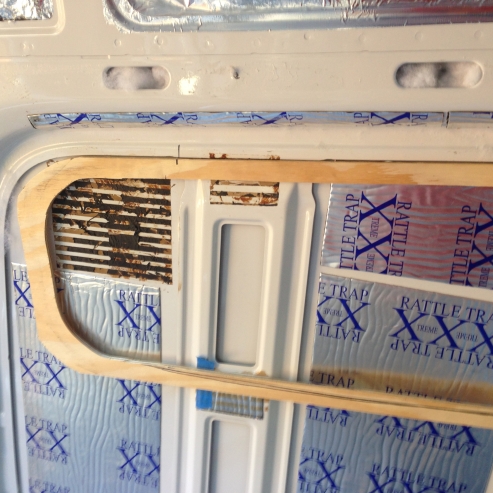
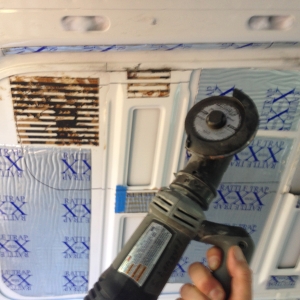
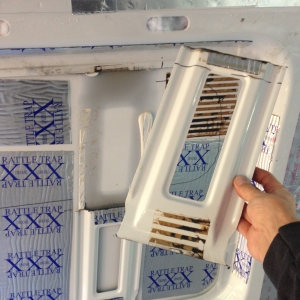
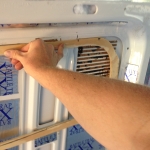
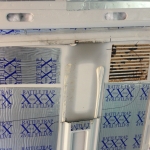
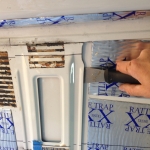
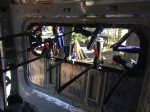
Once the spacer ring was cut and aligned, I needed to remove the two stiffeners from the window cutout. I chose to use my Rotozip with angle grinder attachment (tool geek), but an angle grinder would have also worked fine. I very carefully cut the stiffeners, then cut out the caulking that held them to the sheet metal.


I also had to deal with removing a fair amount of Rattletrap Xtreme from the previous owner. This was perhaps the most time consuming part of the whole installation. That stuff is sticky, messy, and hard to remove!
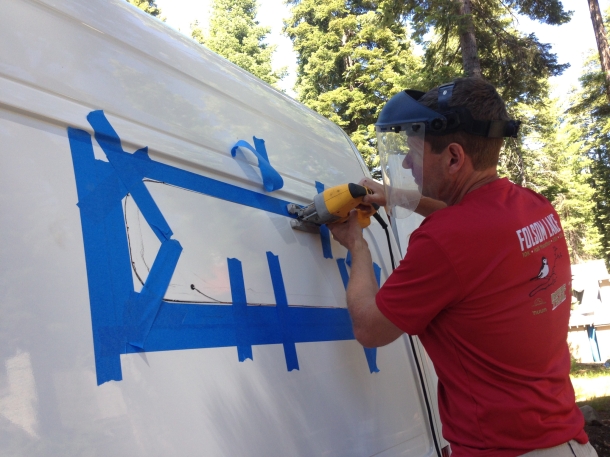
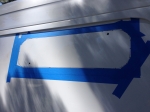
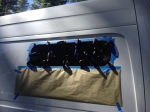
Once the interior was prepped and marked, I drilled small holes along the edge of the cut line to transfer the cut line to the outside of the van. As in the installation of the front CR Laurence windows, I chose to make my cut from the outside since the foot of my jigsaw could sit flat and make for an easier and more precise cut.
You can see in the photos below that the drill holes make the edge of the cut obvious. Then I used my Coroplast cutout template (and a sharpie) to transfer the cut line to the outside. I drilled two larger (starter) holes to drop in the jigsaw blade.

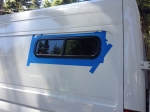
I covered the outside of the cut with blue tape to keep from scratching the paint with the foot of the jigsaw and cut out my hole.
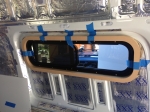
Once the hole was cut, I test fit the window, used a file and angle grinder to remove any burrs and imperfections, test fit again, then painted all exposed metal with a couple coats of self etching primer.
I also painted my spacer rings with 2-3 coats of oil based paint to seal the wood and protect it from any moisture. Then I used an adhesive caulk and a bunch of clamps to secure the spacer to the sheet metal.

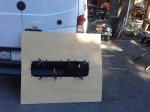
Test fitting the window

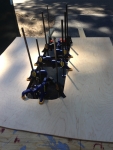
Gluing and clamping the spacer ring

You can never have too many clamps!
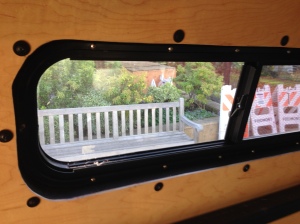
The last part was to apply a layer of butyl caulk tape to the outside of the window flange then screw the window to the van with the trim ring.
I made a small mistake on the installation of my first window. Learn from my mistake. I was in a hurry to get the window finished before dark. It was a cold day and the butyl caulk was fairly stiff and hard to work with. I ended up with a small “lump” of butyl caulk on a back corner. I also forgot to mist the sheet metal with a household sprayer. Misting the sheet metal keeps the butyl caulk from immediately sticking to the sheet metal and helps it to squish and ooze into place. In my case I ended up with a small 1/16″ line of butyl caulk visible on the back corner. Annoying to me but no one else would likely notice. For the second window, I put the butyl caulk in the sun on something dark to get it soft and easier to work with. I also remembered to mist the sheet metal, and the window screwed in perfectly.
As with the CR Laurence front windows, I had my lovely girlfriend push in firmly from the outside as I tightened the clamp ring.
Expect a bit of butyl caulk to continue to ooze out over the next 48 hours or so. Just trim out the excess.
Don’t forget to to a garden hose test on the windows for leaks. I blasted the windows for about 5 minutes with the sprayer with no water intrusion.
Trimming out the windows
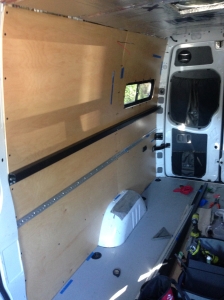
After the windows were in it was time to get the walls up and trim out the windows. My method is only one of zillions of cool ways to finish out your sprinter. I’ve seen amazing van walls from cedar tongue and groove, to fabric covered plywood, to gorgeous recycled barn wood, and everything in between. This is your canvas. Make it your own.
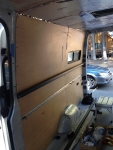
I chose to use maple veneer 1/4″ plywood for wall coverings. Strong enough to take some bumps, but also light and flexible enough to match the wall contours. Our priorities were gear storage, and also having a bright open feeling to the van.
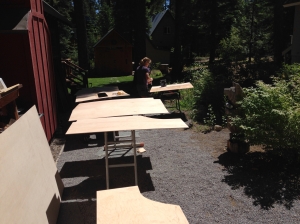
Back to the Coroplast templates. I used Coroplast sheets to make cut templates for the wall panels. Coroplast is great stuff for making templates. Nothing in a vehicle is straight, and Coroplast is easy to trim and test fit with a razor blade. It’s an investment at about $20/sheet, but definitely paid for itself with time saved for me.
Since both sides of the van are mirror images of each other, I only had to make one clean template, then make a mirror image for the other side.
-

- Coroplast is easy to trim with a utility knife for curves and corners
-
- I carefully trimmed around the window opening.
-

- Finished template
-
- Cut marks and notes
Once I had a clean Coroplast template, I traced them to plywood with a pencil and cut both wall panels. After test fitting the panels, I was ready to attach the trim ring to the wall panels.
Because the RB trim ring is made of MDF, I applied 2-3 coats of a Minwax black oil based stain sealer to penetrate and seal the trim ring from moisture. (There will always be moisture around a window; take extra care in sealing around your windows).
I had cut all my wall panels at the same time using Coroplast templates, and sealed them with 3 coats of a water based clear polyurethane sealant. I choose water-based products wherever practical since I don’t want oil-based paints off-gassing in a small living space.
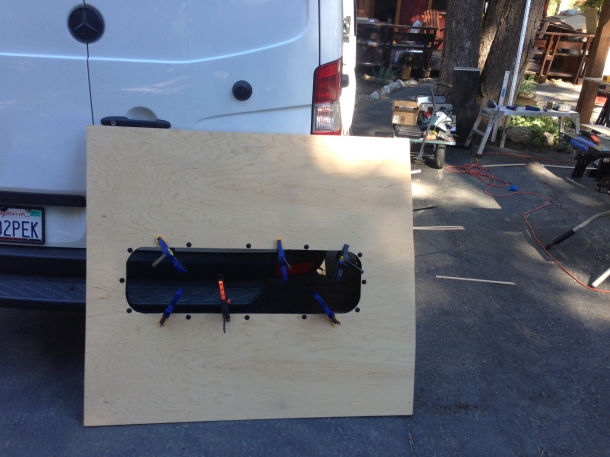
Back wall panel with the RB components trim ring, glued, screwed and clamped.
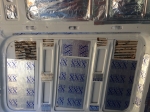
I glued, screwed and clamped the trim rings to the wall panels., replaced the insulation in the walls (thinsulate, reflectix, and foil faced denim, sealed with foil tape).
-
- Painting all the wall panels at once.
-

- Glue, screw, clamp!
-
- The finished product!
-
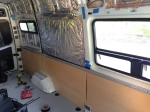
- finished wall panels with the bed rail.
Having the option of a window covering for privacy and/or stealth camping was important. I used a steel fender washer (painted black) with my attachment screws to provide a large magnetic attachment point.
We found an eBay seller who made magnetic window coverings for Sprinters. We had already purchased her nicely made magnetic window coverings for the front and CR Laurence windows. Her Ebay seller name is ripplewear. We contacted her to see if she could make us custom window coverings for the Hehr windows, with magnets sewn into the edge. She was great. I e-mailed her a few measurements and pics, and she had custom window coverings to us in less than a week. Much better than we could do ourselves with our limited sewing machine skills.

The magnetic window covering from ripplewear. We keep it rolled up and stick it only if we are stealth camping or need privacy or extra insulation from cold.
Final notes
I mounted my platform bed at about 42″ to accommodate my tallest bike (fork mounted + 1-2 inches for clearance). We also have a luxurious 6″ memory foam, three-fold mattress. The bed overlaps the window by a couple inches with bedding. Not a big deal for us, but a design consideration.
-
- Window height with bed rails at 42″ and a 6″ mattress
-
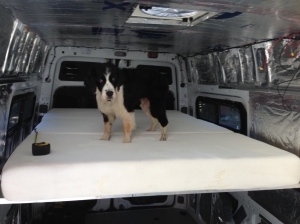
- Van pup!
-

- Windows, bed, garage, bikes.

Hopefully that helps. Please leave comments/feedback below. I’d love to see hear how your projects go. Also, please consider subscribing to the blog. I will be adding van conversion content as I work on the van build.
Project Gallery (tons of detail pics!)


-
- Test fitting the window
-
- Gluing and clamping the spacer ring

-
- Cut marks and notes
-
- Finished template


-

- Van pup!
-

- Window height with bed rails at 42″ and a 6″ mattress

-

- Glue, screw, clamp!
-

- Painting all the wall panels at once.

-

- finished wall panels with the bed rail.


-

- The finished product!
-

- Windows, bed, garage, bikes.


Share this:


Kudos for taking the time to teach the rest of us. You are a gentleman and a scholar. 🙂
LikeLike
Thank you! Couldn’t have done many of my obscure projects without the Internet help of those before me. Just paying it back.
LikeLike
Thanks so much for the write up. I appreciate the good word.
LikeLike
Hello! Thank you for posting all this great information. I hope you’re enjoying your rad van adventures! I’m wondering if these RB Components panel bed windows come with bug screens or not. Also you mention that they are Hehr windows, yet I can’t find this specific product on Hehr’s site. In fact, the only place I can find these is on the RB Components site that you linked. If you have any additional information, that’d be great!
LikeLike
Hi Kevin- Yes the windows have bug screens integrated into them. The screens also slide open. They’ve been in for nearly a year now and we like them.
Finding DIY info on Motion and Hehr windows (and CR Laurence too) is a pain. They aren’t really geared for consumer sales, and information is scarce. They all really just market to aftermarket installers and not DIYers, even though they aren’t really complicated to install. I spent a few hours looking for information online without success- part of the reason I wrote the DIY window installation blog posts.
Good luck with your project. I know that wasn’t really that much help. There is definitely a leap of faith on ordering Windows sight unseen.
LikeLike
Hi there! I just ordered the windows and am eagerly waiting for them to arrive. I appreciate your response to my comment and again many thanks for putting this guide online. I plan to follow your process closely and I may bug you again with another question if it pops up! In fact, I feel one coming on right now…
Have you noticed any buckling or surface irregularities on the exterior of the vehicle in the window cutout, as a result of removing part of the window stiffeners?
LikeLike
Thanks for the write up! Motion windows must have stepped up their game since you did this. They have a nice install video now. Thanks again!
LikeLike
Thank you and thanks for the support! When I was researching the window install initially I spent many hours crawling through the web and forums for tidbits of info. Seems like the window companies just assumed that only “pro” upfitters would be installing them and didn’t provide any information direct to consumers. The explosion in DIY vanlife has changed that a bit for the better.
LikeLike
The funny part is now RB components is linking to your blog for installation instructions! Ha!
LikeLike
What kind of adhesive caulk did you use to attach the spacer ring to the van body? Thanks again!
LikeLike
What materials did you use for the platform bed?
LikeLike
Hi Greg- I bought the DIY platform bed kit from Overland Sprinters in Santa Barbara, CA. It was just unde $1000 when I bought it, rather than the $3-5K for RB and Van Specialties beds. It consists of 3 nicely welded aluminum sections and two rails to hold it bent to the angle of the sprinter walls. Worth checking out. Shipping would be pricey. I was able to pick it up right from him.
LikeLike
Hey!
Thanks again for this detailed write up. Did you attach your trim ring to the window in anyway? I understand that you attached it to the back side of your wall panel but it seems like that’s a source of rattle if it’s not also attached to the wall or window. Perhaps an adhesive caulk? Thanks again!
LikeLike
I also installed the rear windows and have the van trim ring from RB companies. I have not yet installed my insulation so it is still just the windows on sheet metal.
There is a ton of flex in the van now after cutting out the support to install the window. It is crazy loud and rattling. After insulating did it go away?? It is wobbly after the support was cut out for the windows.
LikeLike
Hey Curtis- Amazing just how flimsy the sheet metal is in the van. The previous owner of mine went overboard with stick on sound deadening material (Rattletrap Xtreme). He put it everywhere. I think that helped with noise on my rear window sheet metal. Between that, insulation, and wall panels, it’s really quiet. I suppose you could also cut a “T” shaped piece of plywood and clamp/glue it on just below your windows for some additional material to reduce flex and rattling.
Hope that helps.
LikeLike
Thats great to hear! I was a bit worried this early in my build especially because you can literally see the sides off the van wobble when you drive behind my van.
LikeLike